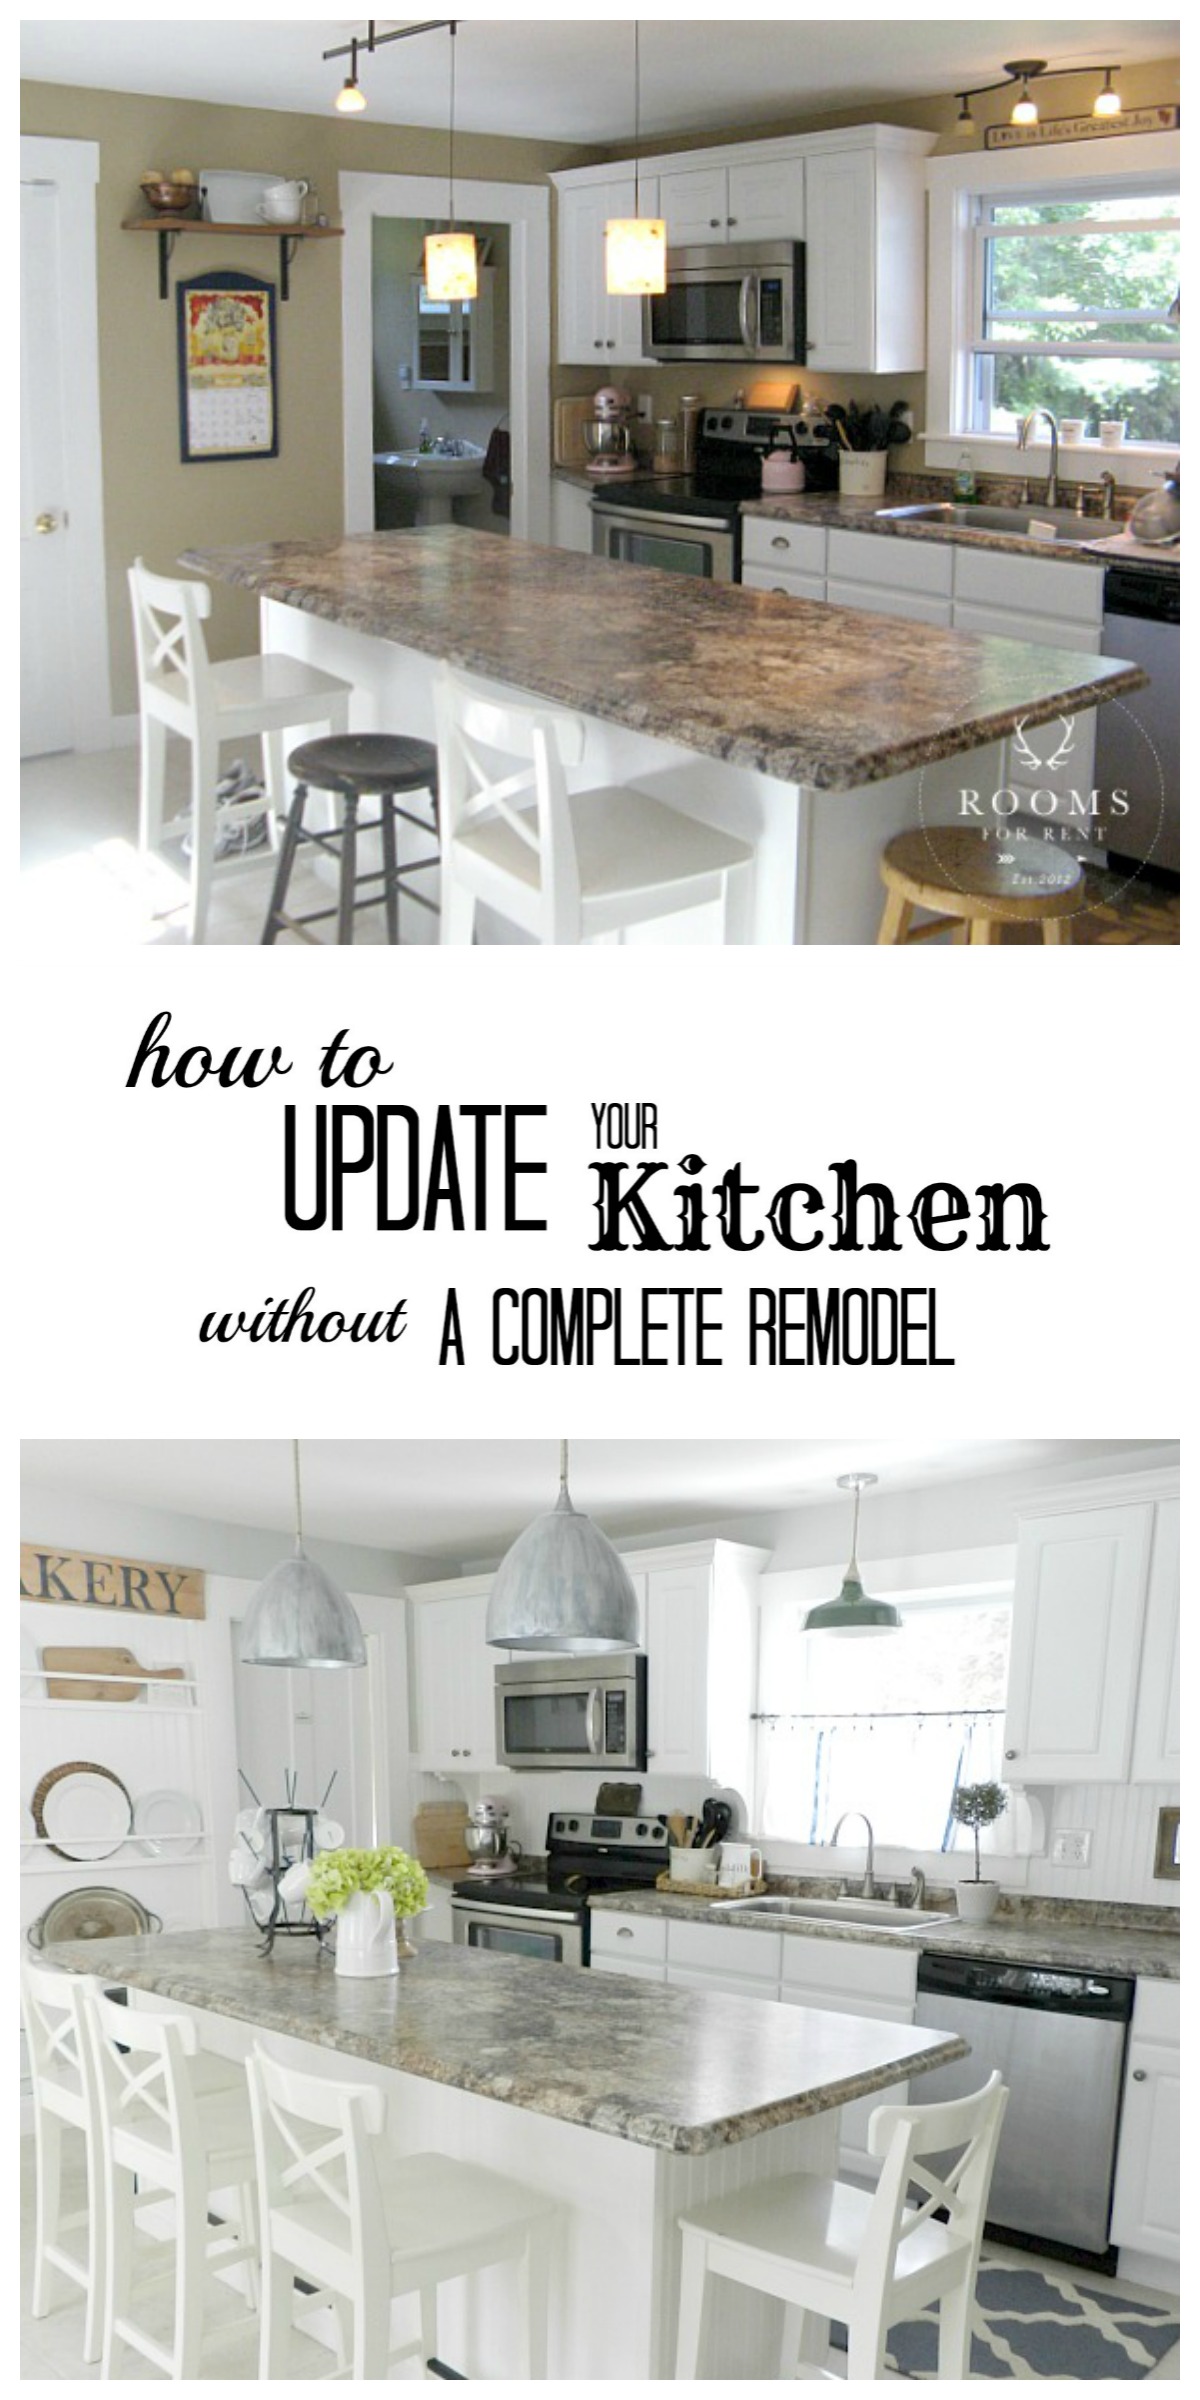
After the last post I shared of our kitchen, with our new runner, I came across some older photos of our kitchen from just after we moved into our house. I know I’ve shared about our kitchen progress before, especially when I shared my design plan to spruce up our kitchen. But when I came across some of the older photos of our kitchen, it really surprised me how much our kitchen looked like it had changed, but we didn’t do a major remodel. So today I’m going to share with you how to decorate your kitchen while keeping it functional.
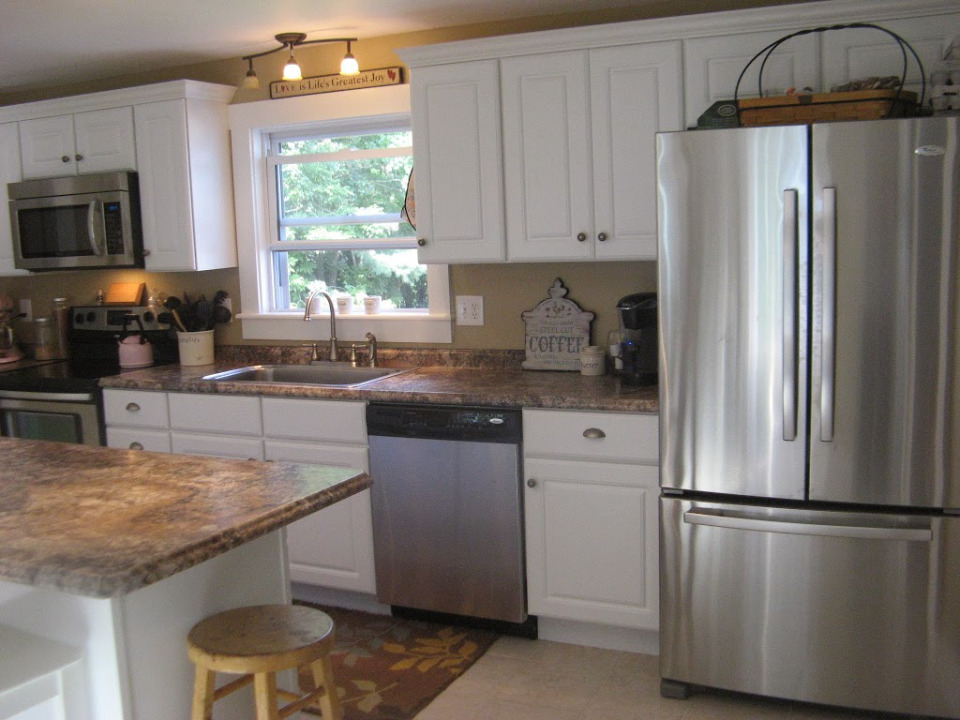
To show you how much our kitchen has taken shape, let me show you first what it looked like just after we moved in.
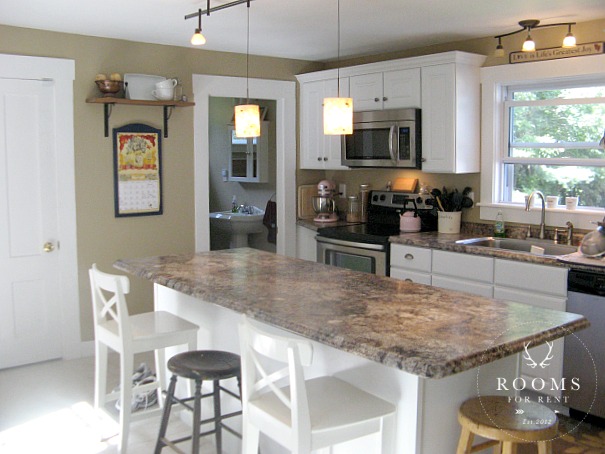
Before
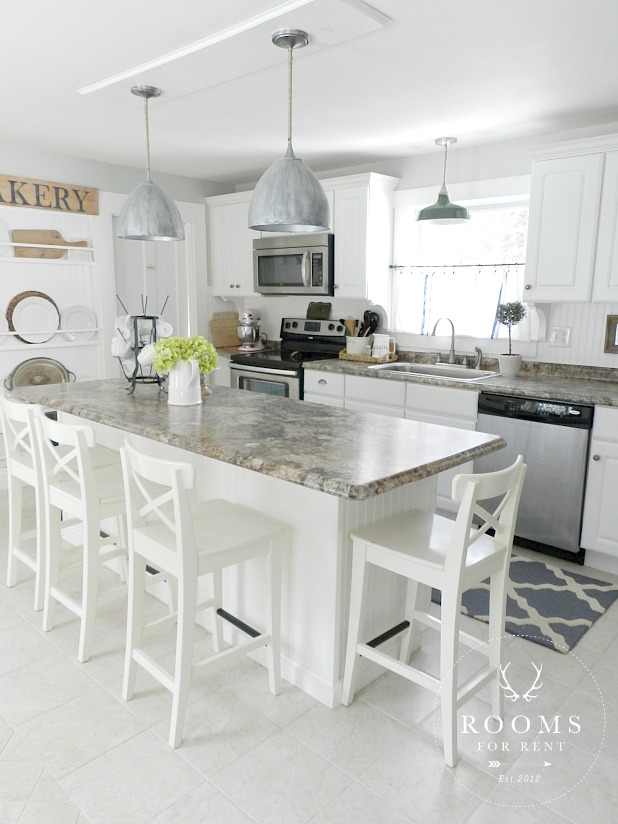
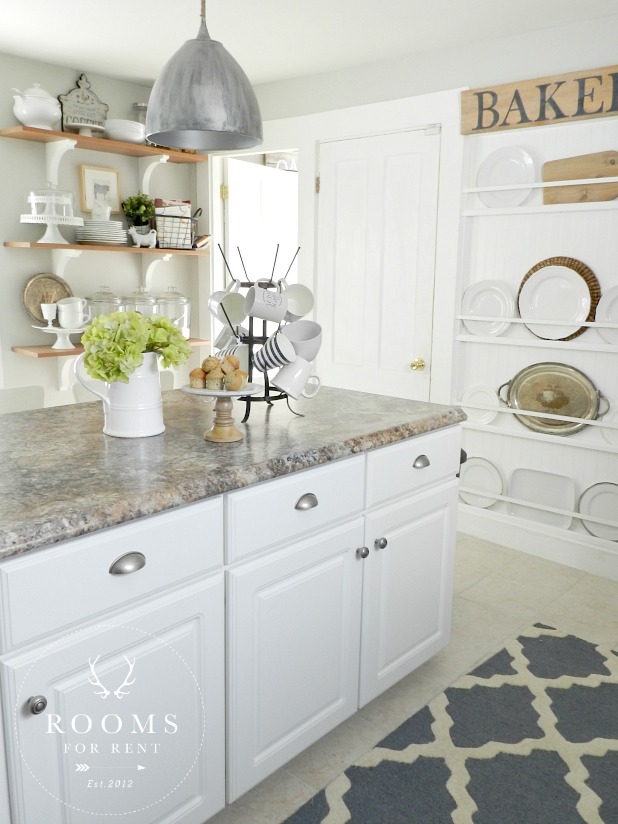
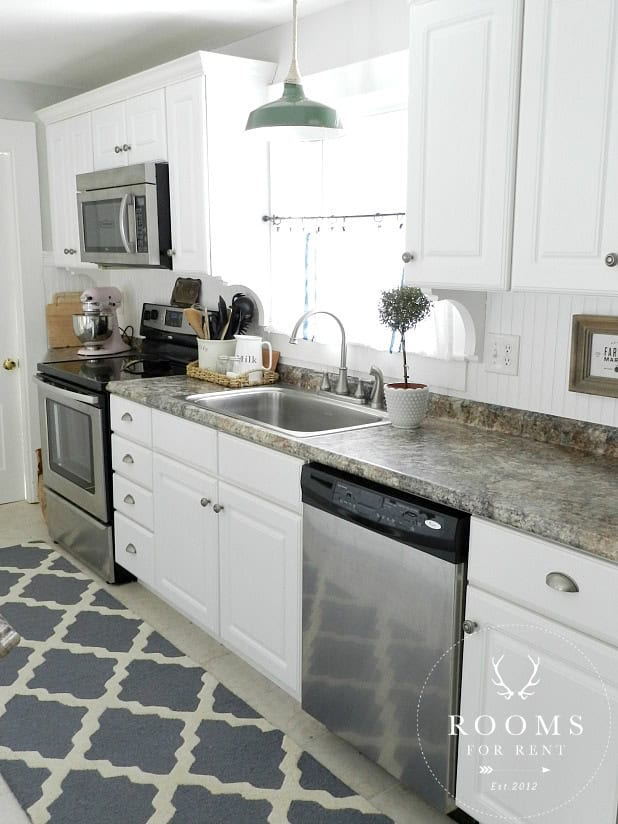
After
It’s amazing what a little paint can do, right?!?! It feels like we did a complete remodel, however you will notice all the bones of the kitchen are exactly the same. The cabinets, the appliances, the countertops, the floor, none of those things changed. The biggest architectural detail we brought into the space was bead board. We wrapped our standard cabinetry island with bead board and trimmed it out. Then we bought two more of the white Ikea bar stools for a more unison look. I held off on painting until we were able to tackle the plate rack wall. The kitchen felt swallowed by tan, so I gave it a nice bright coat of Owl Grey by Benjamin Moore.
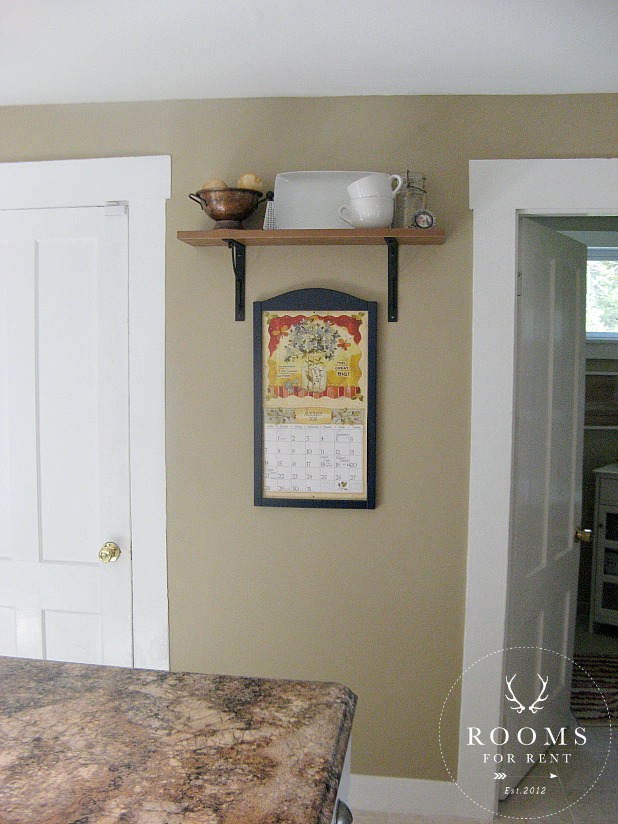
Before
There are three doors on this back wall in our kitchen, and I always felt like the small section of wall between these two doors looked out of place. There wasn’t enough room to add cabinets, and it just felt bare. To try and bridge the gap we put up a shelf (seen above), but it really wasn’t cutting it. Then after asking and asking and asking, I finally talked the hubby into to tearing that wall apart so the we could build a built-in plate rack wall between the trim.
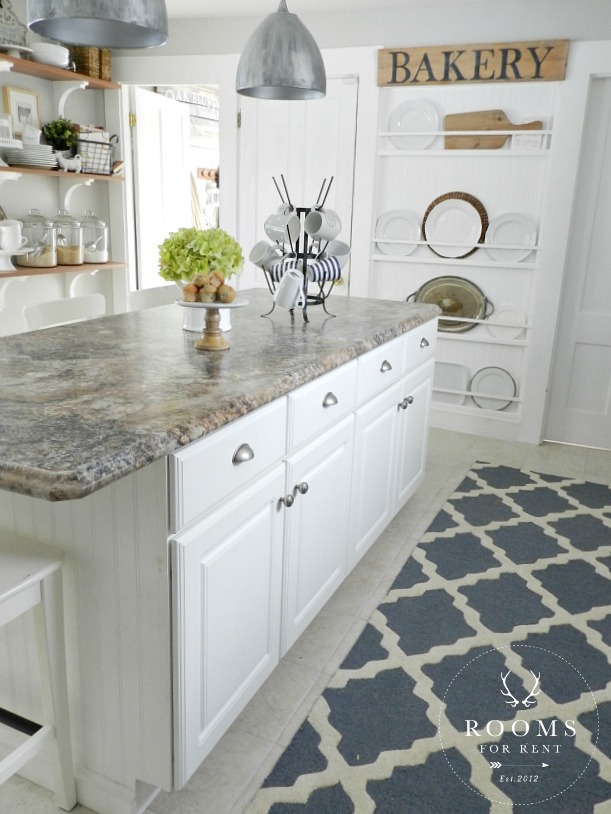
After
We had enough left over bead board from when we transformed our back hall, so all we had to buy were some 1X2’s and a few pieces of strapping to make the racks. No longer did we have this awkward wall between the doors, but a completely functioning space to hold dishes, and serving platters that I can grab quickly when entertaining!
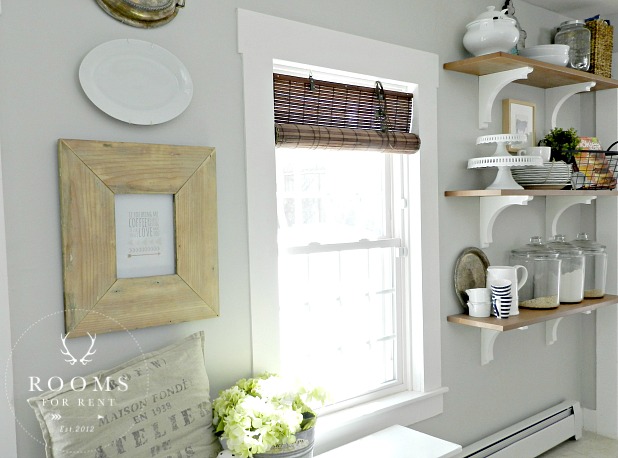
Next came the shelves. Some people think it’s an odd thing to ask for home decor items or DIY projects for your birthday, or special occasions, but we are no stranger to that around here. My parent’s would always ask me again “No sweetie, what do you really want, for you,” and I would reply “but that is what I really want, new throw pillows for our living room” or “new frames for our gallery wall”. Those things make me happy. So the same spring we did the plate rack wall, new open shelves was what I wanted for mothers day! Since my birthday is the week before mothers day, I already knew just what I wanted for those shelves, and got most of the items I wanted for birthday presents. Below you will see the opposite side of our kitchen, and how it looked right after we moved in.
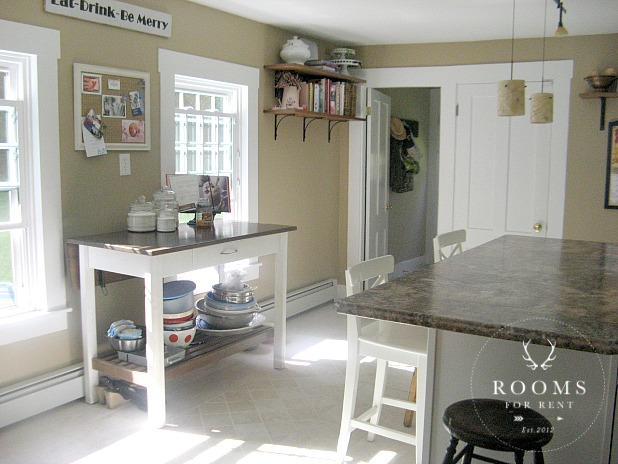
Before
We sold the smaller island you see pushed up against the wall between the two windows. It was perfect in our previous apartment, but here it just didn’t seem to fit anywhere. Looking at that photo you wouldn’t really notice a problem with it where it is, but the problem wasn’t so much in the island itself, it was how it functioned for us. Because we already had an island now, I didn’t need more countertop space, or storage. Since we use our kitchen entrance as our main entrance, I needed a spot to tuck shoes away easily, and a place for two little people to sit down while I helped put shoes on, or take shoes off.
After
By replacing the extra island with a bench, that holds crates underneath to tuck shoes away into, it helped us keeps things organized and tidy, and served us better and the needs we had for the space. Sometimes it’s hard to move past a good piece of furniture, but if it isn’t functional for what you need, than it isn’t serving you well.
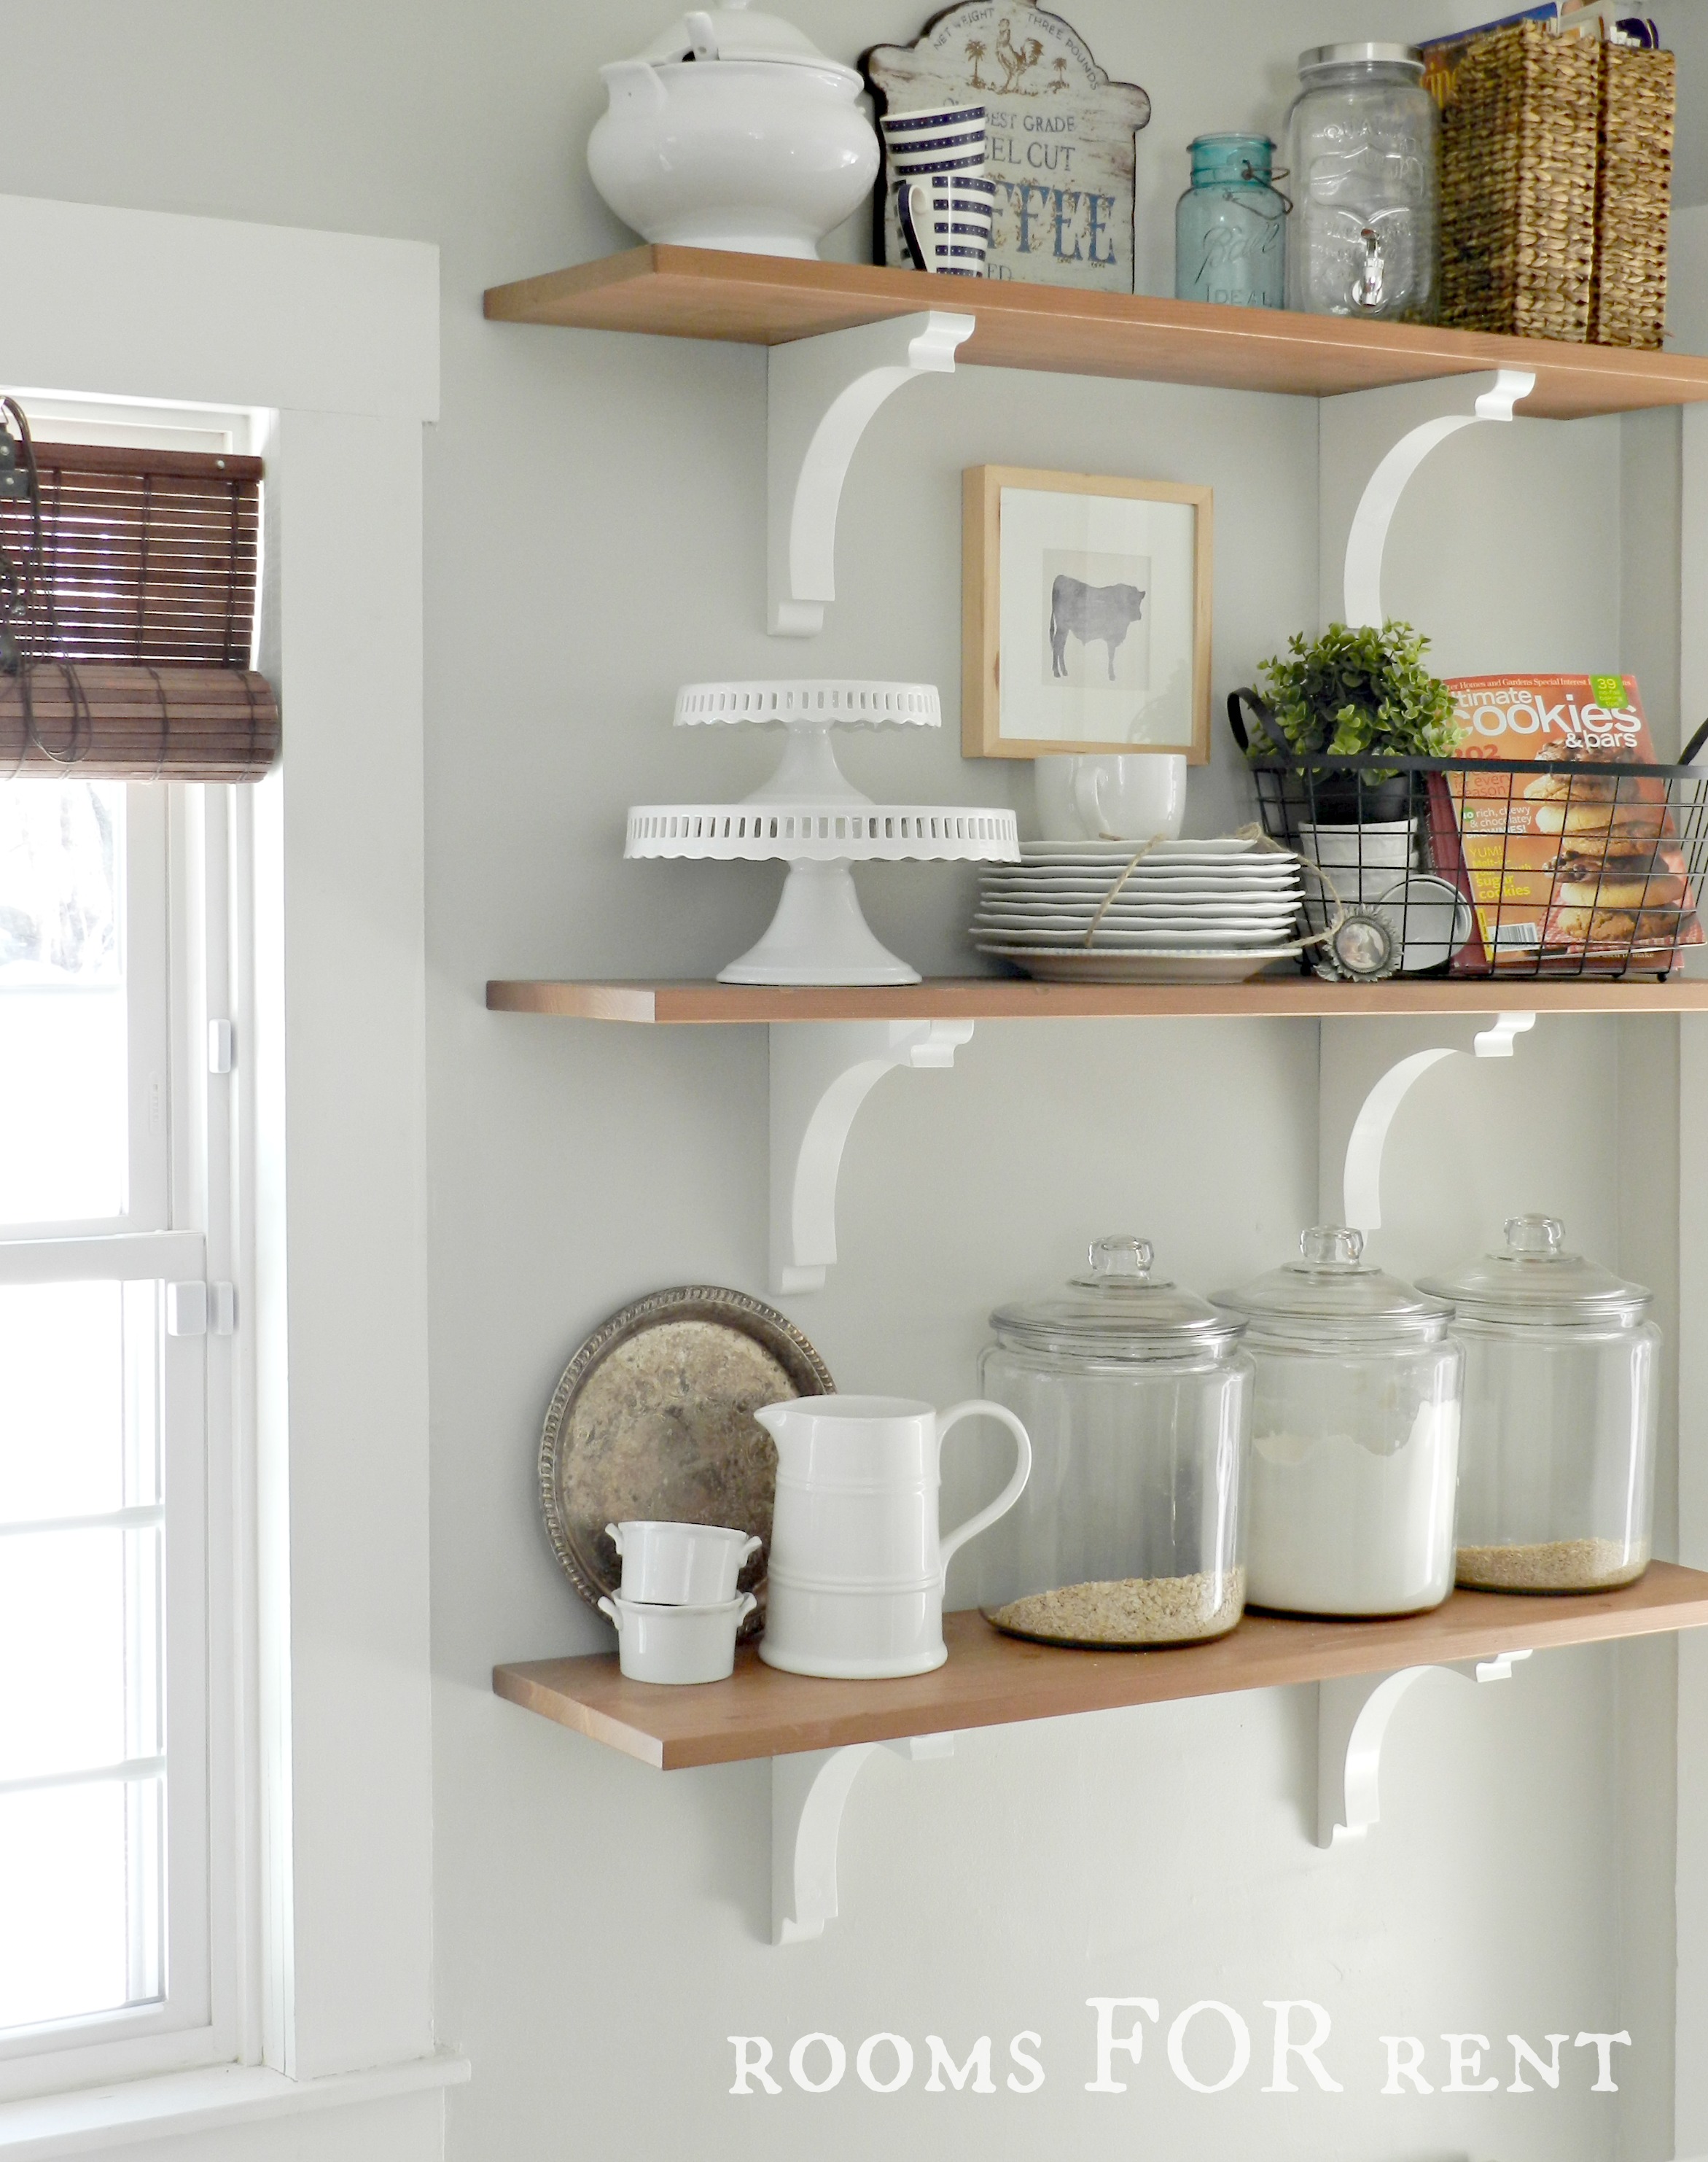
We actually used the same shelves, the third one was just sitting in the basement. The wood planks were old from Ikea, and the corbels we purchased from Home Depot. That was the main expense. We purchased the ones you see here for the shelves, and four more to go under our upper cabinets to give them more of a built-in feel. As I mentioned before I received some items on the shelves for birthday presents, and the rest bought with birthday money. My favorite gift were the three large glass canister jars on the bottom shelf. They look exactly like the ones from Crate & Barrel for $30 a piece, however these are walmart at just under $10 a piece and you would never know the difference. The white dish ware are all from Home Goods or Marshalls, including the mason jar decanter on the top shelf. In fact, other than the cow print from here, everything else on the shelves is from either of those places as well! The very best thing about all of these pieces is how they serve me. Every piece is fully functional, they don’t just collect dust. I love to host, and I often get asked where I store everything, but the answer is, in plain site. I use my server ware as decor in my kitchen. It’s a win win for function and design.
The last change to make to the kitchen was the light fixtures. We still want to add recessed lights, and bead board to ceiling, hoping that’s a project for 2015, but we’ll see. First up was the island pendant lights. I know I shared before, that I really wanted some antique barn pendant lights but everything seemed to be out of the budget for those. So I diy’d my own, and you can see just how I did that here. I loved how they turned out, but I didn’t want to have the same light over the sink.
Sometimes in decorating you just have to be patient enough to wait until the right piece comes along, and this was the case for the next light.
Before
Above you can see how things looked before. This past fall while I was hitting the last barn sale of the season, I found the perfect antique pendant light. Slightly worn, but original enamel in a retro green. I quickly grabbed it and our lighting ensemble was complete! You can see that sneak peak here.
After
All of these changes happened over time, so even if you don’t have money in the budget to do a complete remodel, focus on the things you can change. By changing the color scheme in my kitchen, I pulled out all the gray tones in the countertops instead of having a room swallowed by tan. When choosing items to be functional, I wanted until I could purchase the prettier versions of containers and server ware so it doubles as decor. It’s not always a quick fix, but if you are willing to put in the time, you end up with a room that you love, without breaking the bank!
Stay in touch!
Instagram / Pinterest / Facebook
Have a design question? Visit Doucette Design Co. for all your design needs!

The change in the kitchen is just awesome. I like that you have kept some of the original bones………and made changes where you could.
We are remodeling a 14 year old house and it amazes me to see the changes that are taking place, in just what we are doing.
Each day we find something new to love about the house. Believe me, this house needed to be loved! ?
I love the realness of your blog!!!!! It gives me hope that you don’t have to drain your savings to have a beautiful home. Thanks for such an awesome blog!!!!!
Wow what a transformation for so little! It really is amazing what paint can do!
Hi! I love the barstools from ikea, as well. I was surprised when I went to the store they weren’t the bright white I was hoping for. In your picture you really can’t tell the difference. We have white cabinets and trim and I was thinking it might clash too much. Did you feel that way? Thanks! Love your kitchen!
I think maybe in the very beginning. But I really don’t notice a difference between the bar stools and the white cabinets. 🙂
i, too, am wondering what your counters are made of. I really like the color and pattern with the clean white cabinets. Any details you provide would be appreciated.
Hi Vicki! Our counters are laminate found at Lowes 🙂 Saving up for soapstone, some day 🙂
Beautiful home! You have done an amazing job! Love it! Cindy
HI!
Love your kitchen, esp the lights above the island! Ian wondering what your counters are made of?? Mine are ugly white tiles now and I like the look of manufactured stone, and can’t really afford granite or quartz. Are yours laminate to look like stone? Hopefully I haven’t offended you with my question?? 🙂
Thanks!
Love your house! Found your website on Pinterest. I’m also trying to update my kitchen on a budget. I love your blue rug. Where did you get it?
Hi Kristyn, Thanks so much! I got the blue rug in the kitchen from Rugs USA, you can visit my post “New runner in the kitchen” For all the details and direct link 🙂 Thanks for stopping by!
Absolutely gorgeous kitchen. Just discovered you by my recommendations from Pinterest and they got this right! You have a new follower!
Hi Julia! Thanks so much, so glad you found me, and happy you’re here!!!
HI! I’m new here as well and finally feel like I’ve found a blog that captures my style. I’m loving your home and feeling very inspired. Thanks!!!
Welcome Sara!!! I’m so HAPPY you’re here! 🙂 XO
I really like the transformation. Crisp, clean and bright!
Hi Bre! I’m new here! I REALLY love what you did with the “odd space” between the doors. I have a similar “odd space” in our kitchen, and you shed some new light on that area for me. I think I’m on to brainstorming! The kitchen looks beautiful:)
Thanks Cindy! So glad you’re here, and happy to add some inspiration to your day 🙂
Oh I just love your kitchen!! It looks oh so pretty! And yes I do agree just do a little bit at a time, and eventually you’ll have your room the way you like it!!