Hi Friends! If you tuned in yesterday than you caught our Master Bathroom Reveal. I got so many beautiful comments on how the space turned out, and I have to say we are so pleased with the outcome. Actually my husband even remarked how it doesn’t even feel like the same space it used to be. We feel like we are staying in a high end bed and breakfast on the cape, so I’ll take that as a design plan win, because that’s exactly what I was going for. I mentioned in the reveal I would be back today to share a few more details, because I could have turned the reveal post into a novel, lol. Plus I always like to see more of the transition process in a makeover, and yesterday post was more focused on the final reveal. I’m also going to answer some questions that popped up with the reveal. So let’s get started!
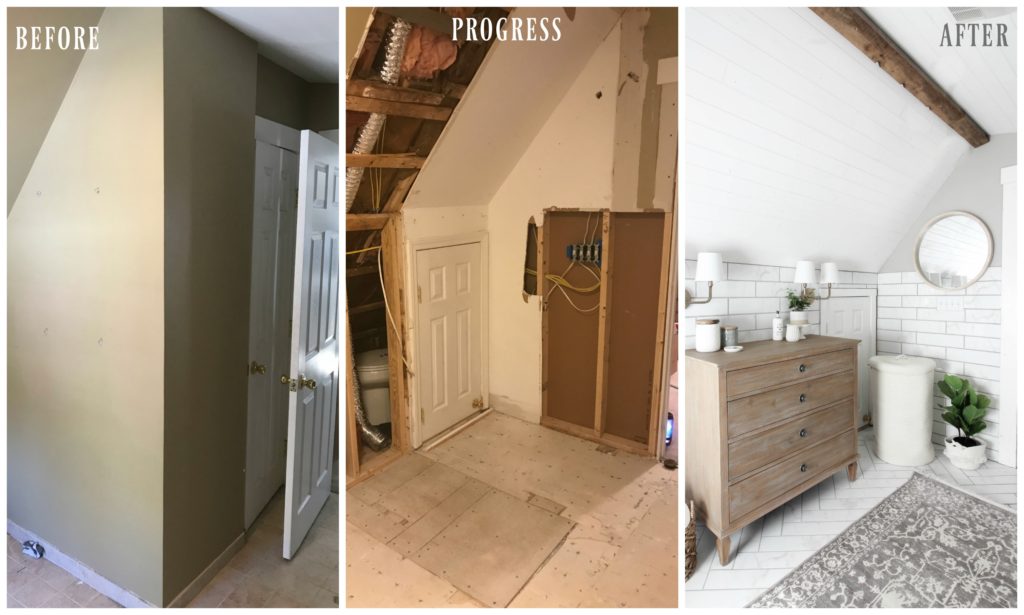
I know I shared a lot of the progression in the demo post, but now that I have the after photos to reveal as well, I thought it would be nice to see it all in chronological order. Obviously the biggest transition was in the corner where we knocked the walls out, and removed the unused chimney. If you remember it looked like this before
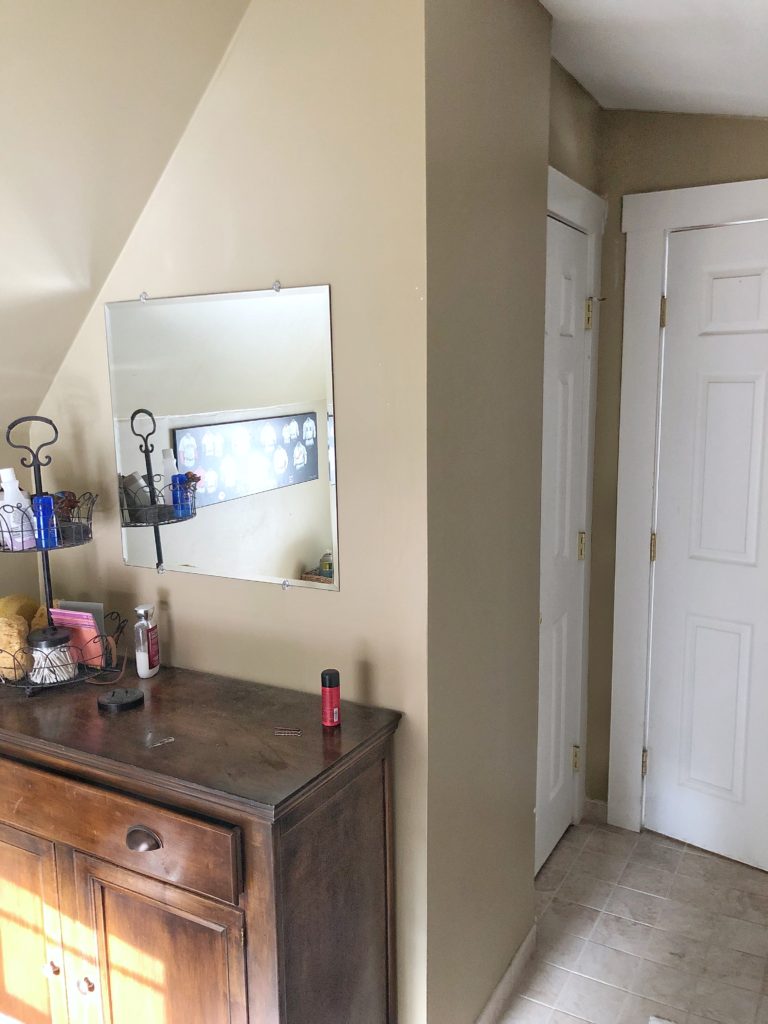
This bump out ate up about half of our bathroom on one side. So after we knocked down all the sheetrock, alls that was left was the chimney.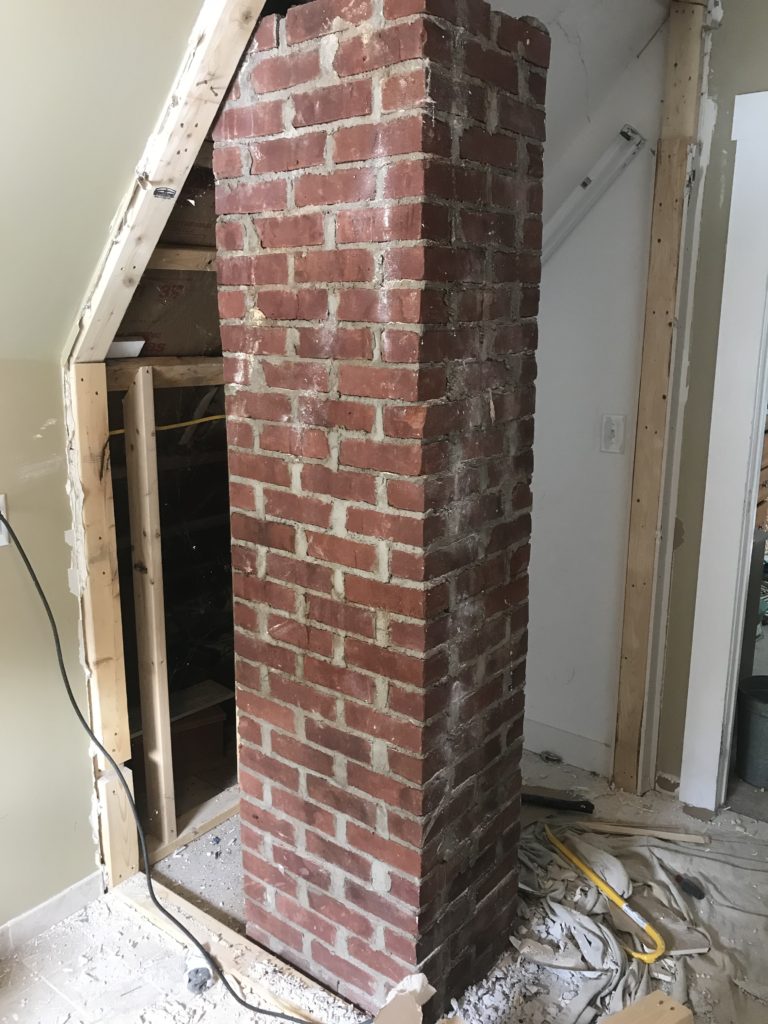
I shared how since it was basically just “floating” in the middle of the room, we weren’t going to keep it, even though I love the idea of exposed brick, this was eating up prime real estate in our bathroom floor space. So away the sledge hammers started swinging. 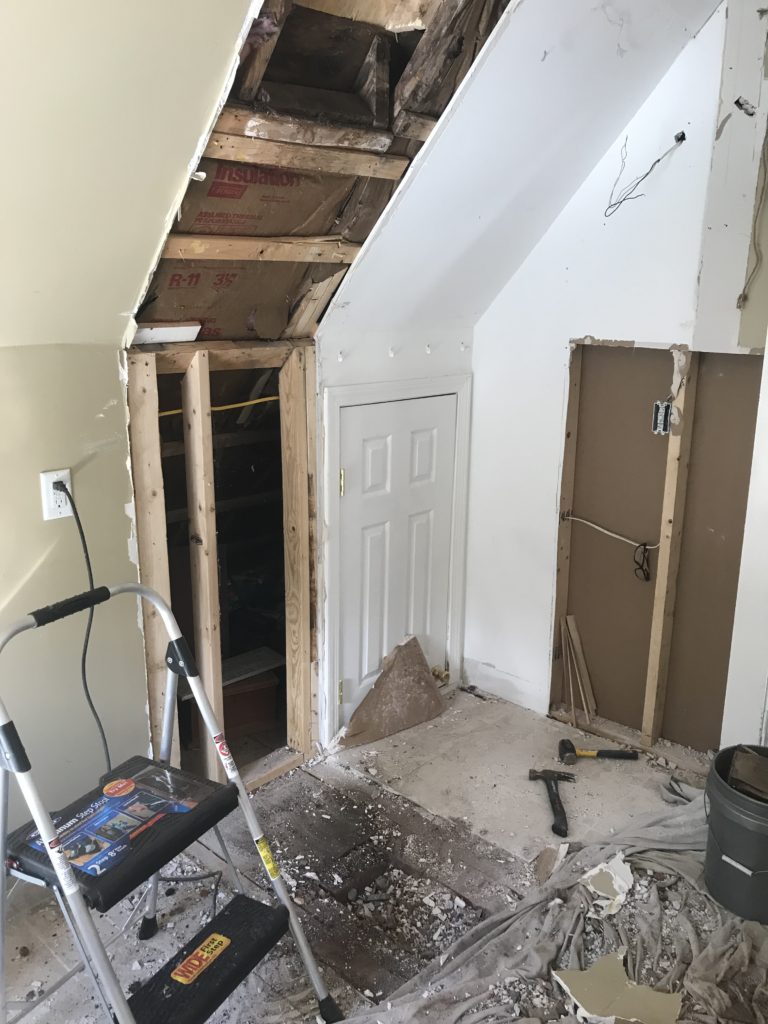
Don’t worry, I was able to salvage about 3/4 of the brick, I plan to repurpose it in our yard this summer as a little walkway. We patched the walls, installed tongue and groove wood planks on the ceiling, and then it was time to install the tile. 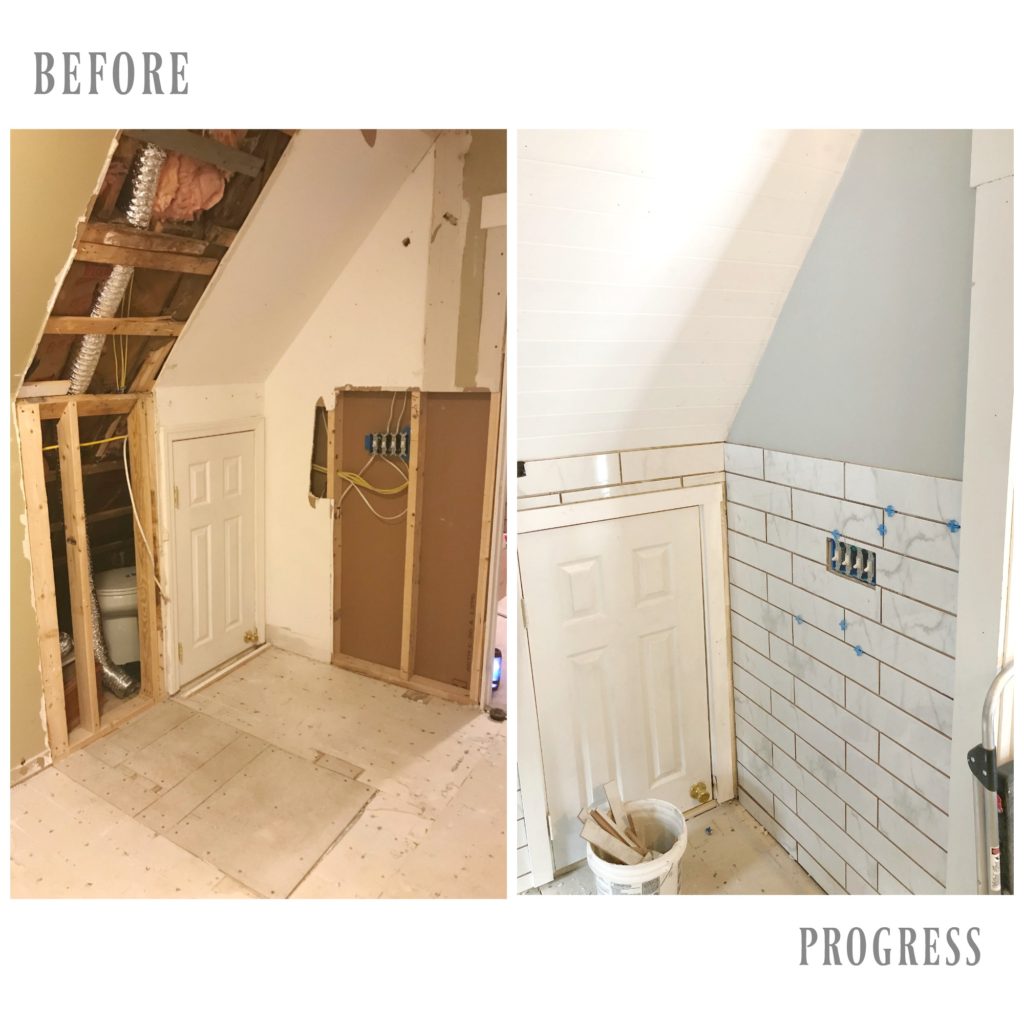
We came a long way from where we started, and a lot hard labor to get where we are today. But we are so glad we made the decision to take down the walls and remove the chimney, because it totally opened up the space. 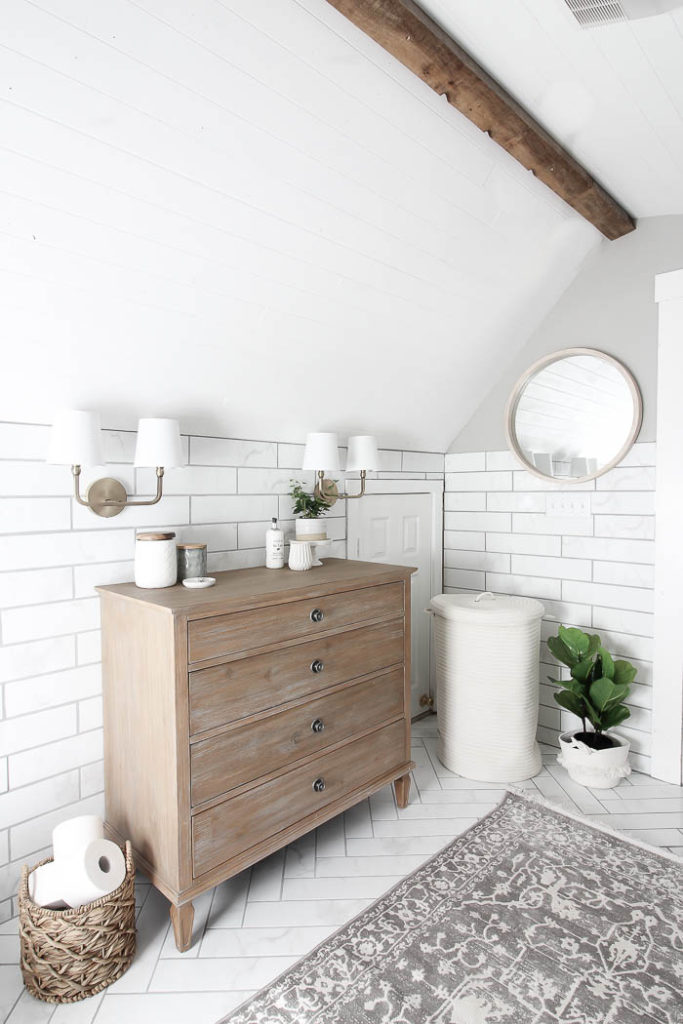
Looking at this same wall but from the other direction you can see the transformation below-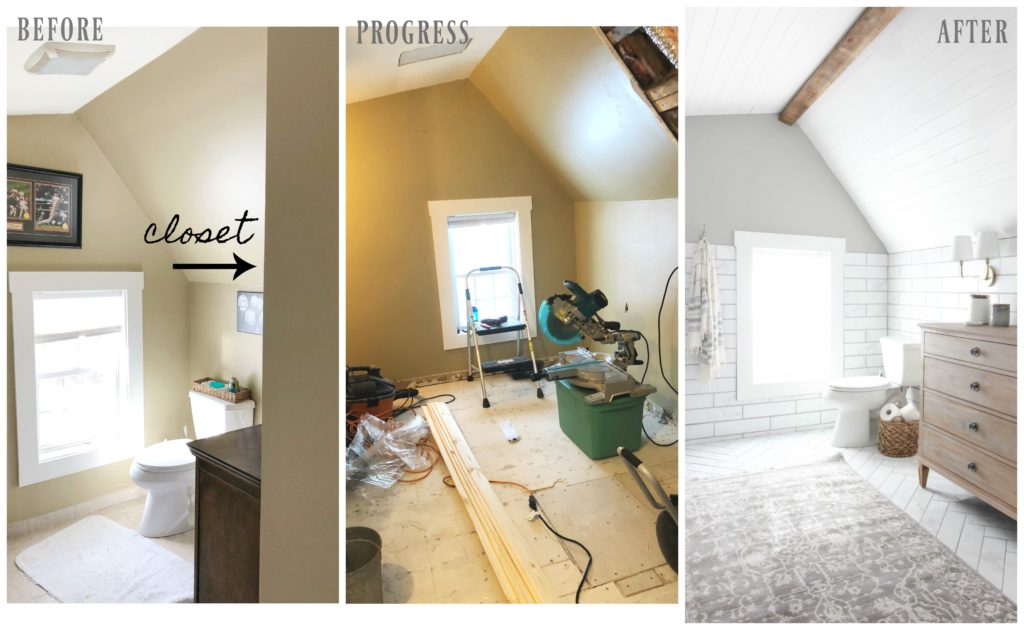
One of the biggest comments that was made was in regard to the toilet location. Trust me if we could have moved it, we totally would have. Honestly I really wanted to swap it with where our sink is. It’s makes the most sense. But there are a few things that stopped us from doing so. If we moved the sink to the wall the toilet is one, yes we could have done a double vanity, however, because of the ceiling height with the eaves, the ceilings aren’t high enough to have vanity mirrors without bumping the ceiling out and installing a whole new roof. And the pitch is so deep, even hanging mirrors to “float” above the vanity, the mirrors would have stuck out to the very end of the vanity, which would have made them not even practical at all. The other reason we didn’t swap the toilet and the sink was time. The timeframe we were given for this project from the sponsor simply just didn’t allow for us to start moving any of the plumbing. What we were excited to have time to do was knock down the wall and chimney to open up the space, but I hope that solves the question of why the toilet is still in front of the window. No it’s not ideal, yes we do have a shade, AND we have 100 acres of conservation land behind us, so it’s just nature staring back at us.
I mentioned in yesterdays post I would share a bit more on the ceiling progression. Something that was not part of the original design plan, but one of those added things that come up sometimes during a renovation. Once the closest and chimney were torn down it left a huge whole in the ceiling.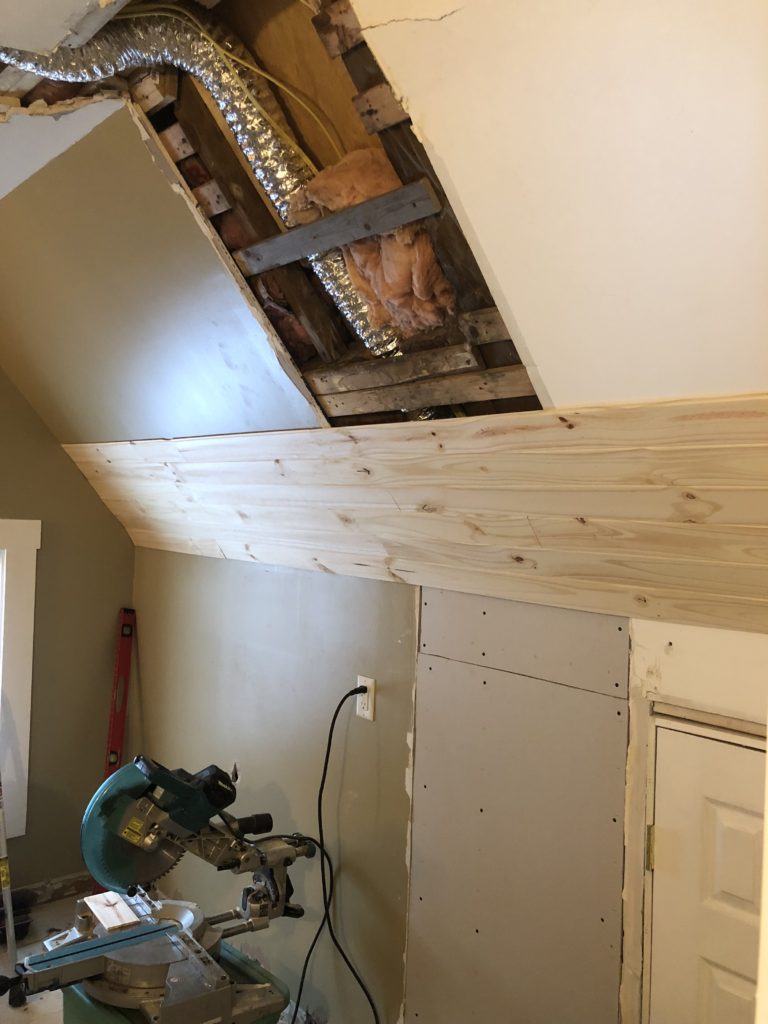 And with the eaves, I think my husband was feeling a bit wiped out from all the reno with the thought of trying to patch it up the right way. He’s a bit of a perfectionist, which is a great strength compared to my laziness. So when I threw out the idea of just covering up the whole ceiling with wood planks, the sigh of relief he let out was all I needed to hear.
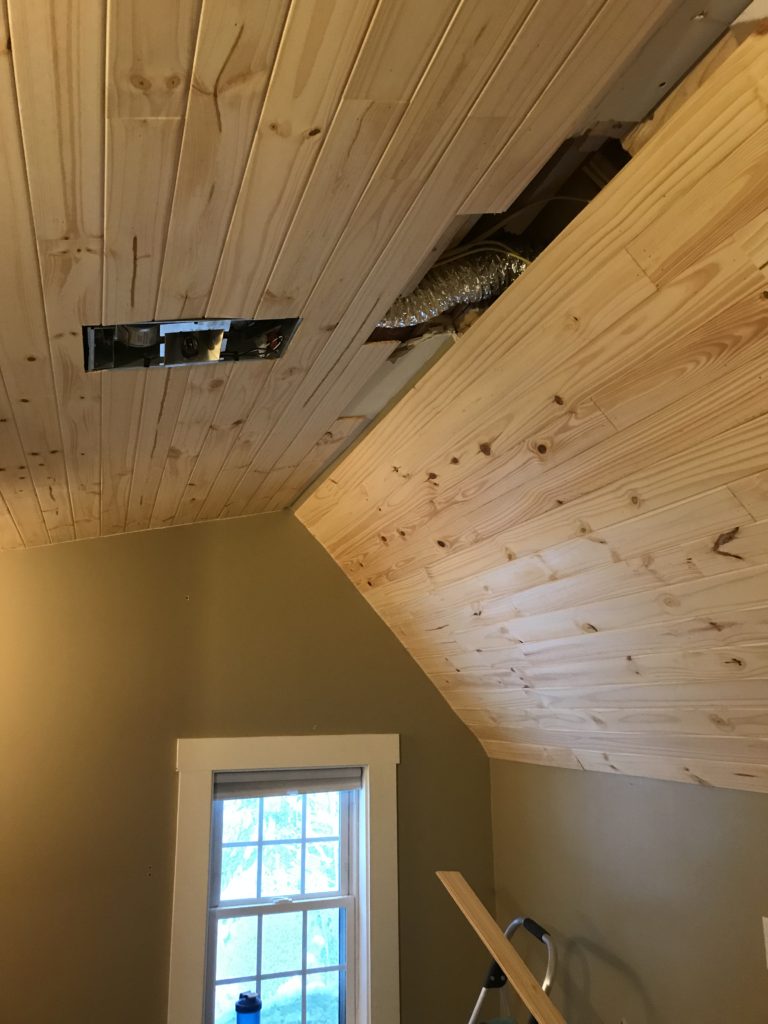
Once all the planks were installed, I painted them white. I used True White by Kilz, part of their Magnolia Home paint line. The best part was the paint already had primer in it, and Kilz stain blocking technology, so I didn’t have to prime the ceiling first, or worry about the knots from the wood coming through. *Paint was provided by Kilz for this project.*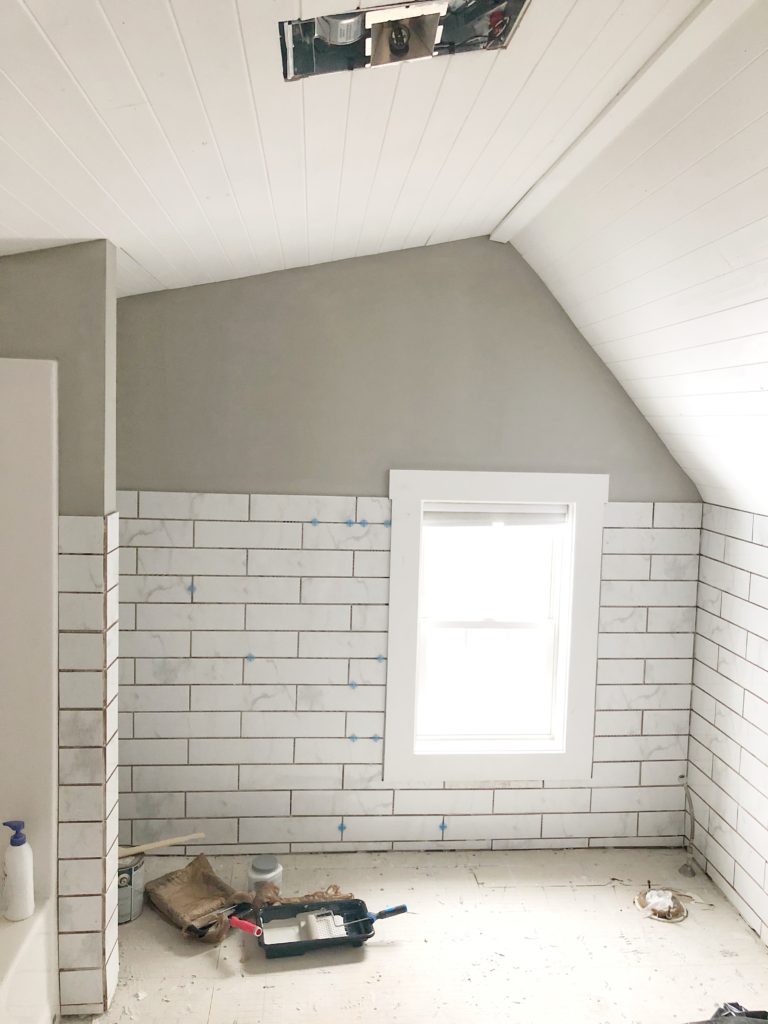
Then I had my “ah-ha” moment! After the walls and ceiling were painted, and the tile was up on the walls, I looked up, and instantly knew what the space would need. You can see in the photo above we used just a 1×3 pine board at the peak of the ceiling, and then I asked the hubby if we could put a reclaimed beam there instead! 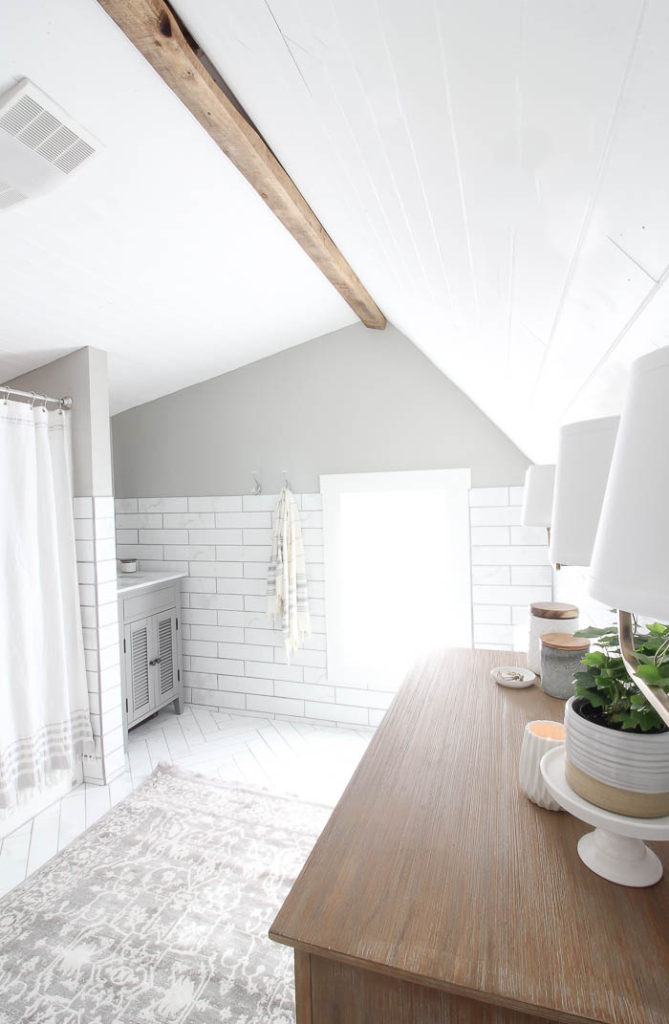
It made a huge impact right away, and honestly made painting the entire ceiling totally worth it! I love how the beam has the same hue as the dresser, and matched the reclaimed shelves so well!
We are so thrilled with the outcome, and that the project is done, ha! It’s nice to have 2 bathrooms fully functioning in the house again. And even though this project was sponsored I thought it might be fun to see just how much money went into this makeover, in case any of you are contemplating tackling a bathroom reno soon! I’ll be back with a budget breakout for this project next!
Stay in touch!
Instagram / Pinterest / Facebook

I was so busy looking at the pretty details I didn’t notice the beam. It adds a lot of warmth to an already wonderful room
Cindy
Wow, what a piece of work! But the final result is awesome, so I’m guessing it was totally worth it 😉
It is nice to have all the room you need to put all those pretty storage pieces in the bathroom. The sconces are a very nice touch. I have a small master bath and well,ugh!!lol!!
Thank you so much Marlene 🙂 I love our storage solutions now, so much better to look at 🙂
Your bathroom remodel is beautiful!!! As a DIYer and a perfectionist…..
I would like to suggest replacing the little door with a plain hollow core door painted with faux grout lines to match the tile. Maybe adding a small old fashion twist latch !!
That is a great idea Jaclyn!!! I kept throwing around different ideas on how to make the door look better, but nothing was coming to mind! So glad you shared 🙂