Hello Friends! I shared our outdoor patio space the other day all ready for summer! It truly is one of our favorite spaces that we enjoy all summer long, and I shared how even though it’s surrounded by trees, I still love to bring potted plants, because it makes the entire space feel so cozy. Today I’m sharing a new planter I made using one of my vintage crates, and I love how it turned out.

Over the past couple years of putting together seasonal planters for our outdoor spaces I’ve come to realize one thing, I want maintenance free! And by that I mean, flowers that don’t require deadheading, or constant watering, and are going to be ok if they end up being neglected a little bit. The potted herbs I had on our outdoor table last year were awesome, and made me realize just how much I wanted my planters to be hands free once I was done putting them together.
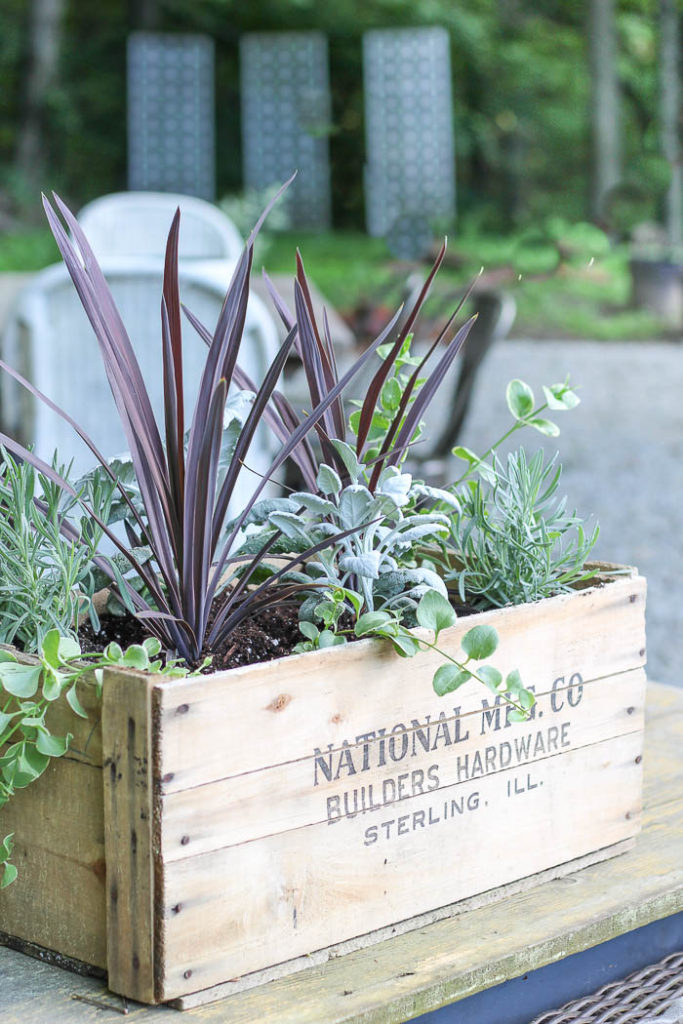
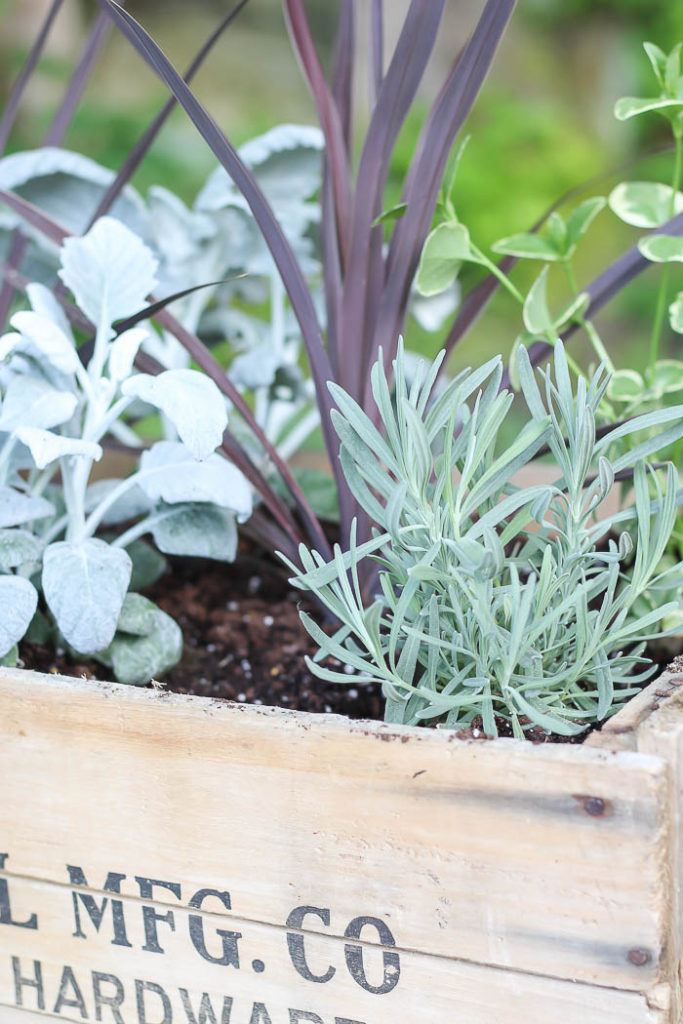
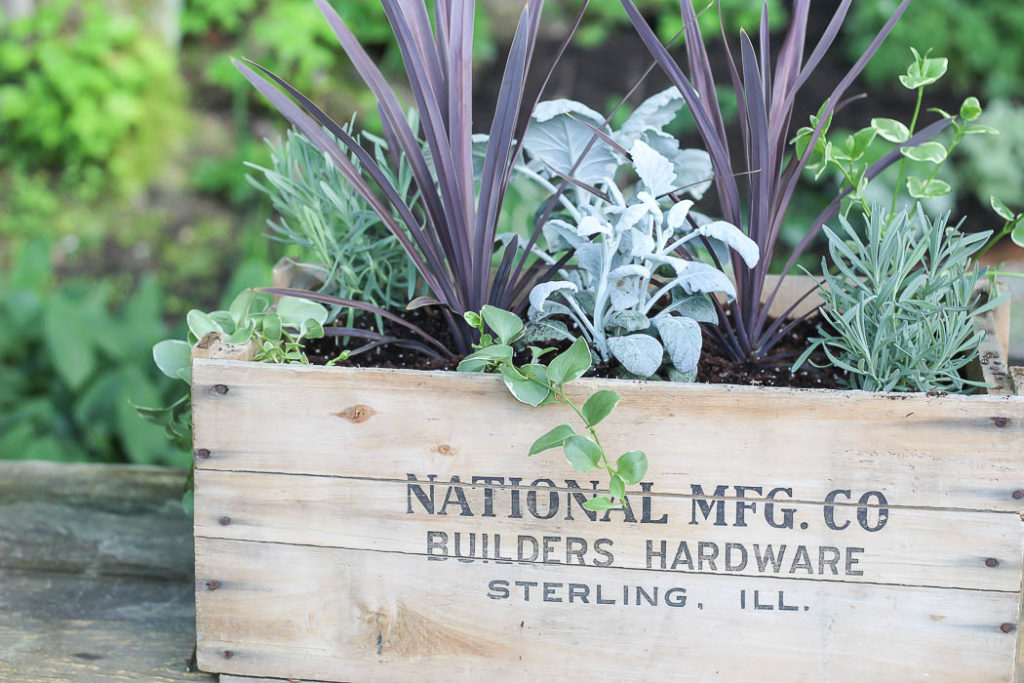
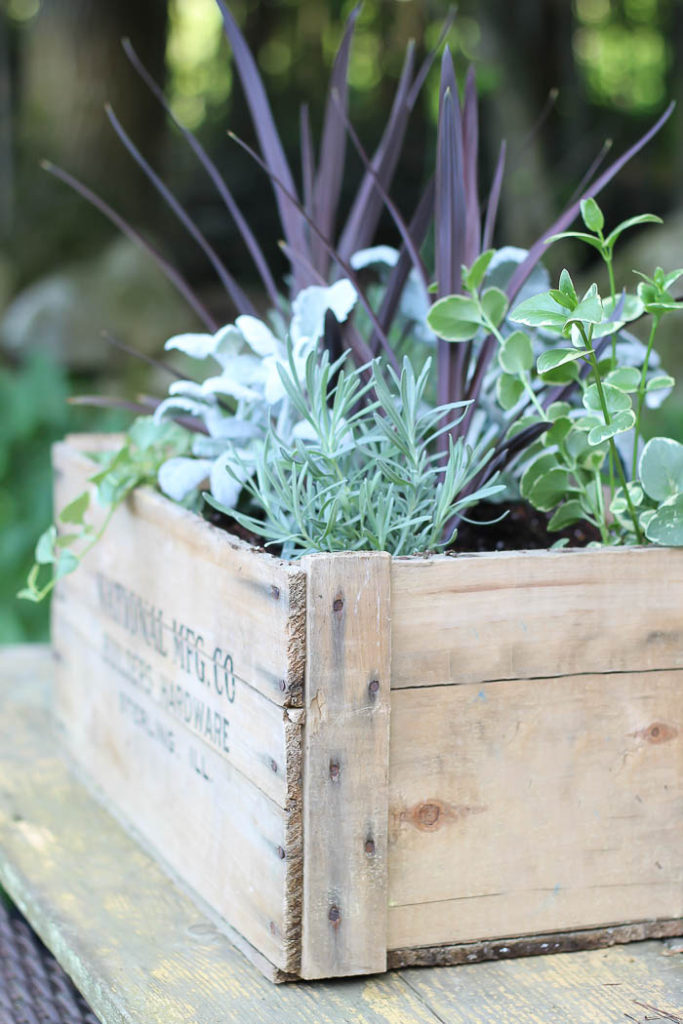
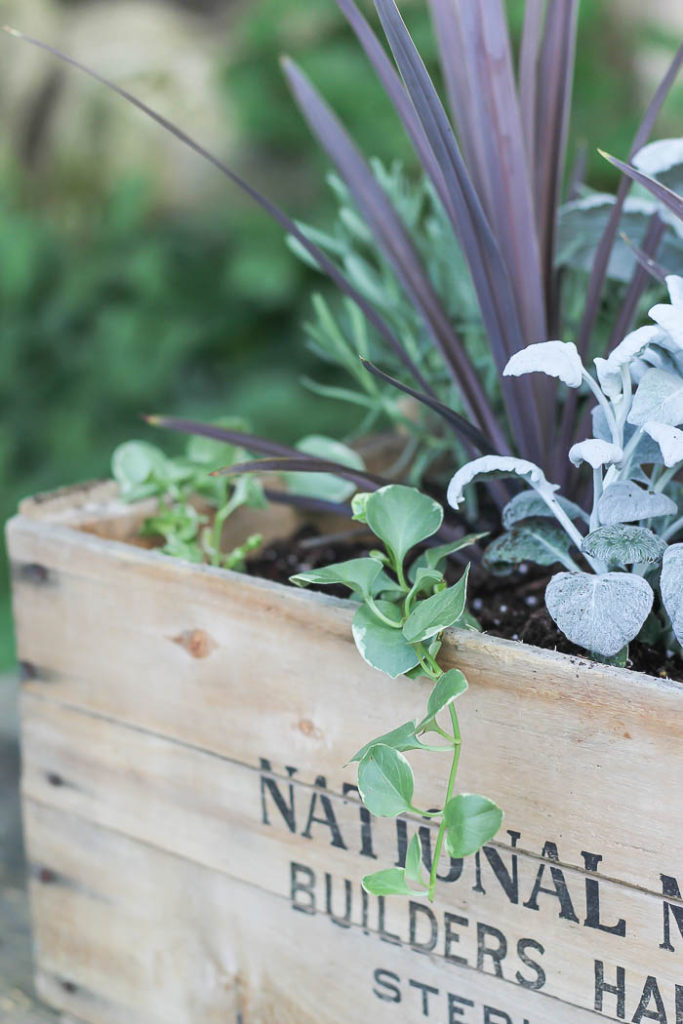
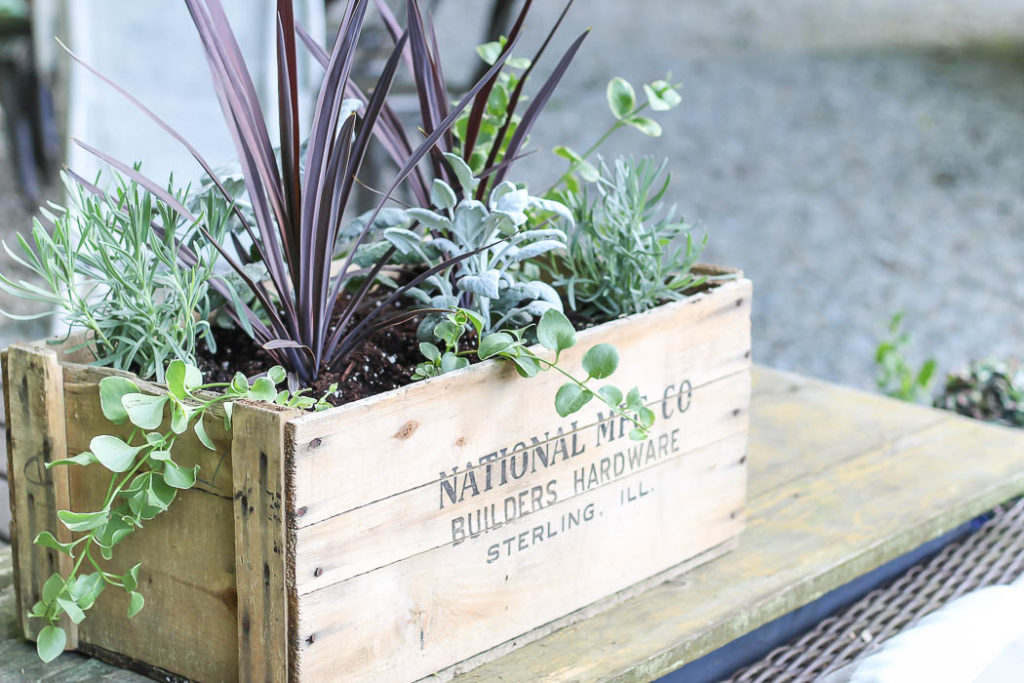
I decided to use a vintage crate I had for the container, and fill it with different shades of green that were full of different texture and sizes.
Here’s how I got started :
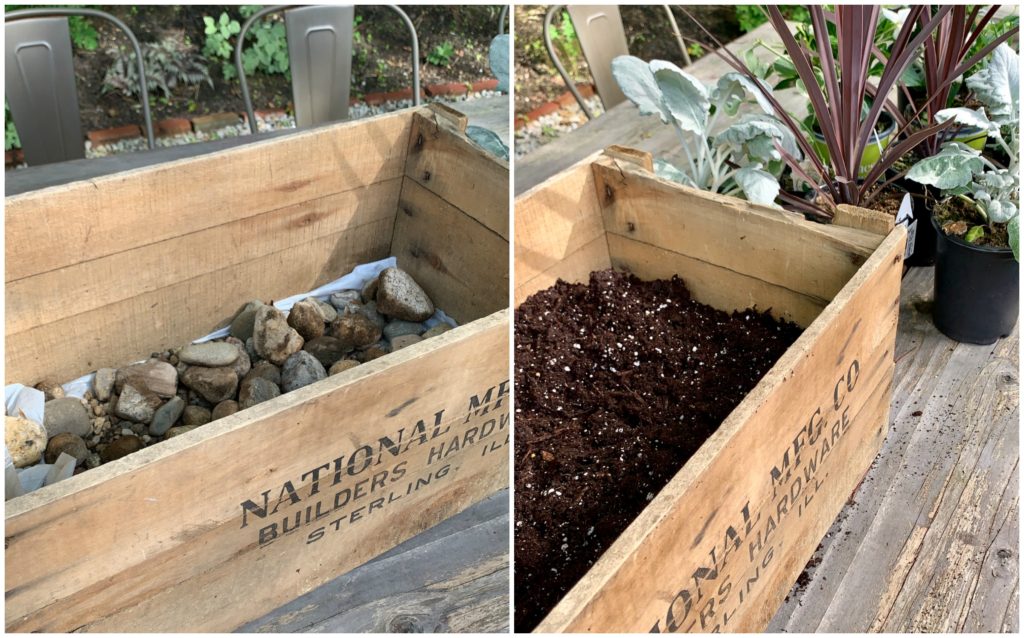
Since the bottom of the crate had cracks in-between the slats of wood, I didn’t feel the need to add anymore holes for drainage. I did however line the bottom of my crate with plastic, and cut a few slits in that, and then filled the bottom layer of the crate with rocks. Providing space for water to drain through. Then I filled it in halfway with potting soil.
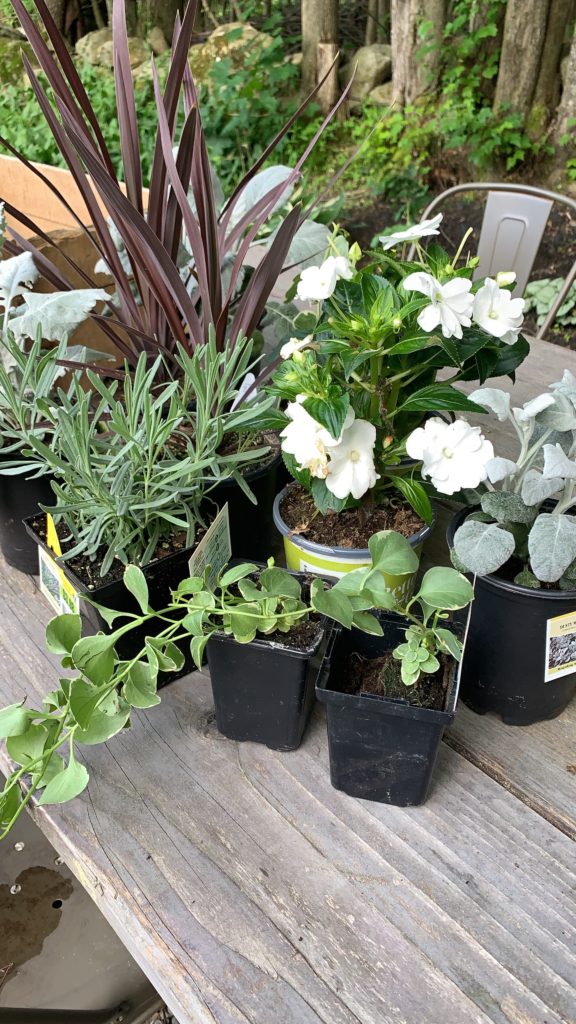
Next, I like to do a dry run with my plants. This allows me to play around a bit with the arrangement, and decide on just what plants I want to use. Like any of my decorating, I stick to neutrals even with my plants 🙂
This years variety I chose dusty miller, cordyline, lavender, and vinca vine.
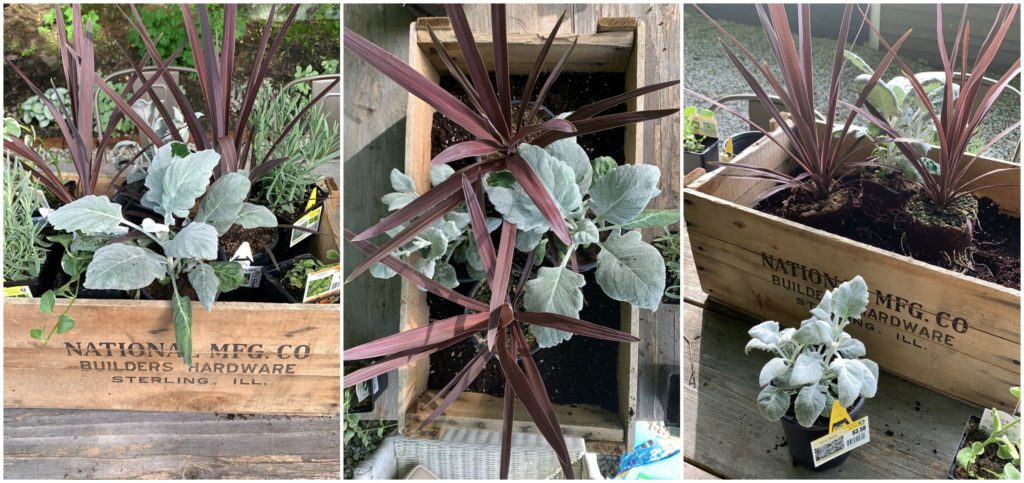
I knew I wanted to use the two cordyline, which is the tall purple spikey plant in the center, and then fill in around it with the dusty miller. I love that they feel like complete opposites, where one is dark and slender, and the other is light and fuzzy. I created a cross, which you can see in the center photo above using 2 cordyline, and 2 dusty miller.
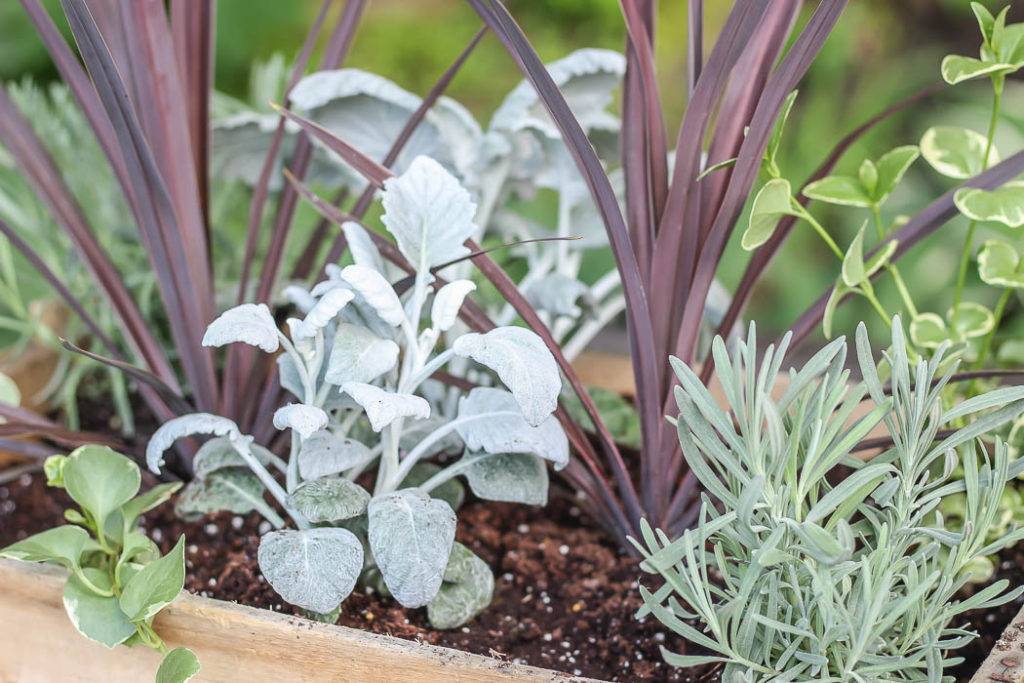
Then for each end corner I places a lavender and vinca vine, and then flipped them on the opposite end. Since the planter is on a small table behind our sofa, you see it from either side, depending on if you are at our outdoor dining table, or fire pit area. So I wanted it to look nice on both sides.
One thing I have also learned is it’s ok if there are some bare spots, these little potted plants grow fast, and will fill out the space around them.
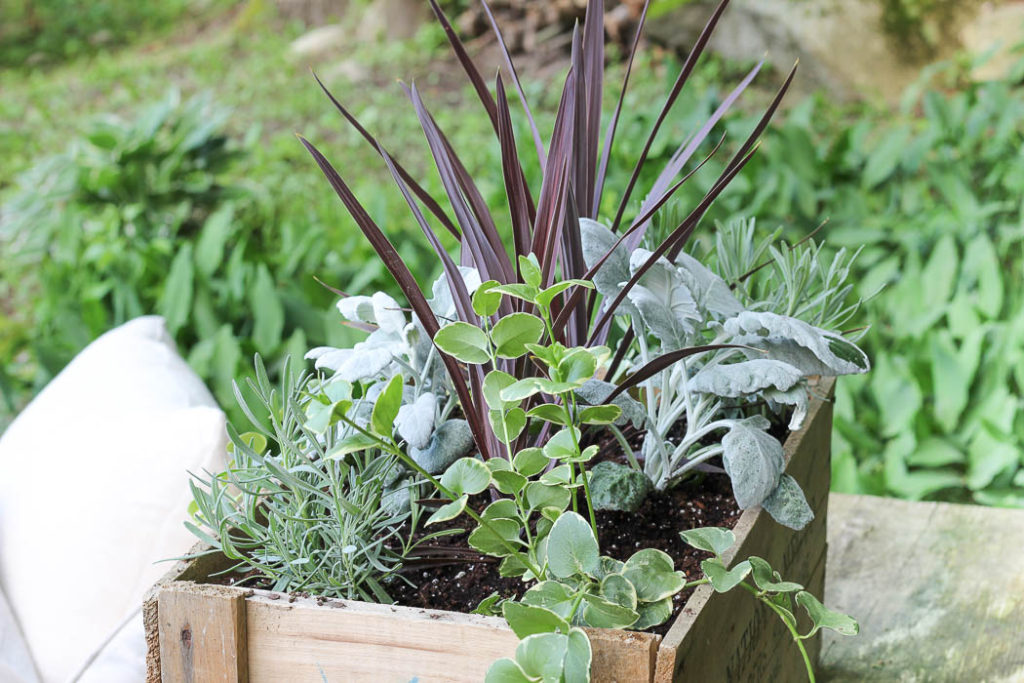
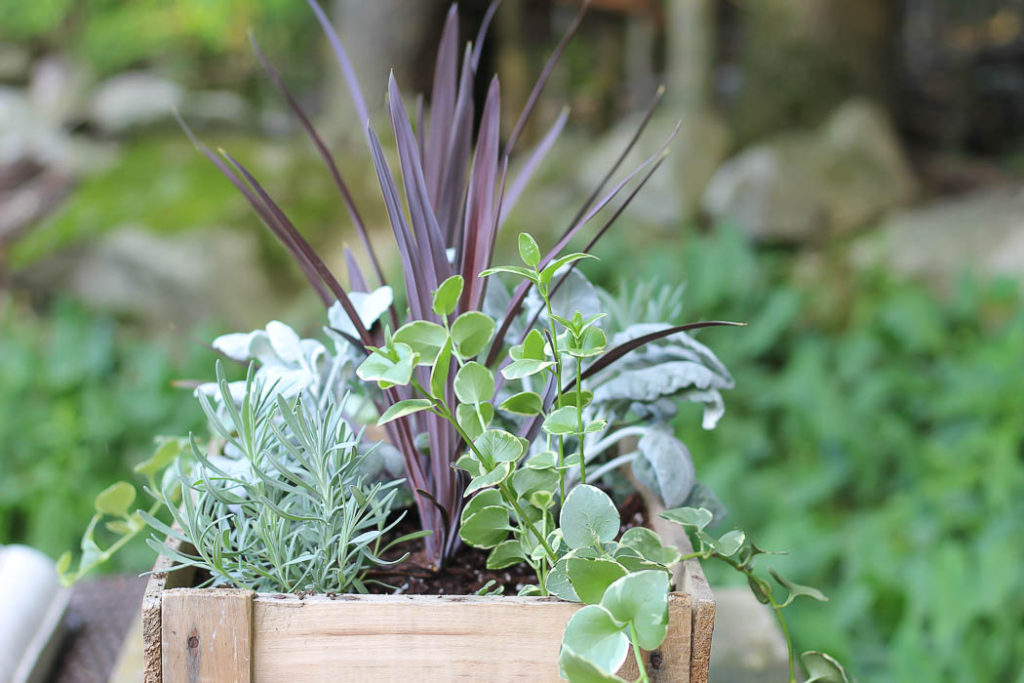
I love how the vinca vine is already cascading over the sides, and can’t wait to see what this looks like in a month or so.
If creating your own planters seems intimidating, you can take a cue from me, I choose to stick to the same three plants, and rotate them. I find it keeps things looking effortless, and takes the guesswork out of how many different varieties to get.
Happy Summer friends!! I hope you get outside this weekend, and take some time to rest 🙂

all of your plant are pretty. They especially look good in the wooden container. I did not see where you planted the plant with the white blooms. Maybe I just missed it. I will go back and take another look. DON’T FORGET TO WATER. that is my problem I for get to water.
Thank you Margaret! I ended up not using the white flowers in the crate, but in my concrete containers. You can see them in photos in my Summer Patio post 🙂