Hi Friends!
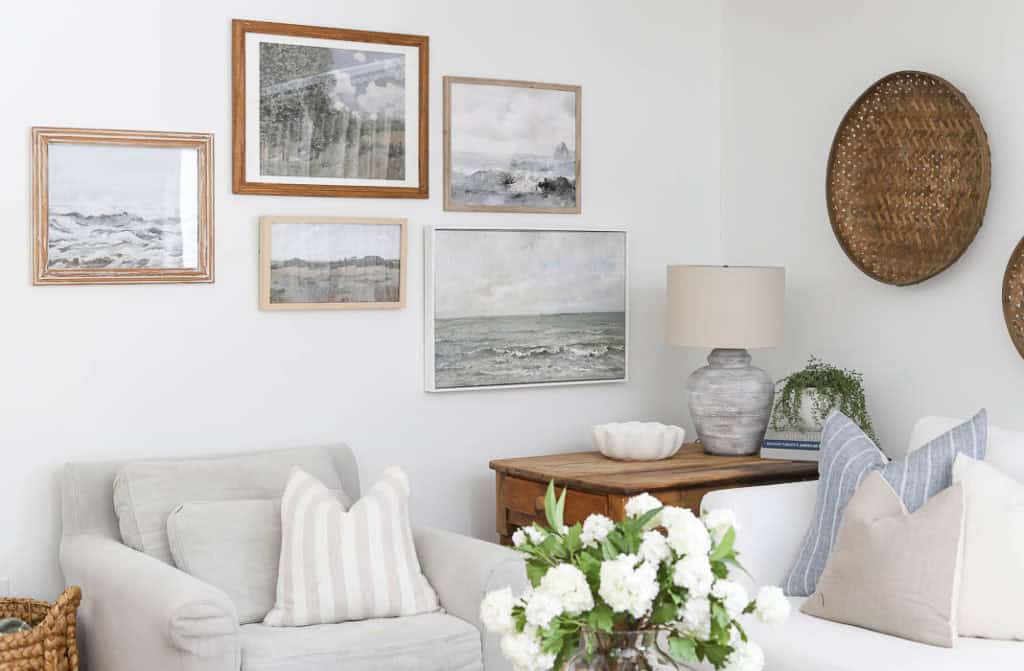
One of my favorite ways to decorate that reflects our personal style is with a gallery wall. Whether you use artwork, or family photos, what we choose to hang on our walls can say a lot about who we are, and reflect what we love. If you have a lot of wall space in your home, hanging a collection of smaller frames in a grouping to create a gallery is an easy way to fill a space, and can often times be more affordable than a large piece of artwork. I recently tweaked the frames I have hanging over our console table in our living room to create a larger grouping of frames, so today I’m sharing how I created this gallery wall and sources for the frames and artwork I used.
Come and see ~

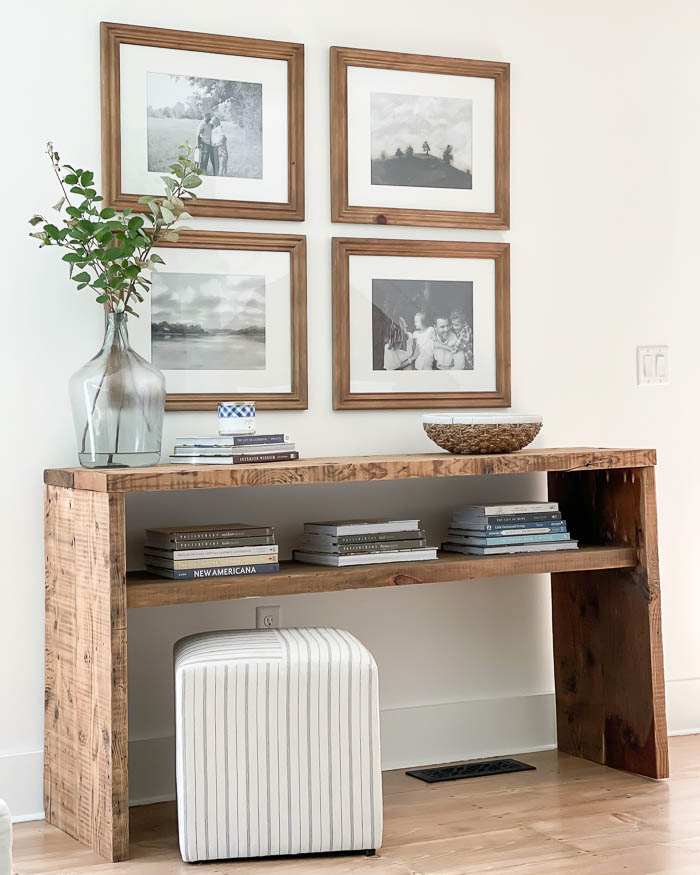
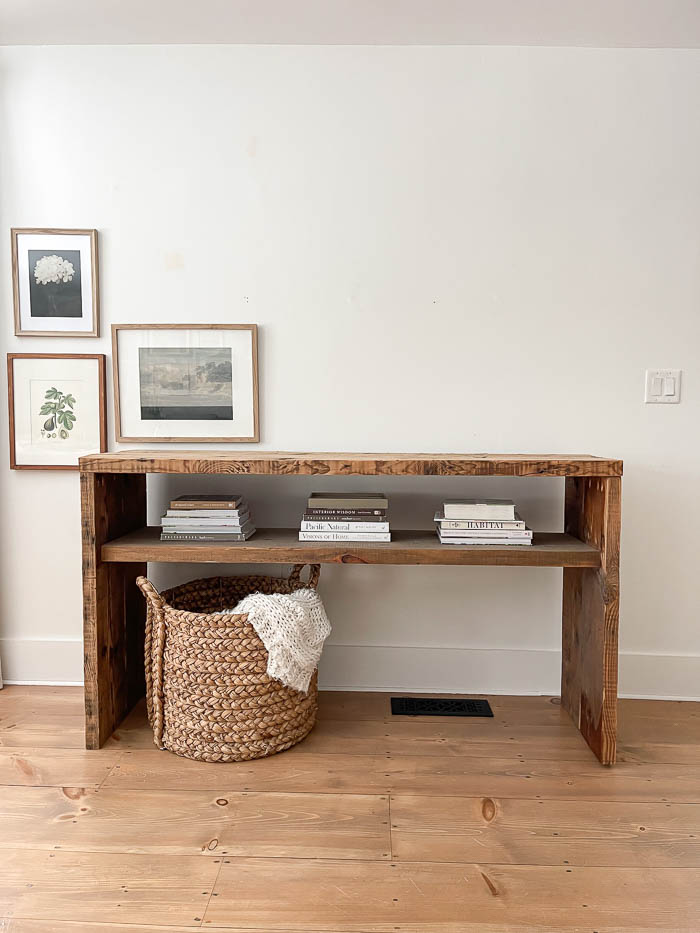
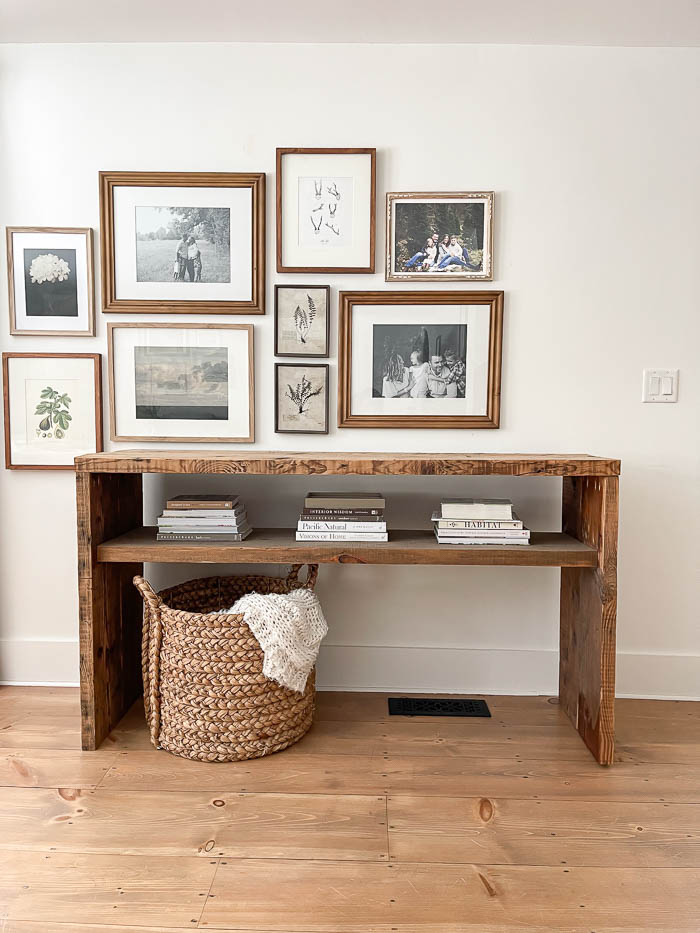
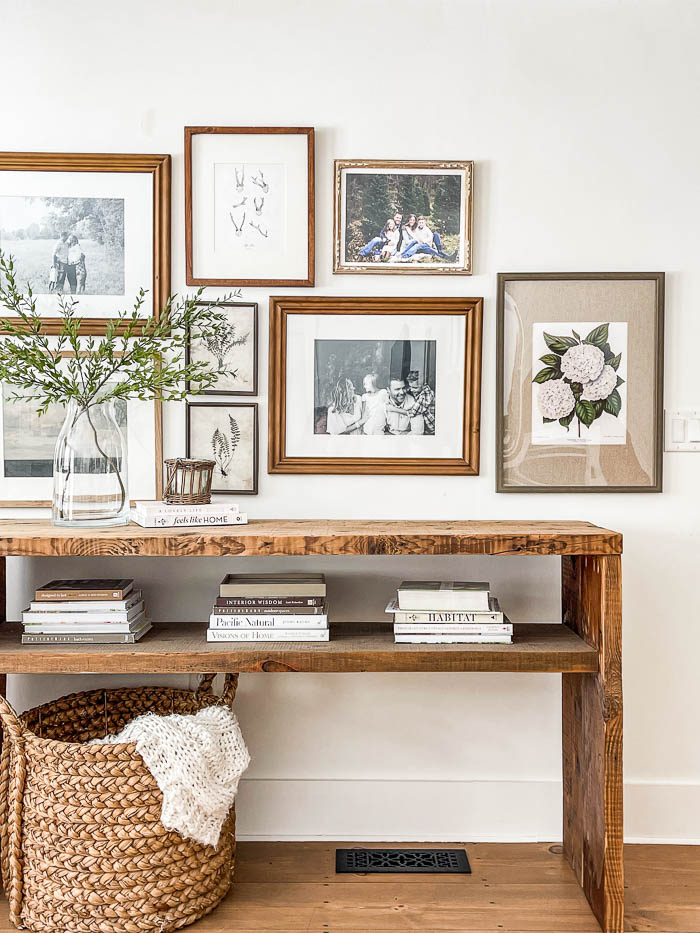
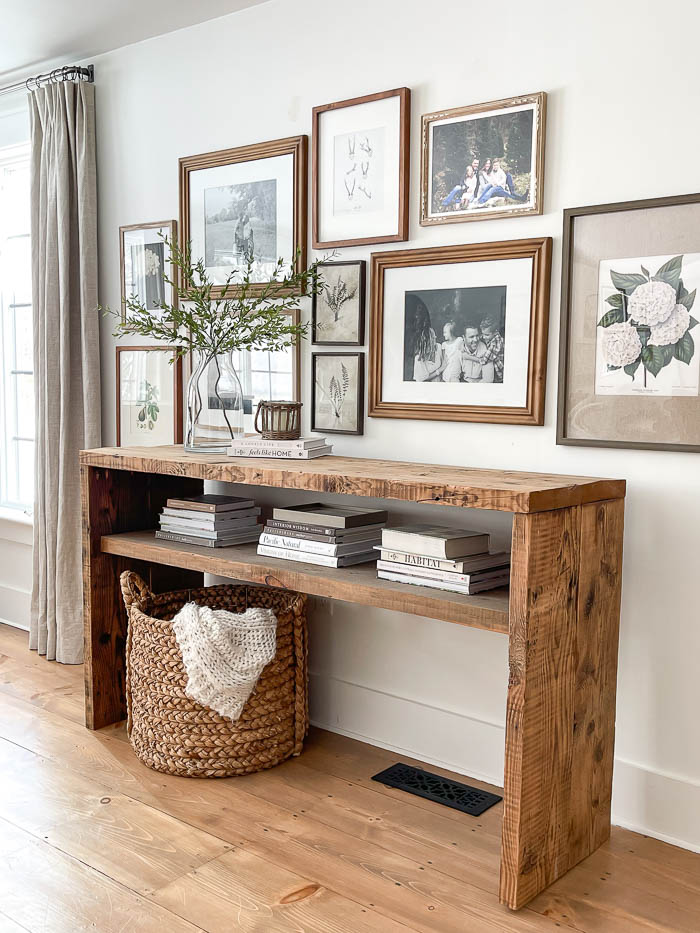
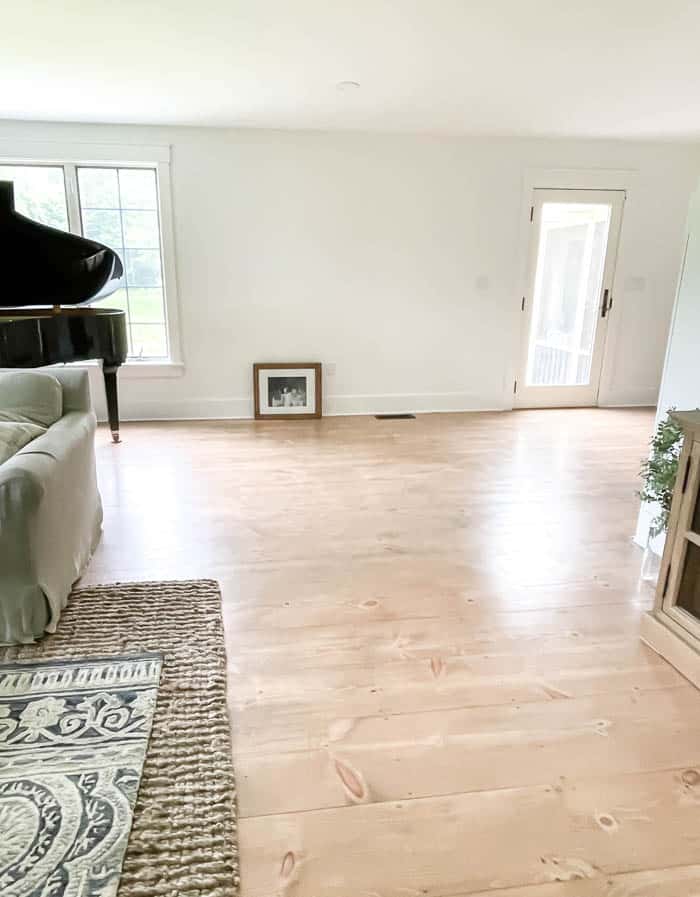
I’ve shared about this wall in our living room when we came up with the solution to build the console table. It is 10 feet from the window to the door, which meant 10 feet of blank wall. When we first built the console table I had hung 4 large frames above it in a grid pattern. But after living with it for awhile I realized I was craving something different.
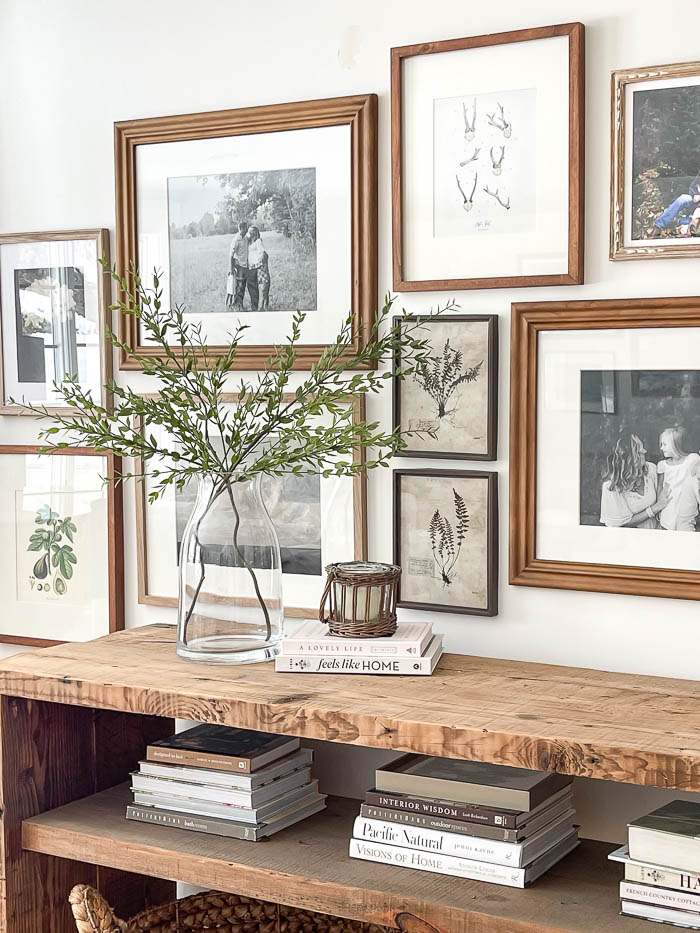
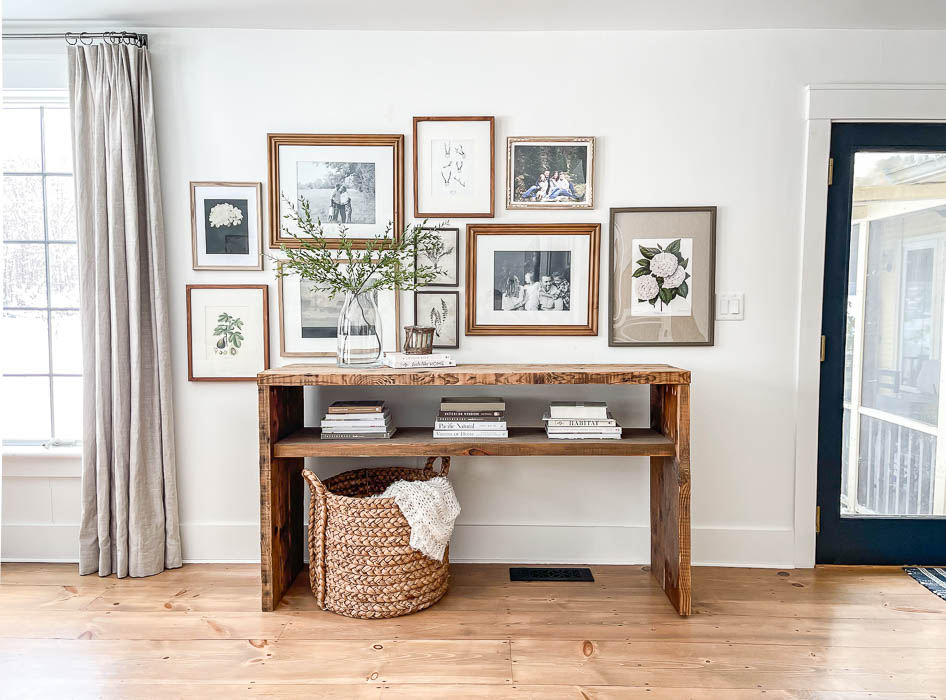
I’ve always been drawn to gallery walls that look like they have been collected over time. I love the look of mix matched frames, and a mix of artwork and photos. So that is just what I set out to do. Thankfully I had most of the frames already, so I gathered all the artwork I hoped to use, and started working on my arrangement.
Before the first nail went into the wall I did a mock layout on the floor. This allows you to move frames around easily before you make the commitment of putting the nail in the wall. I find this especially helpful when working with different sized frames and creating an asymmetrical layout.
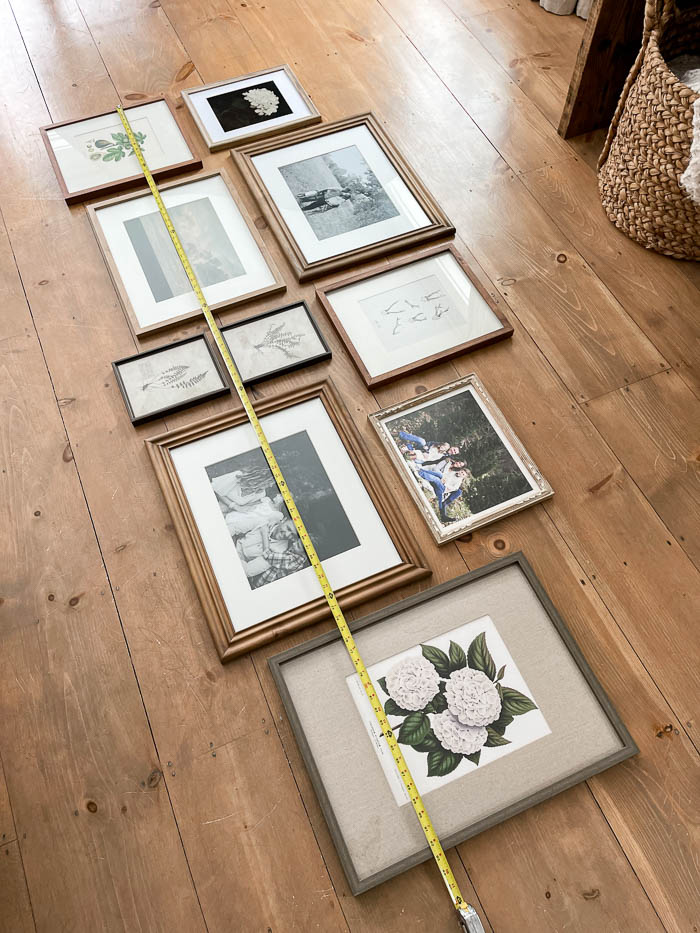
Tip : Measure your wall space before you start hanging photos. Place the grouping of frames you plan to use in the layout you like, and measure the length to make sure it fits on the wall space you plan to hang them on.
Once I had my frames placed in a layout I liked, I then took a tape measure and measured the length from left to right, to make sure that my grouping of frames would fit on the wall space where I planned to hang them. This way I knew before I started putting any holes in the wall that they would all fit.
To Start Hanging
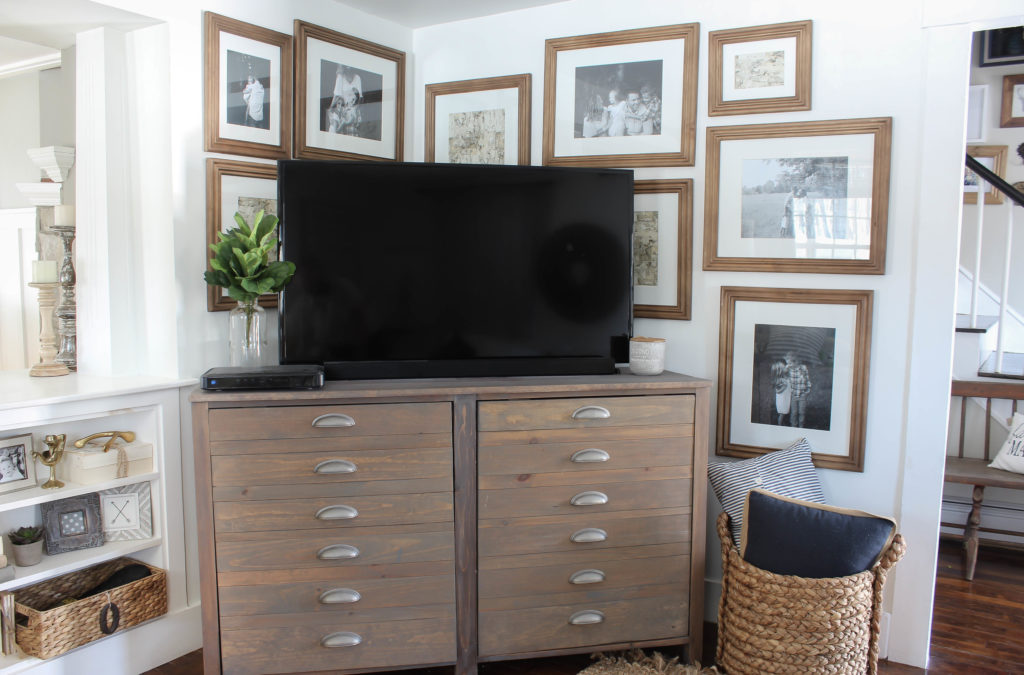
For this particular gallery wall, I knew I wanted it to look like the frames wrapped around the table. So I started by placing my first frame vertically on the bottom left, just below the height of the console table. I then placed a smaller frame stacked vertically on top.
I continued working my way from left to right. Since my first two frames were hung vertically, I hung my next pairing horizontally. I hung the frame on the bottom first, knowing that I wanted to make sure I had the right distance above the table. Hanging the bottom frame first made sure the top frame didn’t start off too low.
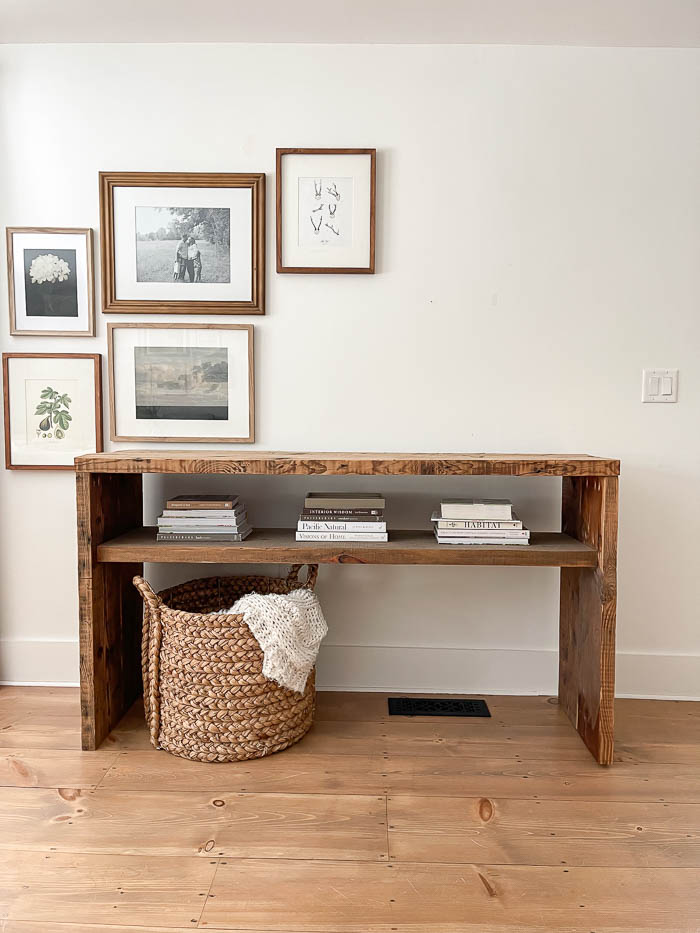
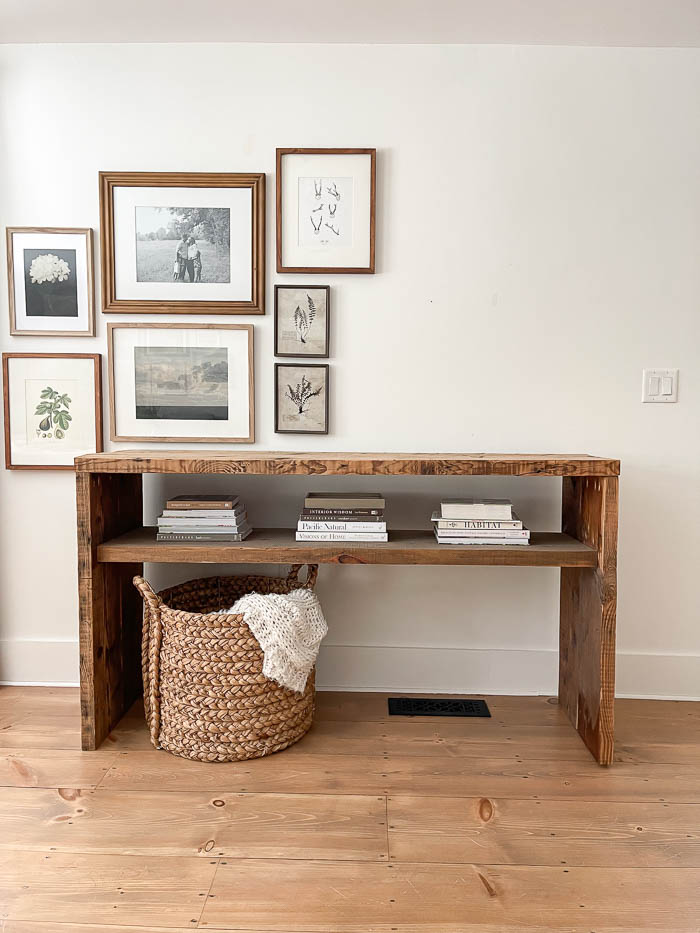
I staggered my heights, and the placement of different sized frames, but kept the distance between the frames the same when possible. When hanging your frames in an asymmetrical style you have more flexibility with the placement. More grace I like to say, then vs. a symmetrical grouping where you would have the same exact distance in between each frame throughout the grouping.
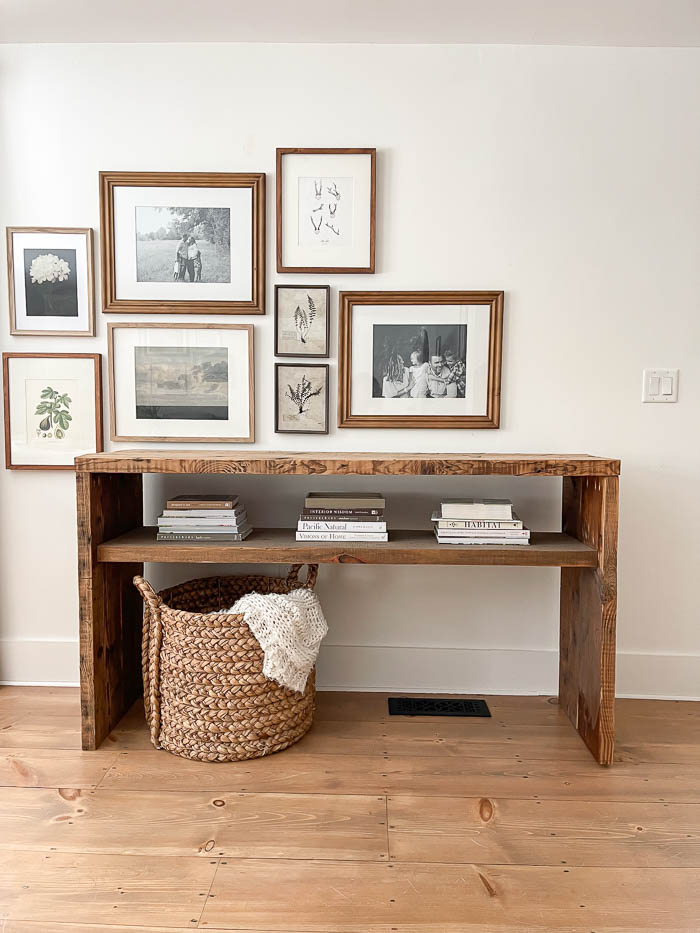

Below are the Sources for each frame and artwork.
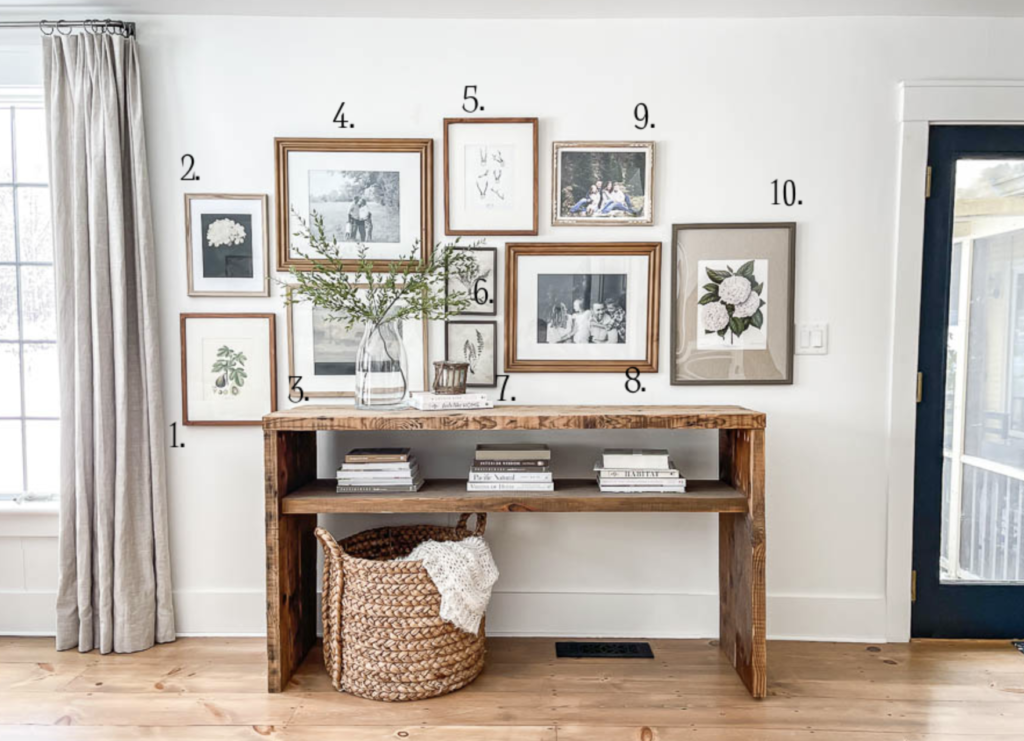
- Frame (14×17) – Pottery Barn // Artwork – Etsy (no longer available, similar print here)
- Frame (12×15) Marshalls (similar one found here) // Hydrangea Artwork – Etsy
- Frame (16×20) – Target // Ocean Artwork – Etsy
- Frame (18×22) – Target(old) // Artwork – Family Photo
- Frame (14×17) – Pottery Barn // Antler Artwork – Vol. 25
- Framed Art print (8×10) – Magnolia (no longer available)
- Framed Art print (8×10) – Magnolia (no longer available)
- Frame (18×22) – Target (old) // Artwork – Family Photo
- Frame (12×16) – Minted // Artwork – Family Photo
- Frame (18×24) – Amazon // Artwork – Amazon
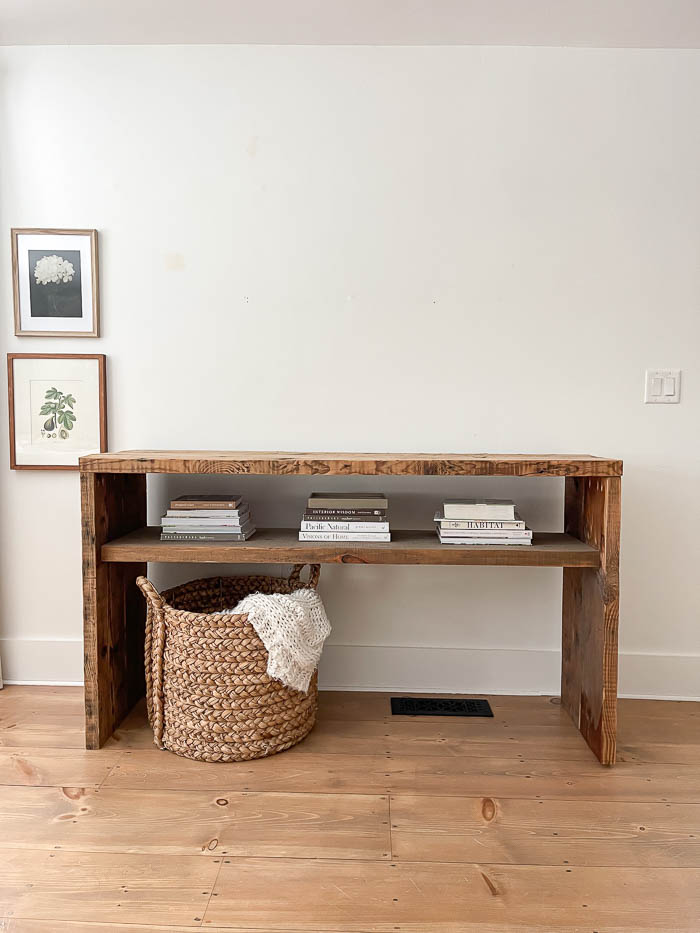
Here was the wall space Before:
After
Click the Photos Below to see other Gallery Walls I’ve done ~
I shared how I created this landscape grouping gallery wall in our living room HERE.
Tips for Decorating Your Walls
How to Hang pictures around a TV