So while I was on vacation, my mother-in-law started talking
to me about wanting to make a new headboard
out of an old door.
I was immediately on board for this project,
because isn’t it on every DIY’er, bloggers list of projects
to do at least once!
Plus
I l.o.v.e. them.
So we added it to the list of things we wanted to do while I was there,
and then one day while surfing Pinterest,
I came across this photo:
{link via : Being Brook}
It was the perfect combination of rustic chic/farmhouse/vintagey,
and I instantly showed my mother-in-law,
and with in 30 min. we were on our way to Home Depot,
and the rest is history!
While we didn’t look at any plans for the headboard,
the original plans came from Ana White.
If you haven’t been to her site, you are missing out.
She gives tons of plans to make your own stuff. So cool, right?!
So with a list in hand we headed to H.D.
and once we had all of our boards picked out,
we had the guy in the lumber yard cut them to our exact measurements.
Doesn’t get much easier than that.
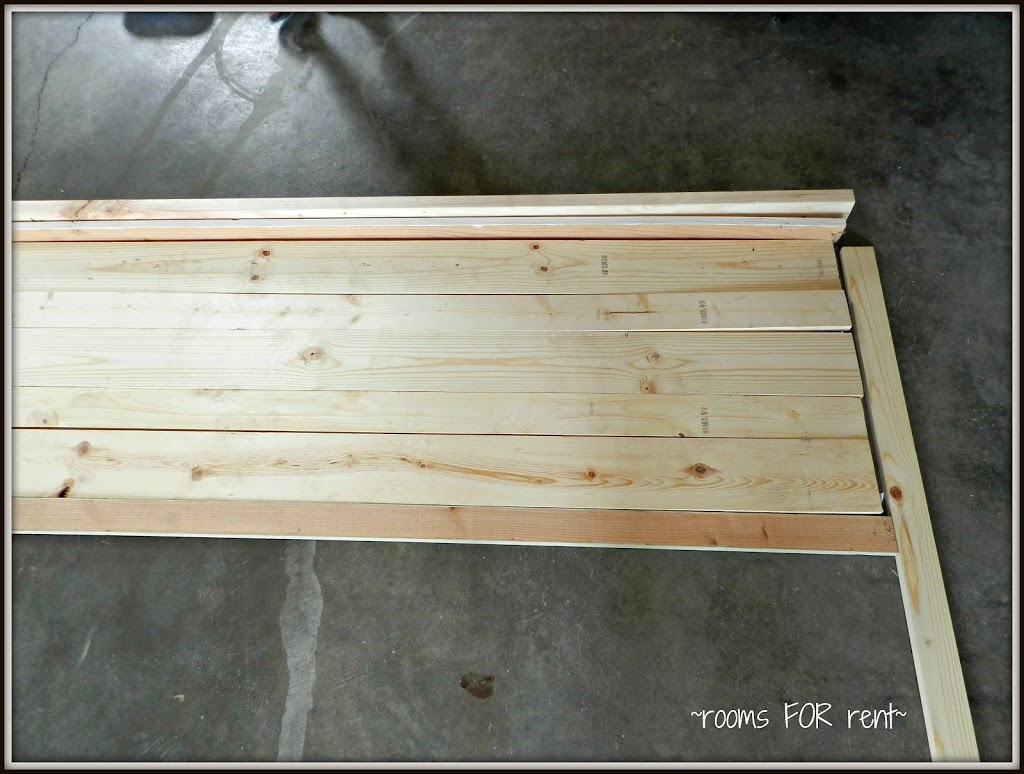
Once we got home we laid out all the boards in the garage to get an idea
of what the layout was going to be.
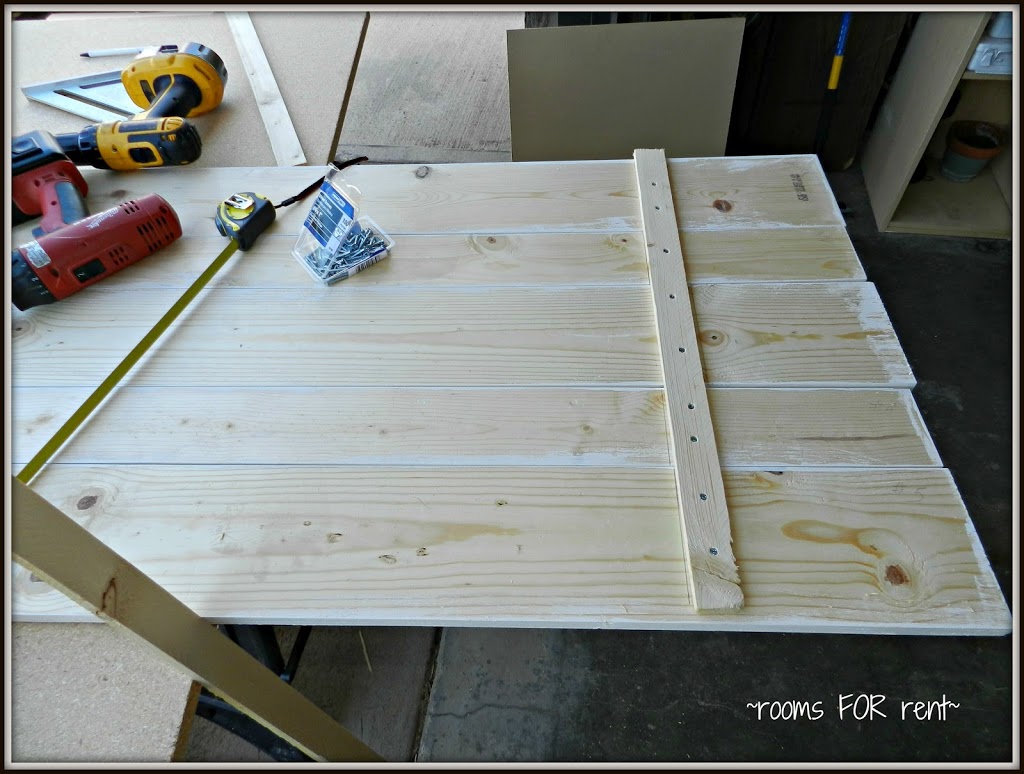
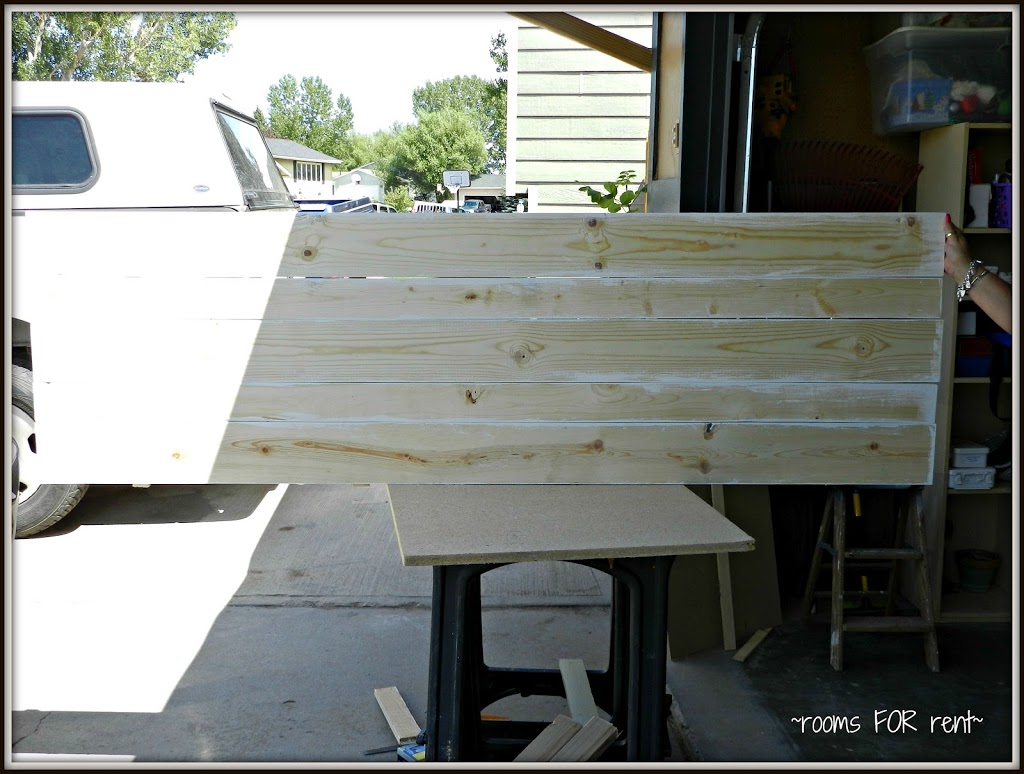
We sanded all the boards first, so that nothing would get snagged on them,
and then painted all the edges white (which was our base color)
so that all the cracks would look finished in the end.
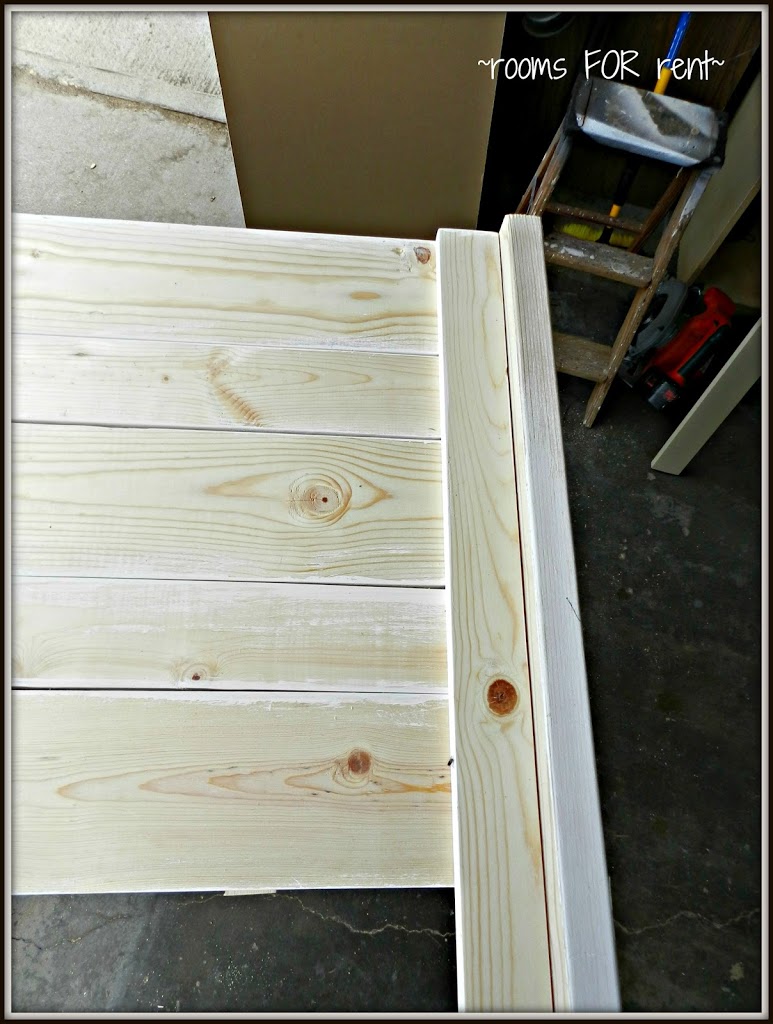
Then we started assembling the back panel,
which is the main part of the headboard.
Holding the pieces together with thin strapping,
this is what the front looked like:
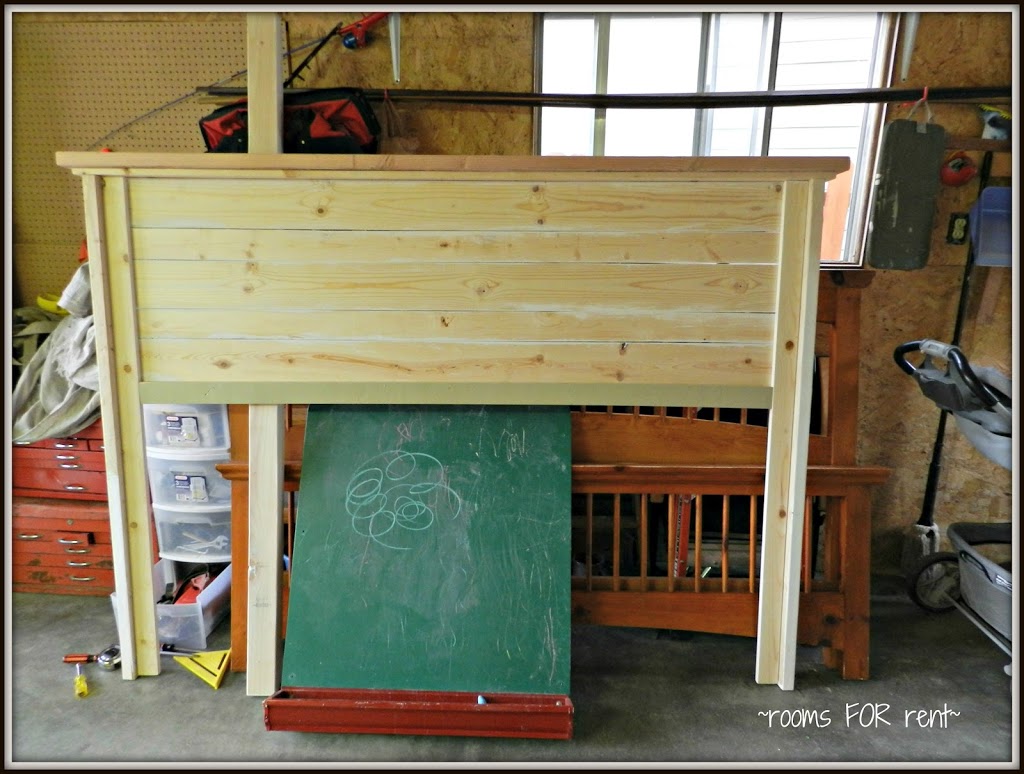
Once that part was complete we attached the legs next.
Then we used a 1×3 and 2×4 (that we screwed together) for the top,
and basic assembly was complete.
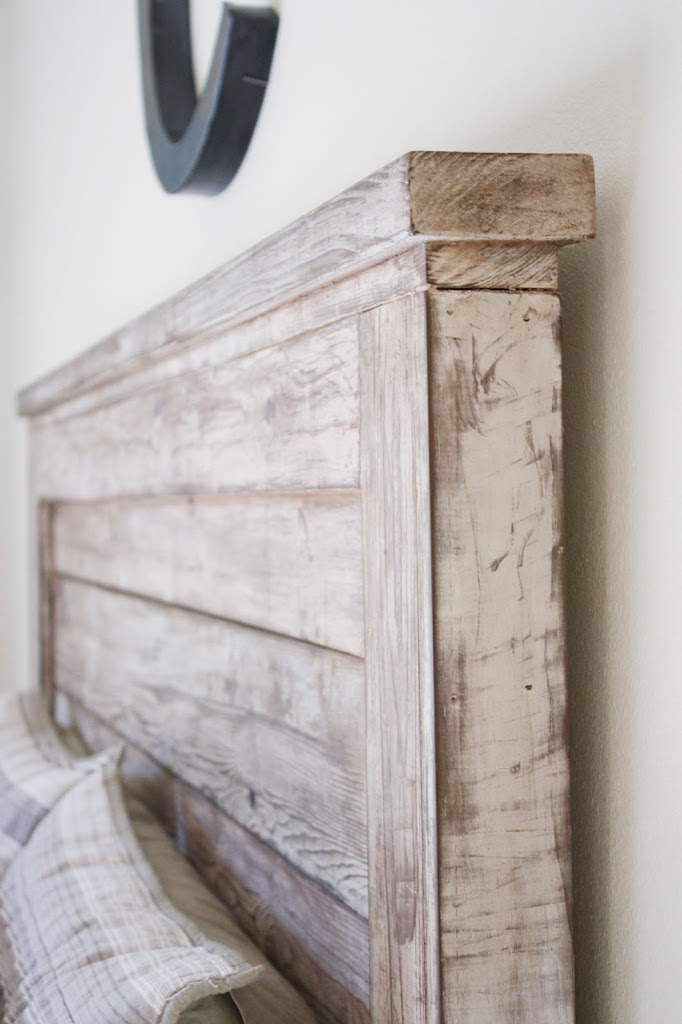
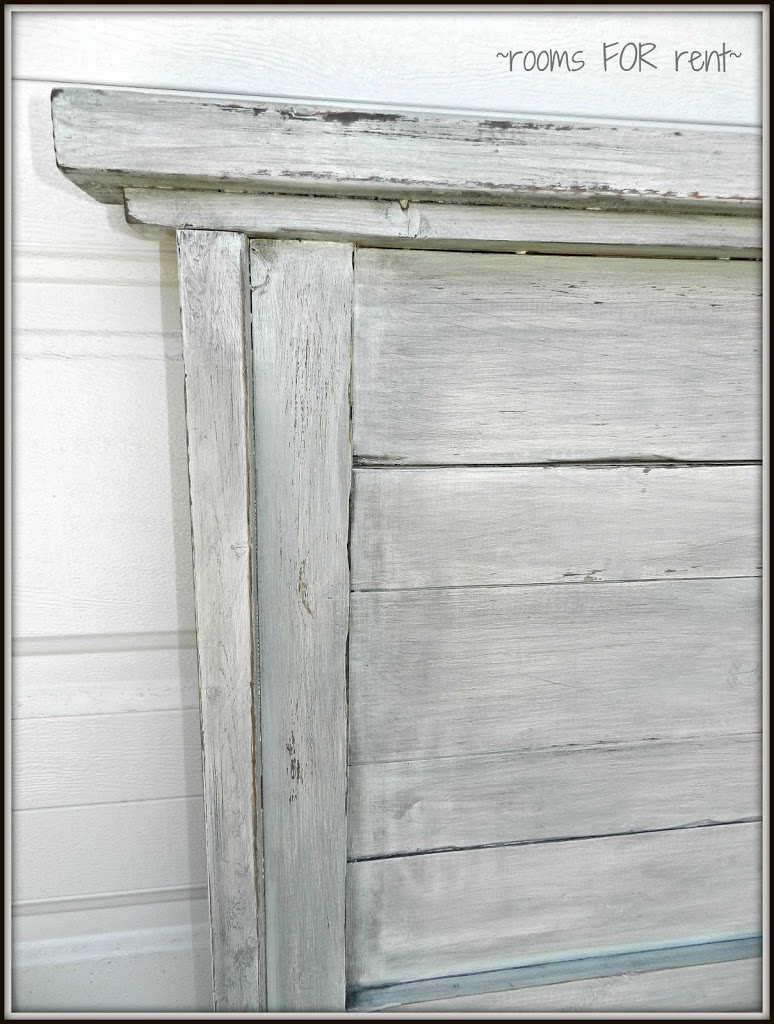
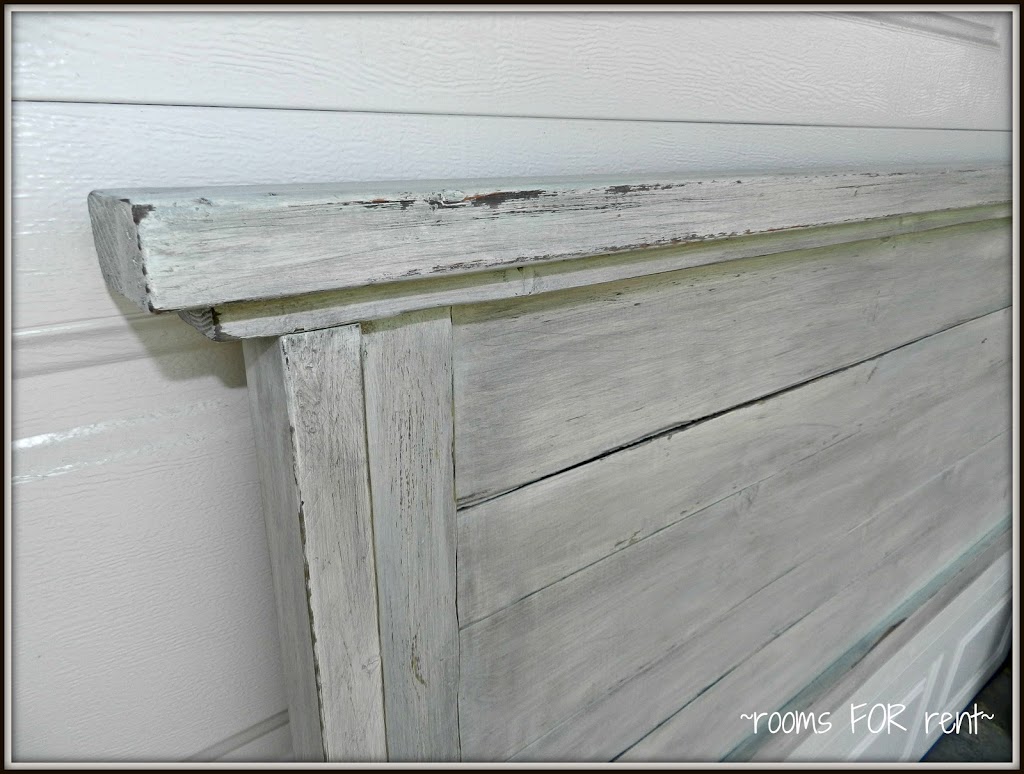
Now for the fun part.
The best part about starting from scratch with finishes is
you can really make it custom to fit your space
exactly.
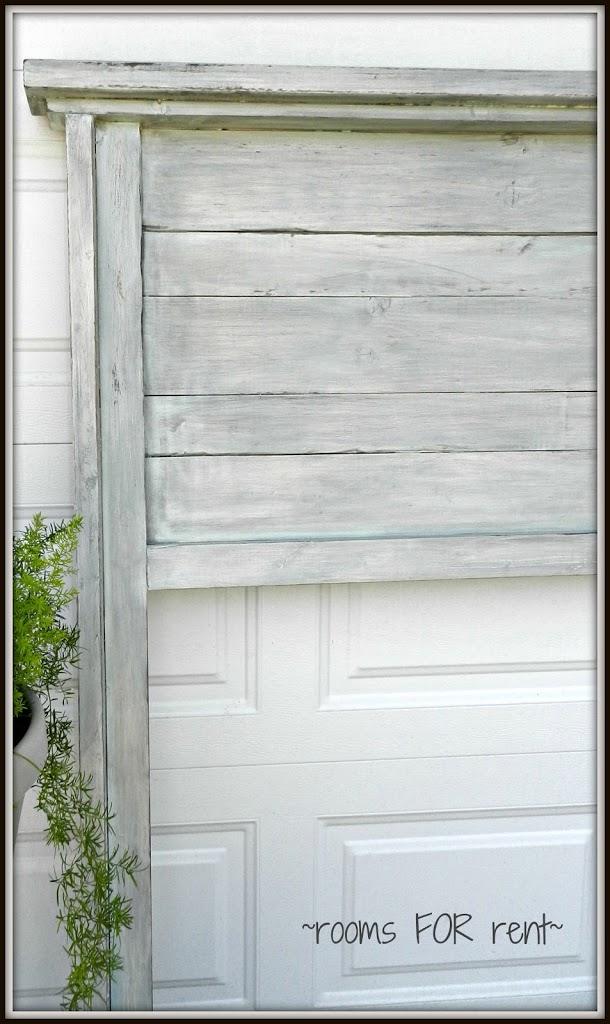
So the whole thing got a base coat of white paint.
Then a rough coat of this sea green/blue (which she already had).
Then sanded and roughed up quite a bit.
And then grey stain was rubbed over the whole thing.
For a look like this:

It was such a fun project to say the least,
and we had a great time putting it together 🙂
And now that I’m home, it’s time to finish up some projects around here!
Stay tuned,
and have a wonderful weekend 🙂
~Bre
I love this! Beautiful! Visiting from the Blog Hop!
Thanks!!! so glad you like it 🙂 Always enjoy your posts 🙂 ~Bre
This is beautiful!! Wow. I’m a new follower from the Blog Hop. You have a gorgeous blog.
http://www.itsybitsypaperblog.com
Thanks so much! Following you back 🙂 ~Bre
Visiting from the Blog Hop…LOVE this headboard! Amazed at the finished creation!
Newest follower,
Dori @ belljarvintage.blogspot.com
Thanks so much! Glad to have you here 😉 Following you back! ~Bre
I love the way it turned out!
Peggy
Thanks so much for the comment love 🙂 ~Bre
That headboard came out awesome! What do you think the overall cost was for the lumber? Just curious…
Kris
Cricket Acres Studio & Barn Loft