Thank you SO much for all of your lovely comments on my Thanksgiving Table I shared over the weekend. It was so much fun to create, and I’m so glad you guys loved it as much as I do! I have gotten so many questions about the pumpkin centerpiece, so today I’m going to share with you how I made it. **Disclaimer: I’m not the best at sharing tutorials, half the time I just wing it, so this is my attempt to show you how I created it from photos I quickly snapped along the way.** I will do my best to make sure I cover all the details, but please don’t hesitate to ask questions about what I used, or how I did something.
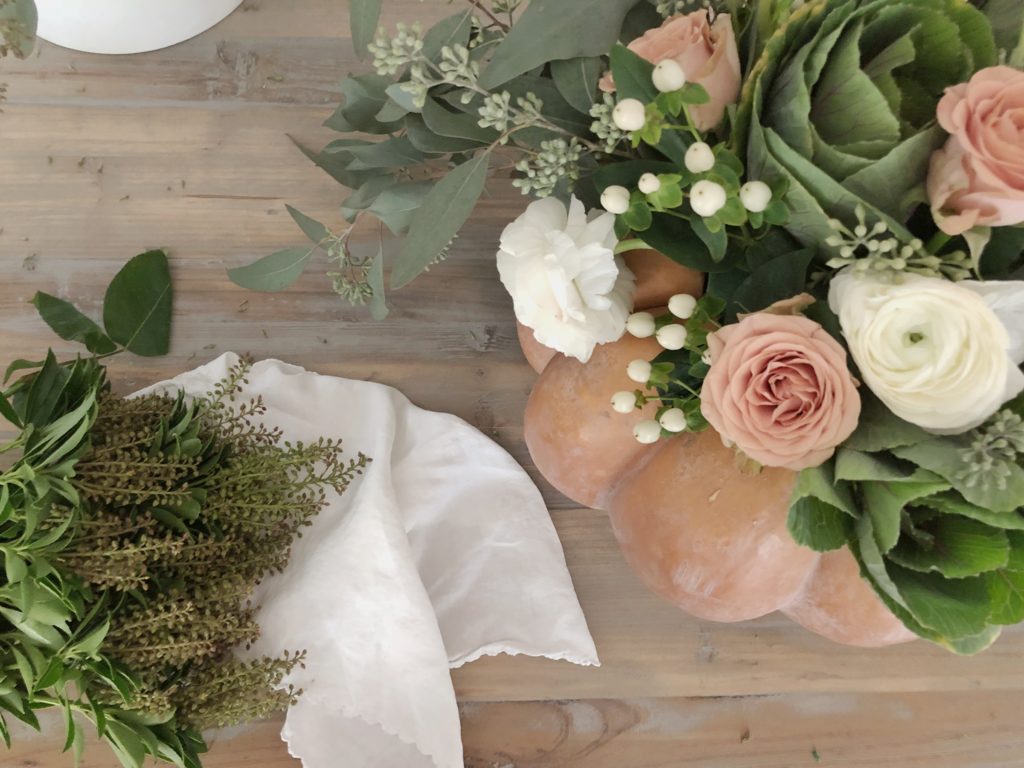
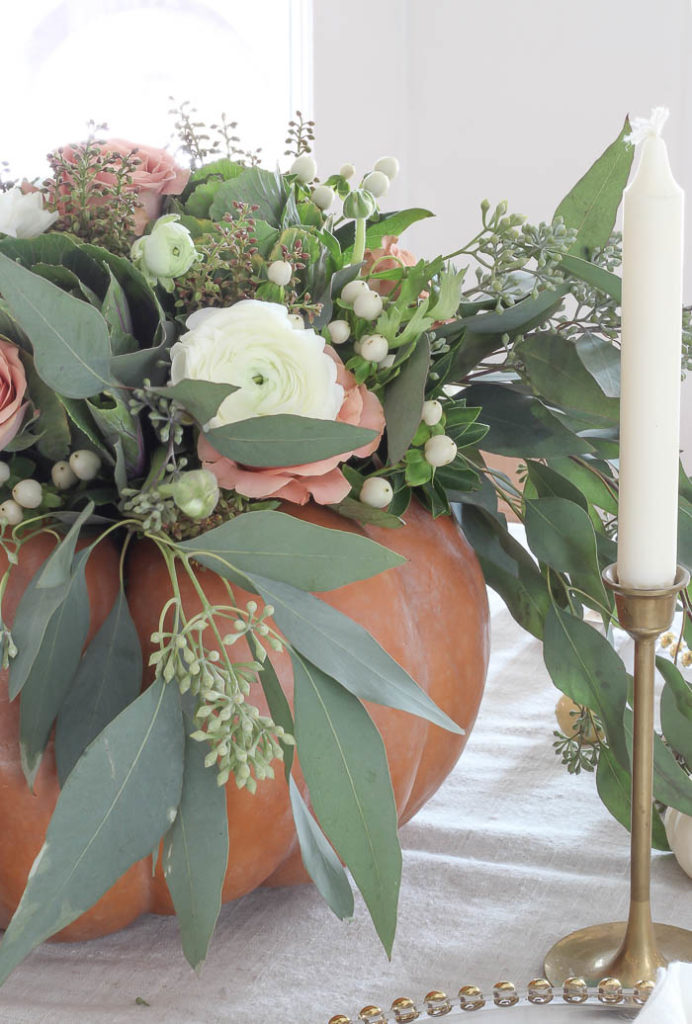
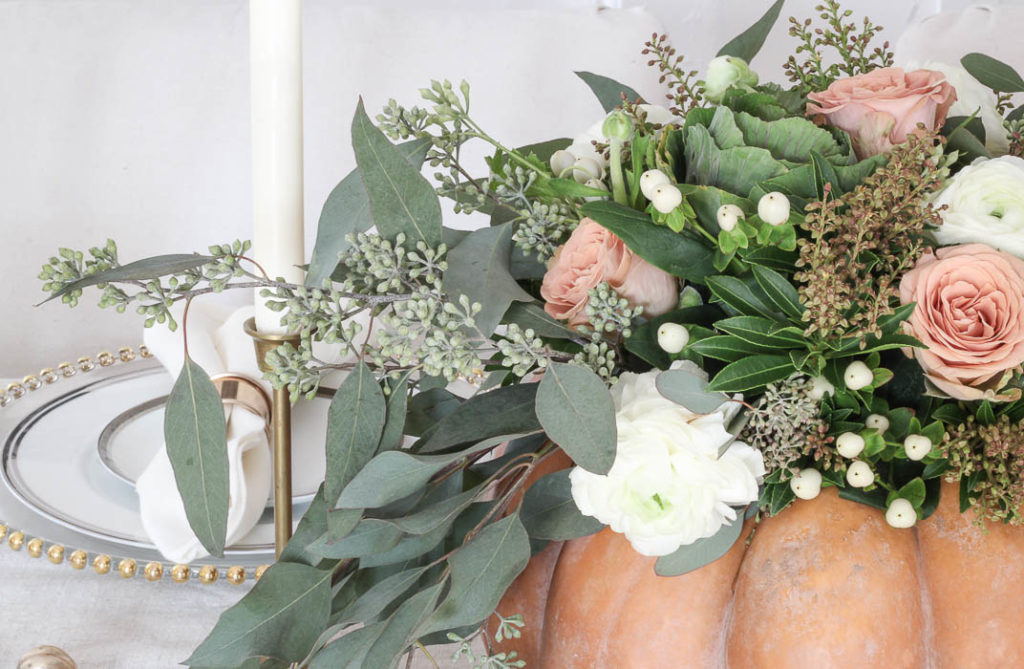
First I gathered my materials. I used a real heirloom pumpkin I had purchased earlier in the season for some of my other fall decor posts as the “vase” for this centerpiece. I just loved the size and shape and color of this one. It truly is so perfect looking, even my husband asked if it was fake, lol.
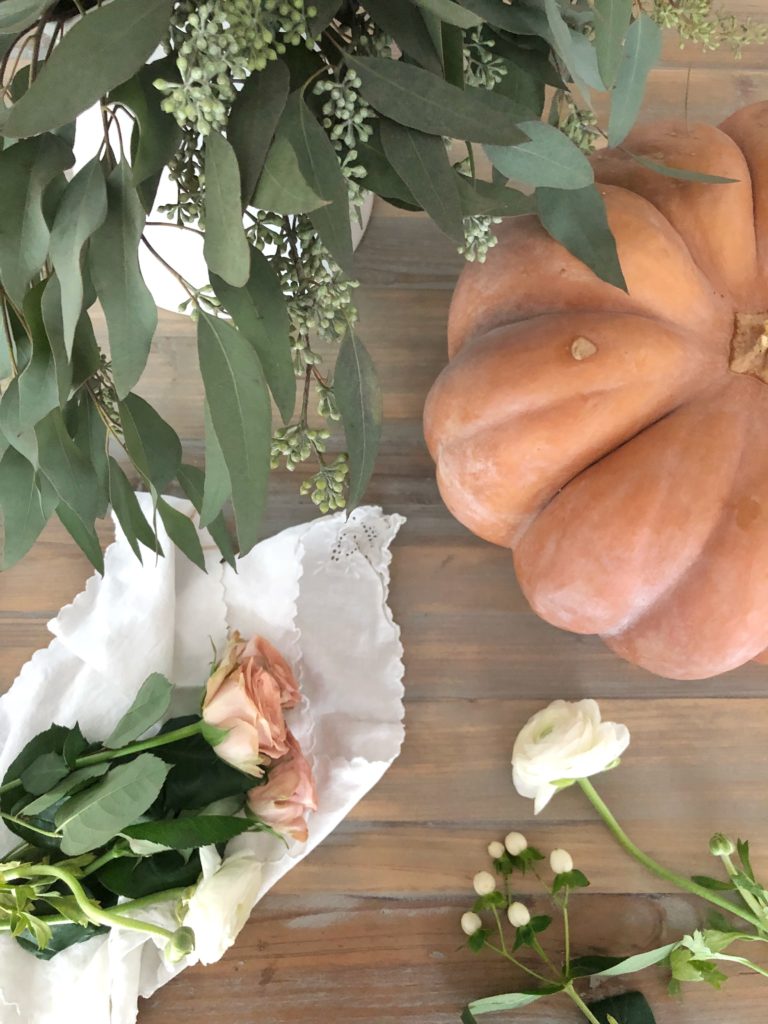
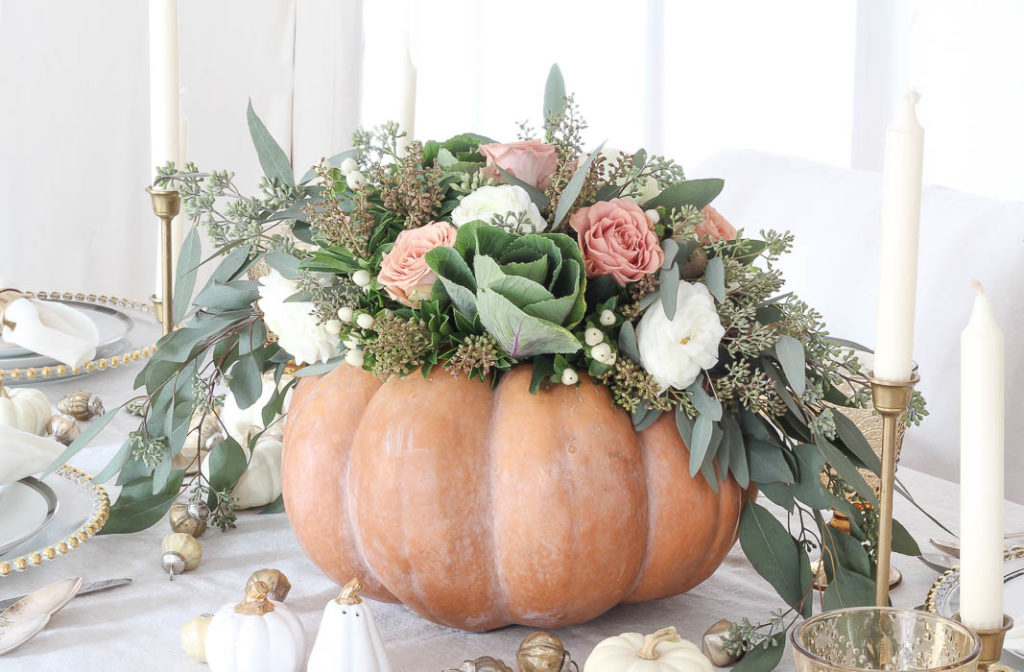
Based off of the color of the pumpkin, I went to my local flower market to grab some flowers that I thought would go nicely with the color of the pumpkin. I knew for sure I wanted to use seeded eucalyptus, because I loved the way it looks when hanging down on both sides. I also knew I wanted to use baby kale because it was “in-season”, and felt like a natural selection. I knew I wanted to use some pops of white, but then they had the most beautiful shade of dusty pink roses, I just had to have them, I couldn’t ignore them!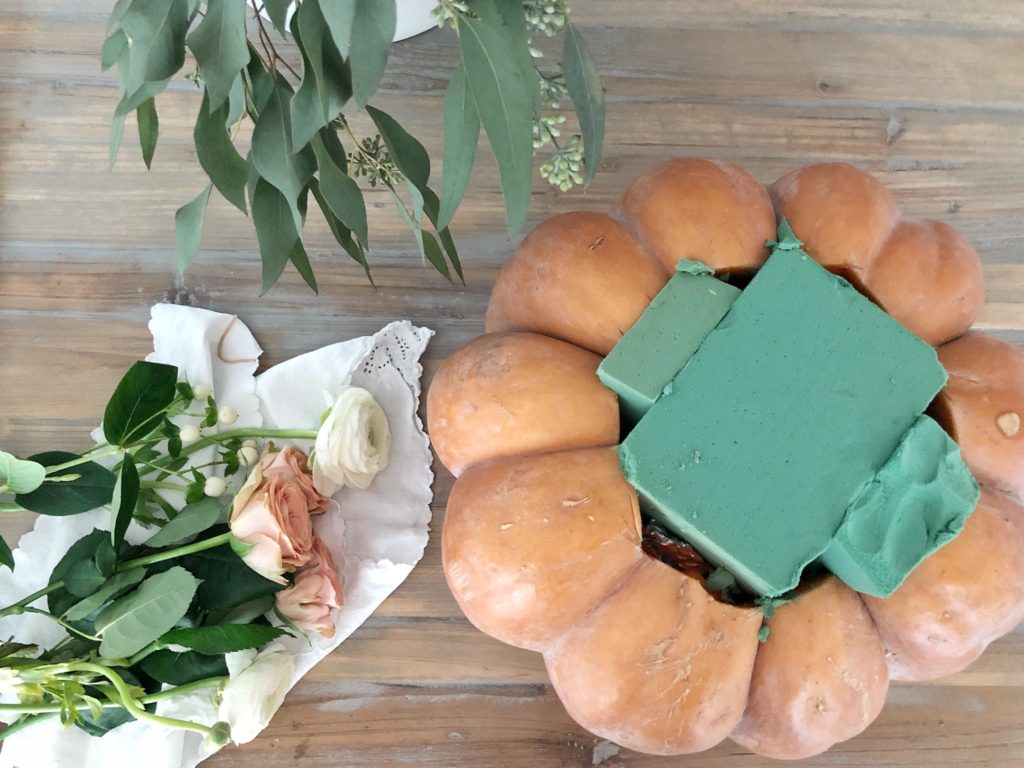
I started by cutting a circle around the top of my pumpkin, just like if you were going to carve it. I removed the top, but decided not to remove the filling. I figured it would help keep my floral foam elevated instead of sinking deeper into the pumpkin. Just to keep things less messy, I placed a sheet of foil over the filling, and then proceeded to place my floral foam inside.
Next I grabbed my “biggest” floral item, the kale. I started with the biggest, and worked my way down in size, this way my statement pieces remained just that, statements, and was able to fill in around them with my smallest floral pieces. 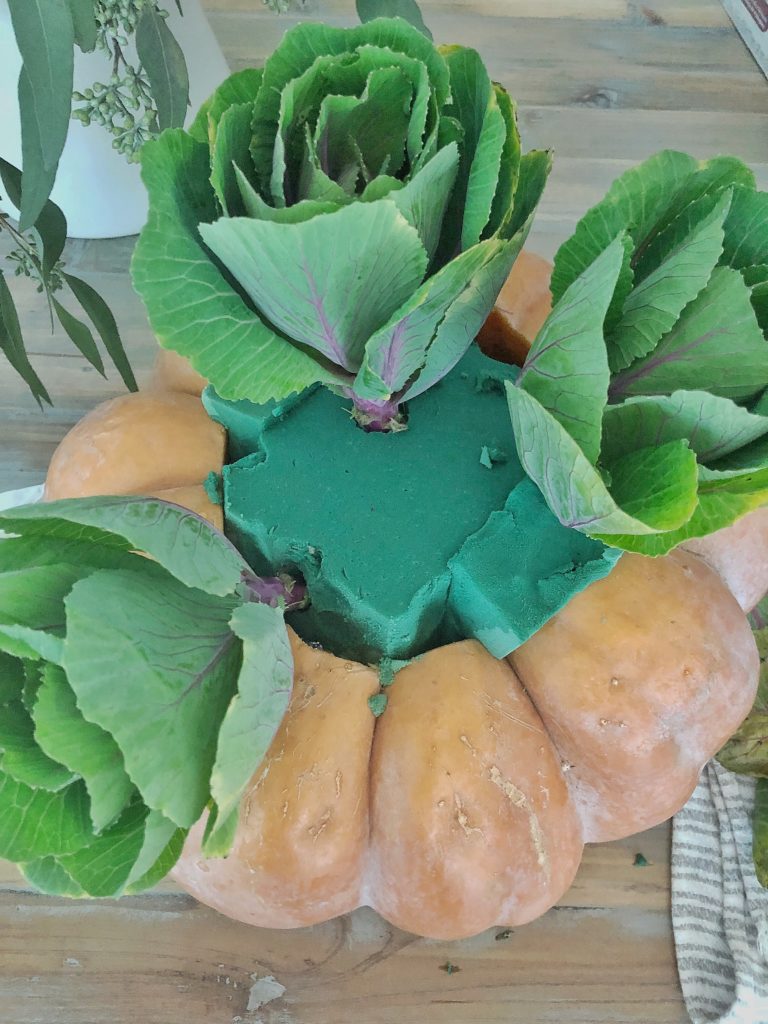
Once my kale was in place, I knew I wanted the seeded eucalyptus to look like it was draping out the sides, so I put those pieces in next. 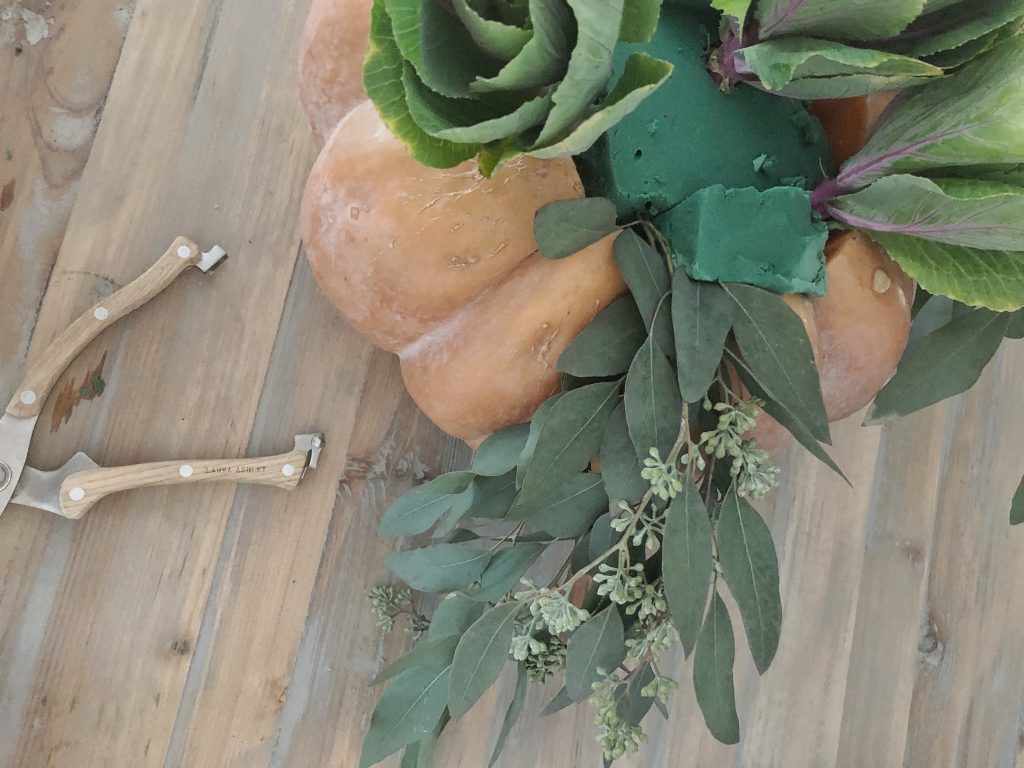
Then I grabbed my pretty roses! 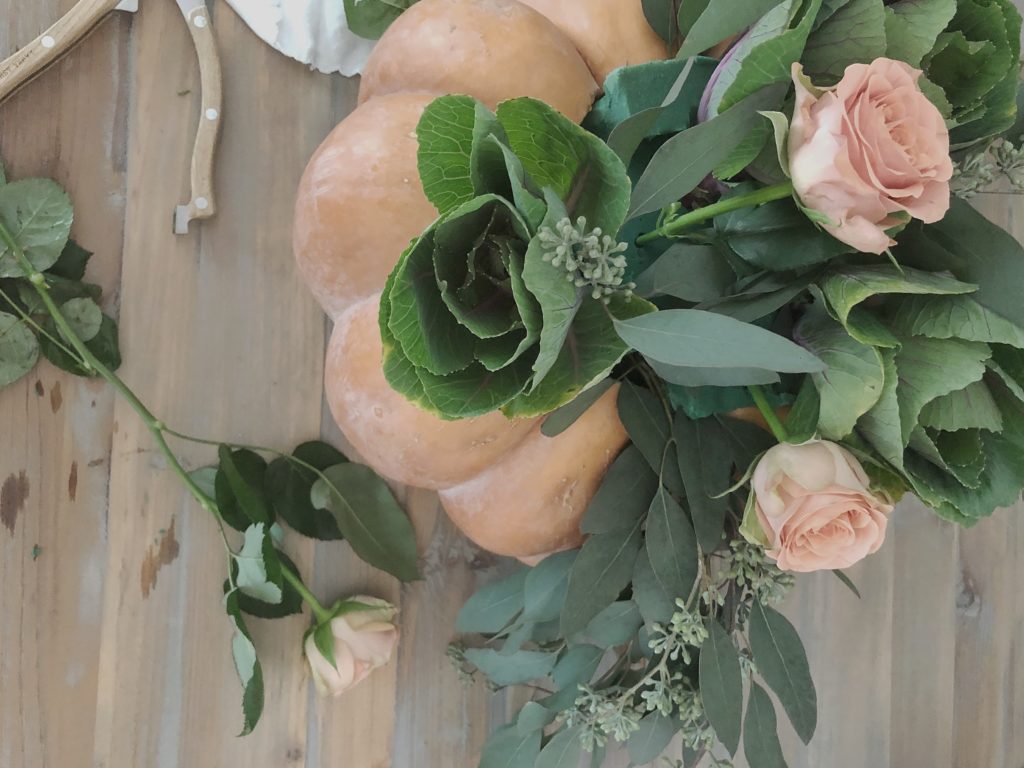
I filled them in around the kale equally, turning my pumpkin as I went to make sure everything stayed balance. Not too heavy on one side, and that I could see the roses from all angles. 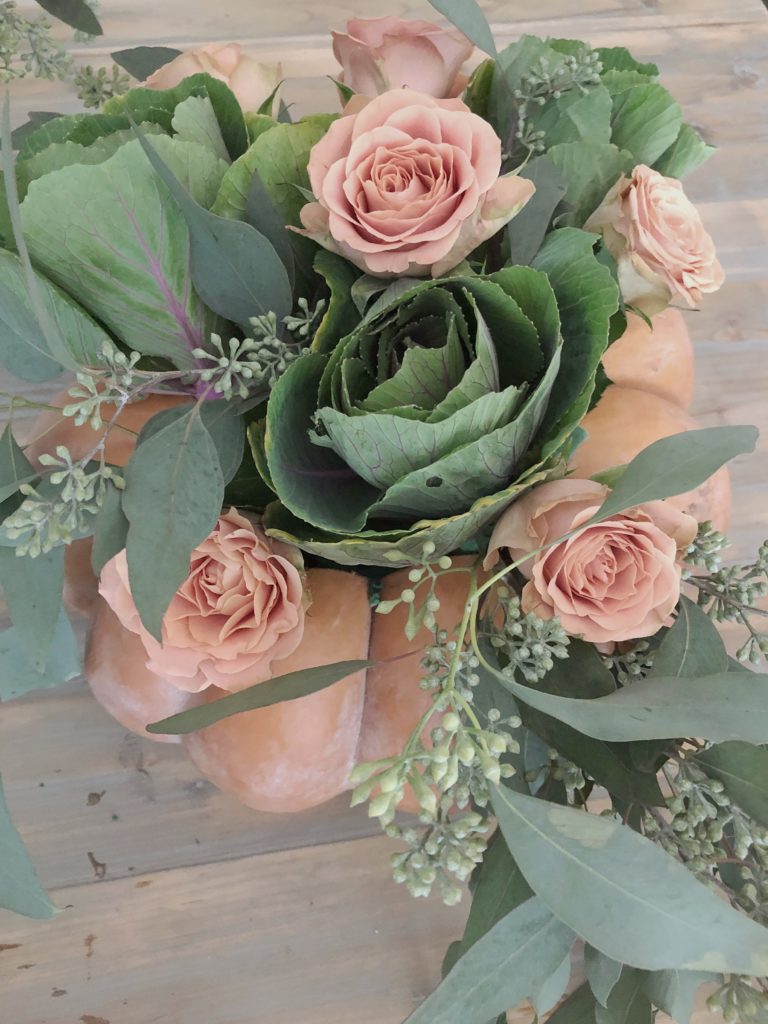
Now for my pops of white to add some dimension, and variety to the centerpiece. 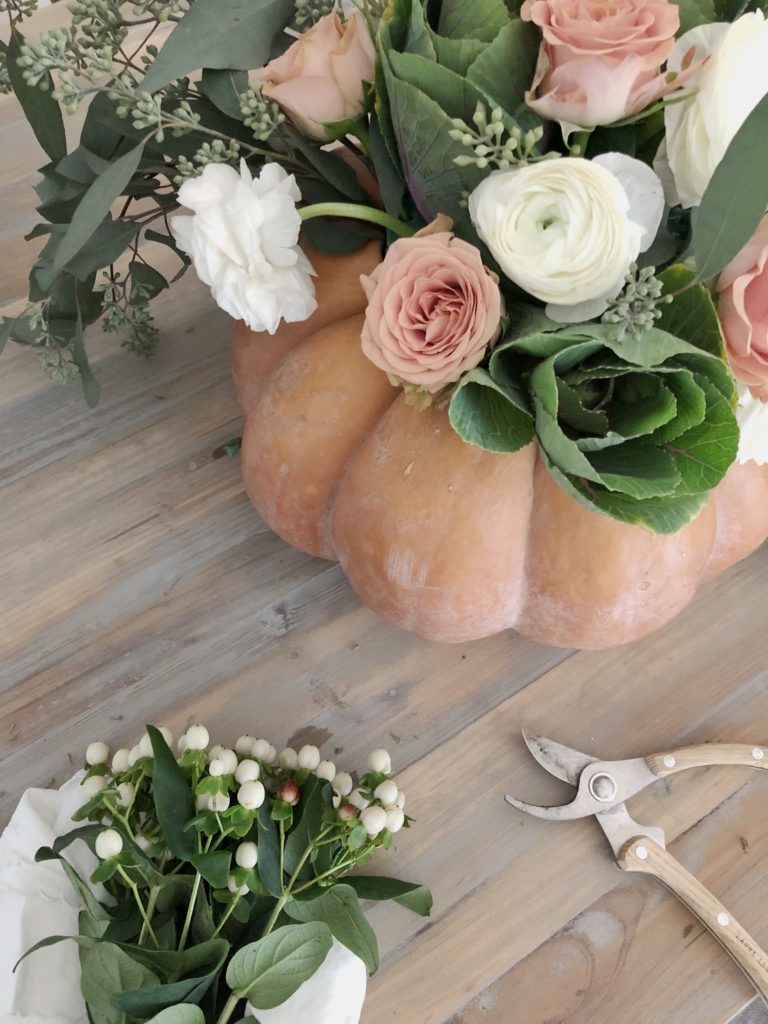
I filled in around the roses and kale as I saw fit. No real rhyme of reason, just tucking pieces in here and there, making sure I had a good mix on all sides. 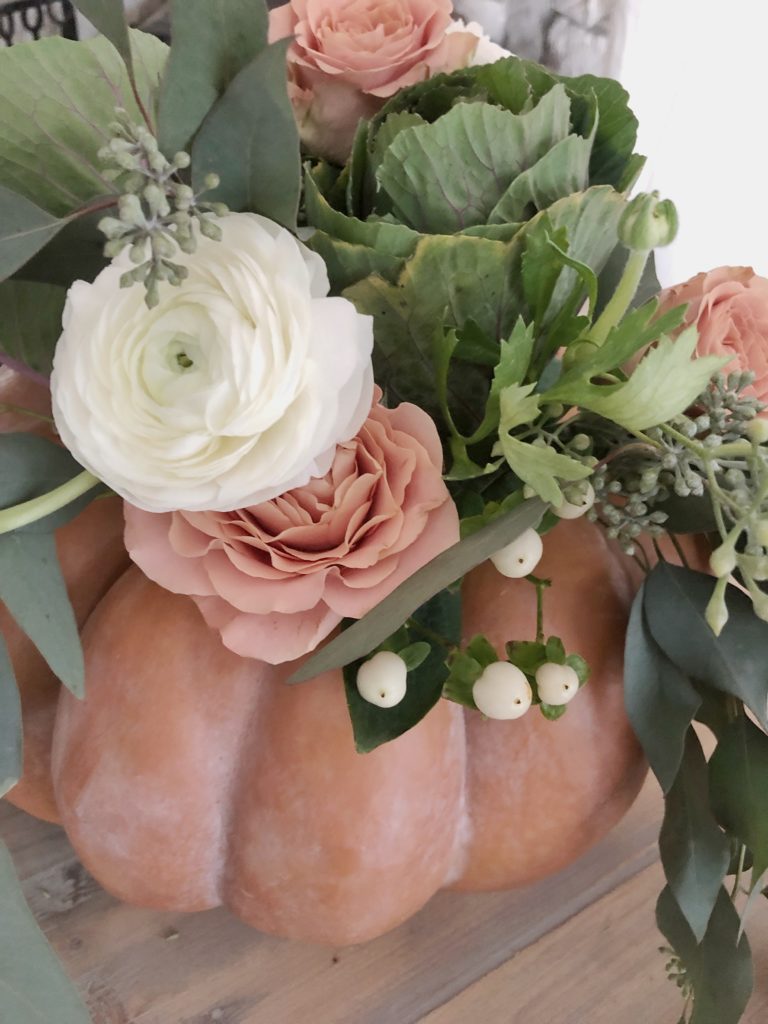
I used the last little bit of filler I had to make sure there were no empty spots, and everything felt nice and full. I even tucked it in some areas where there weren’t empty spots, just to help balance the colors and arrangement of the flowers.
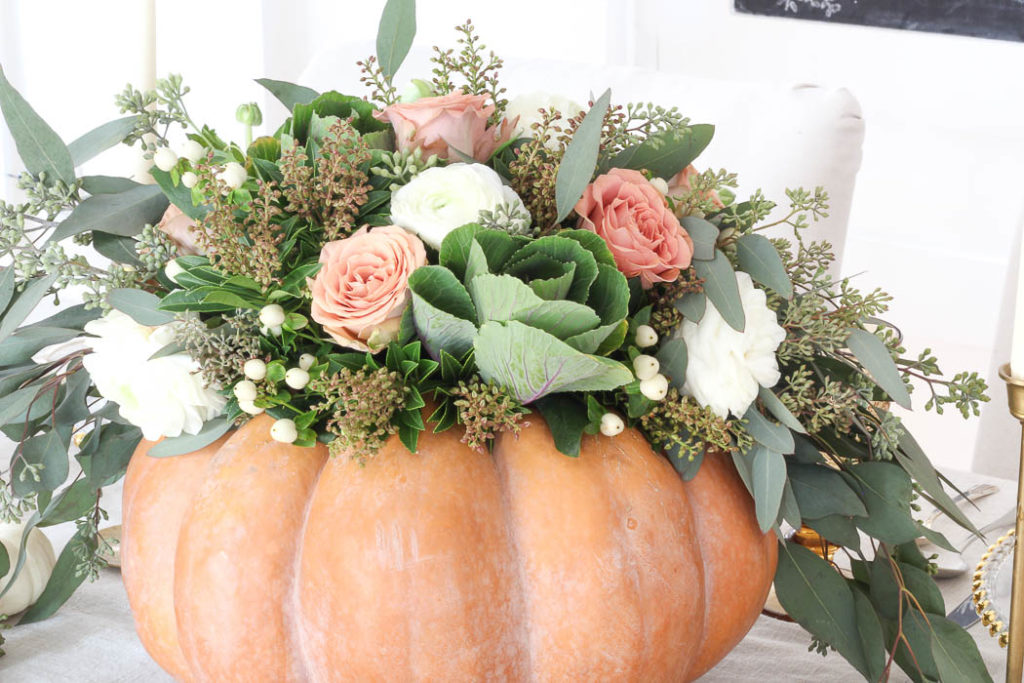
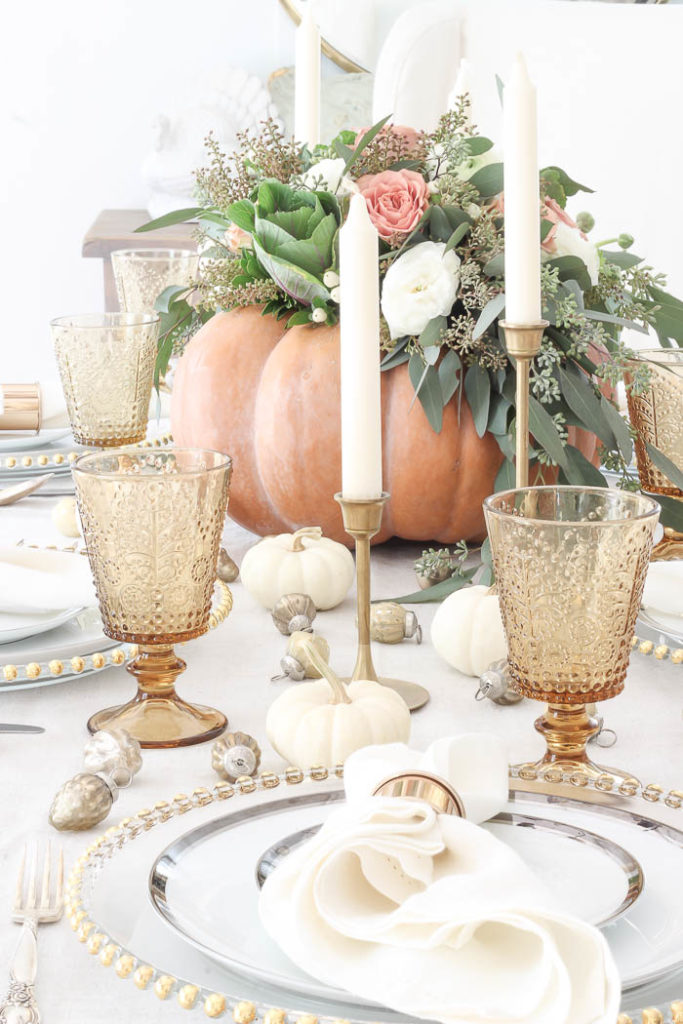
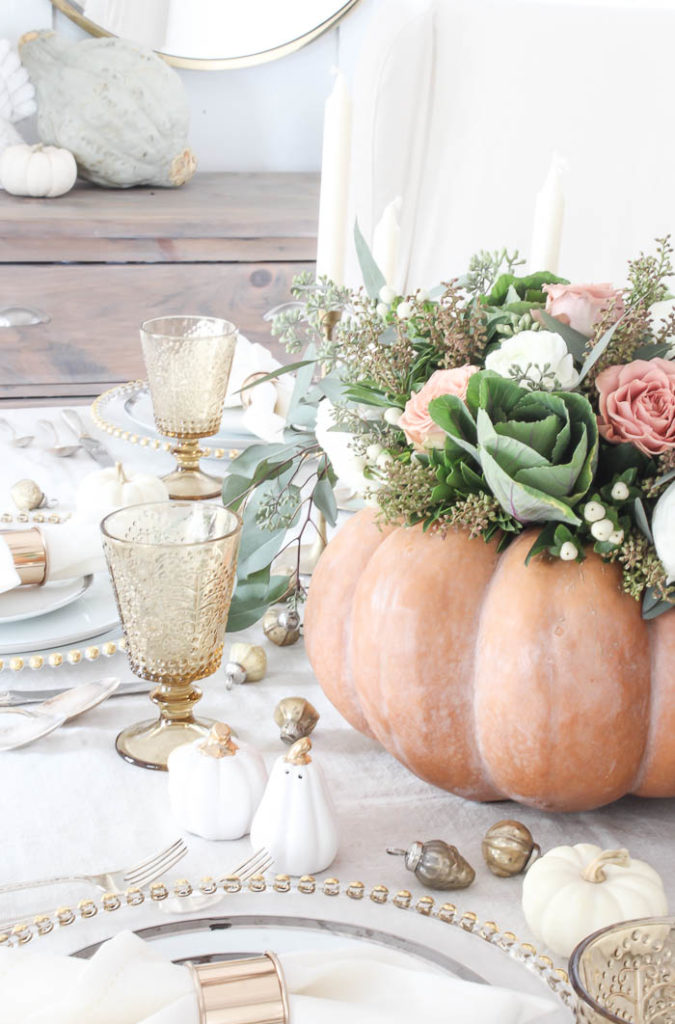
The end result was the beautiful pumpkin centerpiece you saw on my Thanksgiving Table this year. I couldn’t be happier with the outcome. From start to finish it took my just over an hour to create, and I think you’ll agree it was well worth the time!
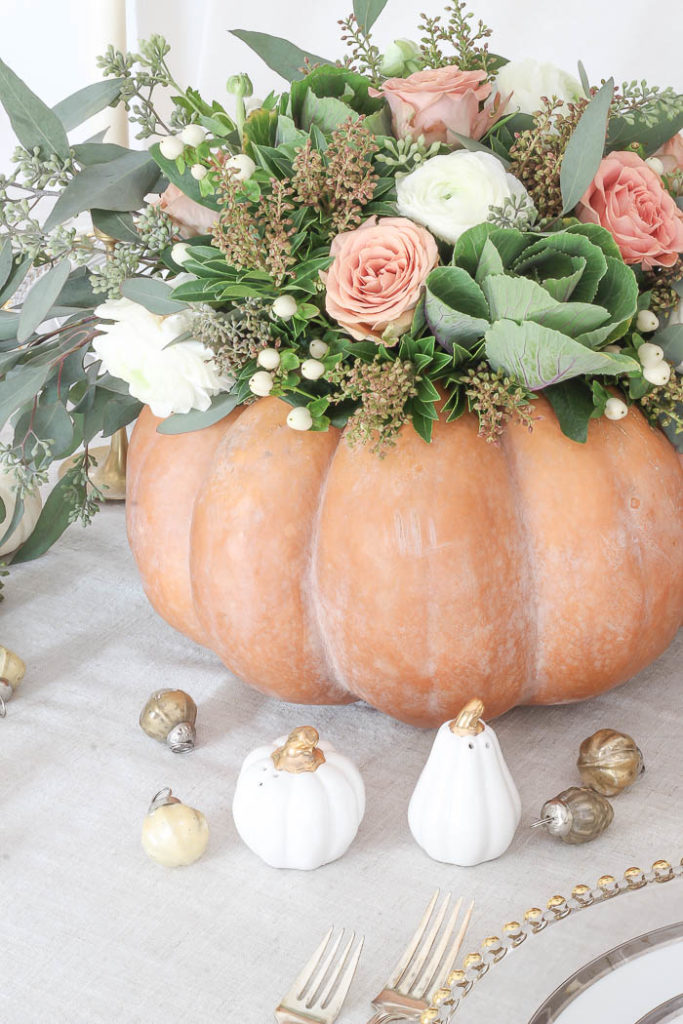

I will also say this was the first time I made a pumpkin centerpiece like this, and found to be fairly easy. So if you are looking at these photos, wondering if you could do the same thing. Pour yourself a nice big glass of wine, put on some music, give your self time, don’t rush. Enjoy the process, and I’m sure you will be able to create your very own in no time!

Just amazing pumpkin. That’s such a great idea, I think your idea beautify my home. Great being linked up with you this week, friend!
This is beautiful! I’m going to give this a try. Just one question. Do you know how long it will last. I noticed you kept the pumpkin guts, does it go bad quickly or does it last as long as the flowers do? Thanks.
Hi! Mine last about a good week and half, and I never rewatered it. The pumpkin lasted about 2 weeks. I’m not sure if taking the filling out helps it last longer or not, but might be something to try as well 🙂 Thanks so much!
Bre, you have made my day! You did a phenomenal job demonstrating and describing what you did! The colors are lovely! I cannot wait to give it a try….with a white pumpkin! Only because I carved my orange one! How exquisite and thank-you!???
OHHH Debbie! You have made mine, with your beautiful comment! It gives me confidence to not shy away from sharing some of the “behind the scenes” of how I create some of the things I do 🙂 Thank you so much!! XO
Beautiful!!! thanks for such nice ideas..
I love this! And the way you explain it. So laid back.
I would imagine you have to make a new one for Thanksgiving, that this will only last a few days before the pumpkin starts to …(rot). And that we might want to protect the table with something if we are going to leave it for a few days? How long did this one last?
Thank you so much Cindy! I’m always afraid to explain things sometimes in fear I don’t do it “good enough”, so silly I know, but appreciate your kind words. So I made this on Friday, believe it or not I still have it, ha! but you are correct it won’t make it until Thanksgiving. The pumpkin is still perfectly in tact, and I still have it on my table with no spills or leaks. I haven’t however added more water to the foam, so believe it or not the kale is showing the first signs of wilting. I think all and all it will last at least a week. I’m tempted to keep the pumpkin and just make a new arrangement for Thanksgiving 😉 Thanks again!
This is so stunning!!!! And your photos are gorgeous!
Thank you SO much Kaitlyn 🙂
Bre,
I just love your blog. This centerpiece is just gorgeous! The color of the pumpkin just makes it! What are the white berries? Are they real? Breathtaking!
Blessings
Hi Shelly! Thank you so much!! The white berries are real, they are called Hypericum, also known as the “coffee berry” !
Stunning! Looks beautiful.
Thank you Sharon!!