Hello Friends!! I’m so excited to share todays project with all of you, and I have teamed up with some friends who are also sharing some fun DIY’s today too! Nothing like tackling a project, or working with your hands to beat some of those winter blues away. This is my favorite time of year to do DIY, because it’s too cold to be outside, and with no holidays or upcoming festivities, I can focus on some of those to-do list items I have been pushing off for awhile. Today I’m sharing how I DIY’d a planked ceiling in our bathroom.
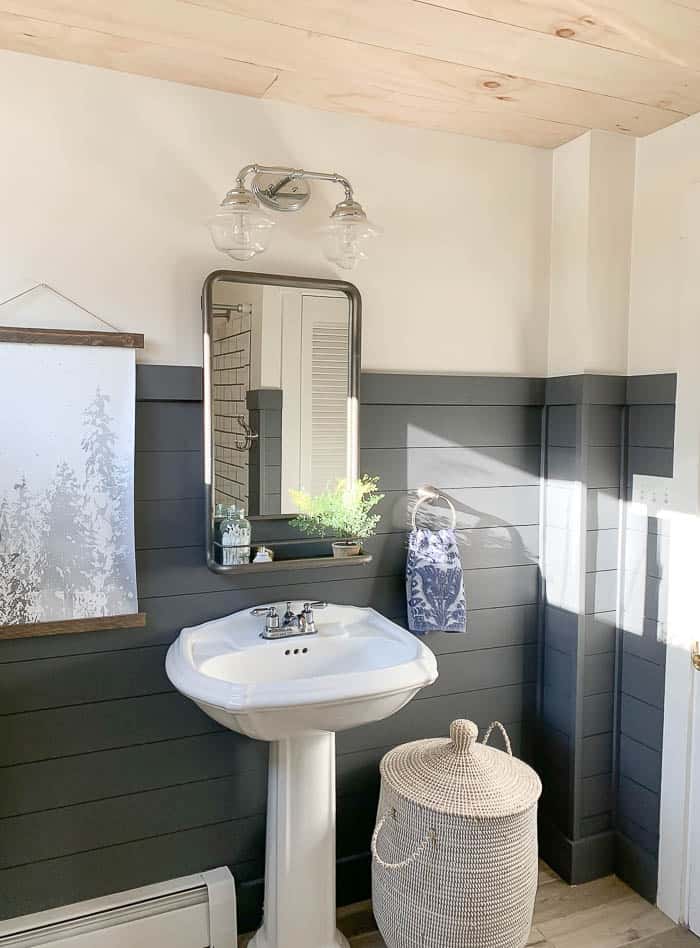
To start, this is what our bathroom looked like the last time you saw it.
Before :
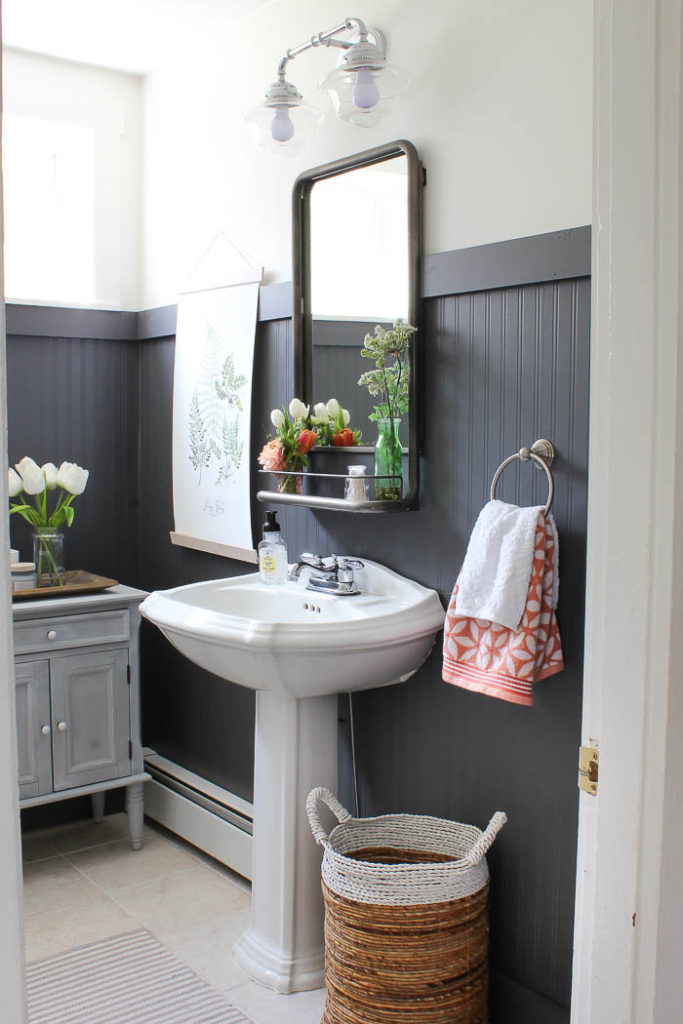
I shared our downstairs bathroom mini-makevoer HERE, right around this time 3 years ago. After having painted horizontal stripes in there for over 7 years, I was loving the new cleaner, crisper look of the dark painted beadboard wallpaper (YES wallpaper!) wainscotting treatment with the crisp white on top. But after living with it for a while, something felt like it was missing.
Shop the Post

I’ve shared before how much I love shiplap on ceilings, and that I would add to every room in our house, but convincing the hubby to do yet again another project was not happening anytime soon. So when a company reached out to me about peel ‘n stick vinyl wood planks, I thought sure! This would be the perfect solution to the extra character I was craving in our downstairs bathroom.
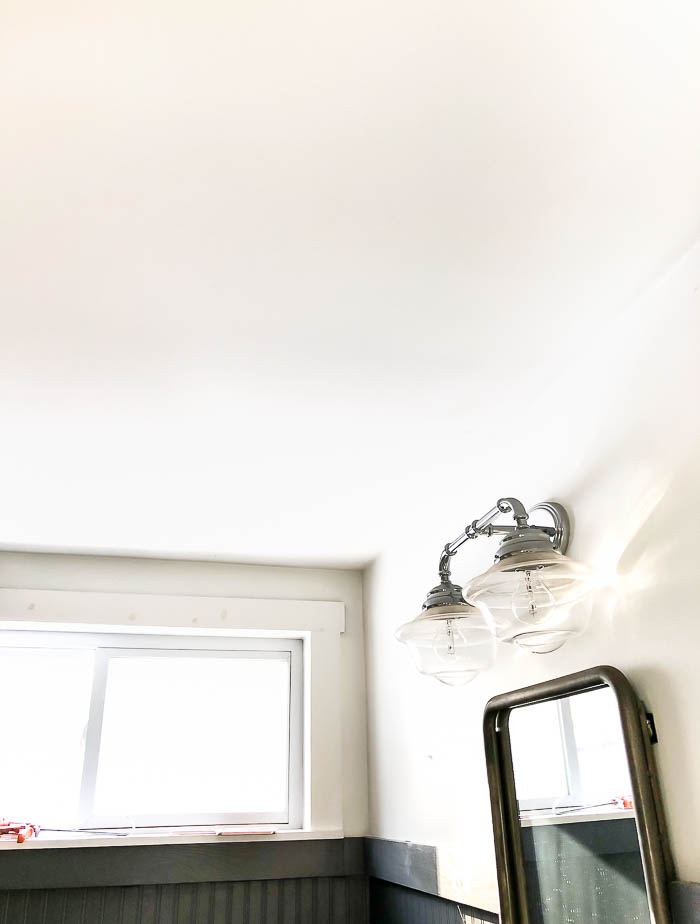
Ceiling Before :
The boxes arrived, I waited 2 weeks for the vinyl planks to acclimate to our house, and started applying them to our bathroom ceiling. They worked! And like a breeze!
They went up in no time, and I could cut them with scissors to get the right lengths. They were so easy to install – too easy. I was about halfway through installing them on our bathroom ceiling when one came loose and fell down. Then another, and another, and then it was like rapid fire. I tried installing a few on a wall vertically – thinking maybe it was just because they were hanging from the ceiling. Nope – that didn’t work either. So armed with some heavy duty construction glue, I decided that they just needed a little help sticking to the ceiling.
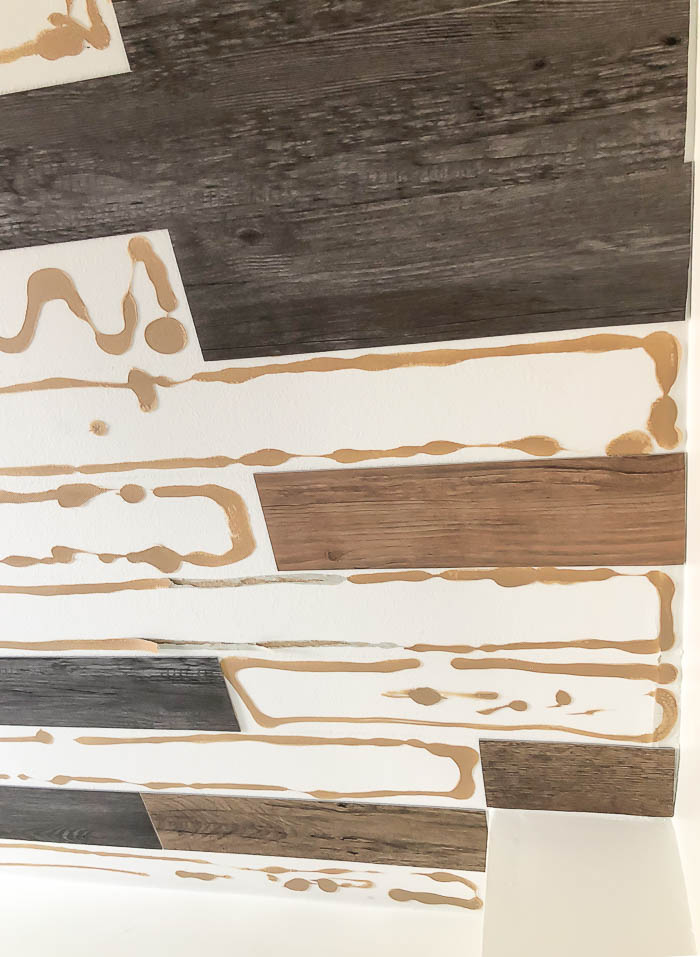
Well that worked for about 3 months, and then fate would have it, they started falling down again. This time leaving the glue residue all over our bathroom ceiling. Talk about an epic failure.
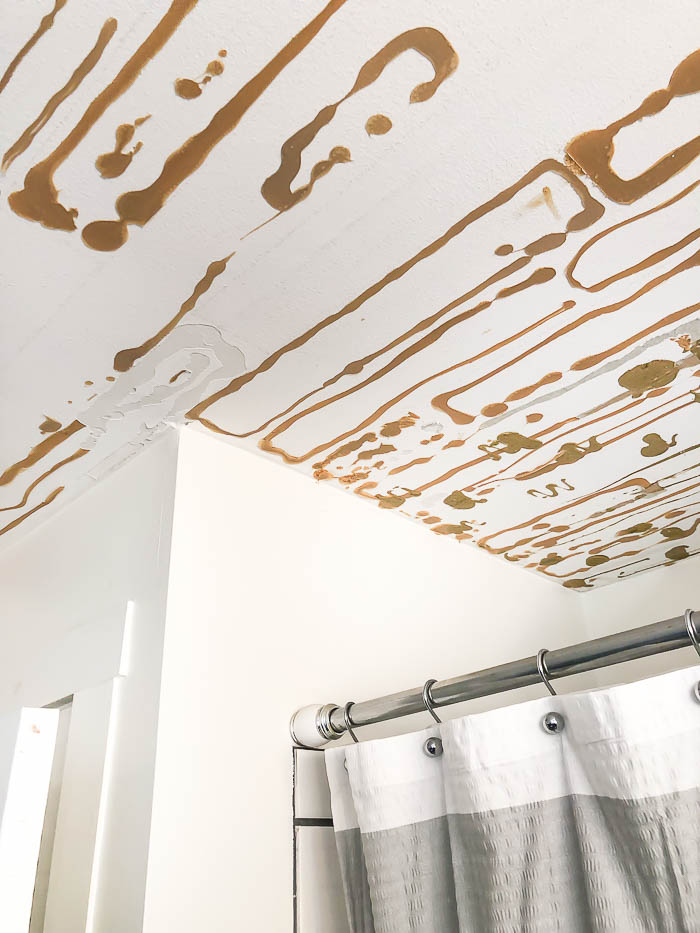
Determined to not let this ceiling get the best of me, and wanting a solution fast – like really fast because if I have to look at this ceiling with squiggly glue lines on it for much longer I just might burst. I was determined to fix our ceiling on my own – since I got us into this mess, I wanted to be the one to get us out of it, and cost effectively. I turned to Plywood.
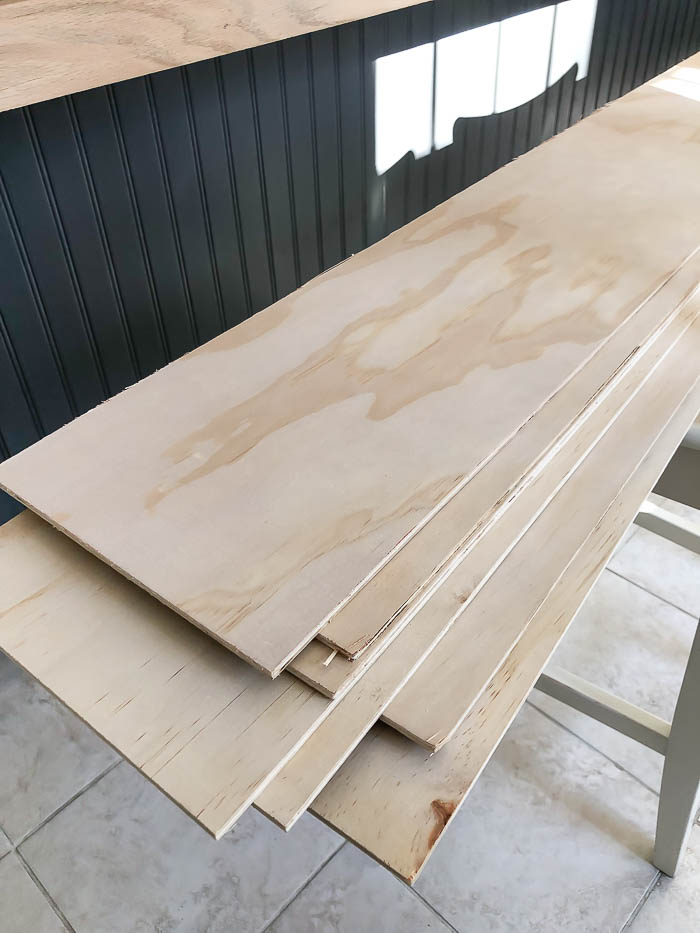
I had seen others rip down sheets of plywood into planks, so one morning on a whim, I hopped in my car and headed to Home Depot. I bought 2 sheets of 1/4″ plywood, and had them rip them down into 6″ planks for me in the store, and headed home full of anticipation.
Shop the Post
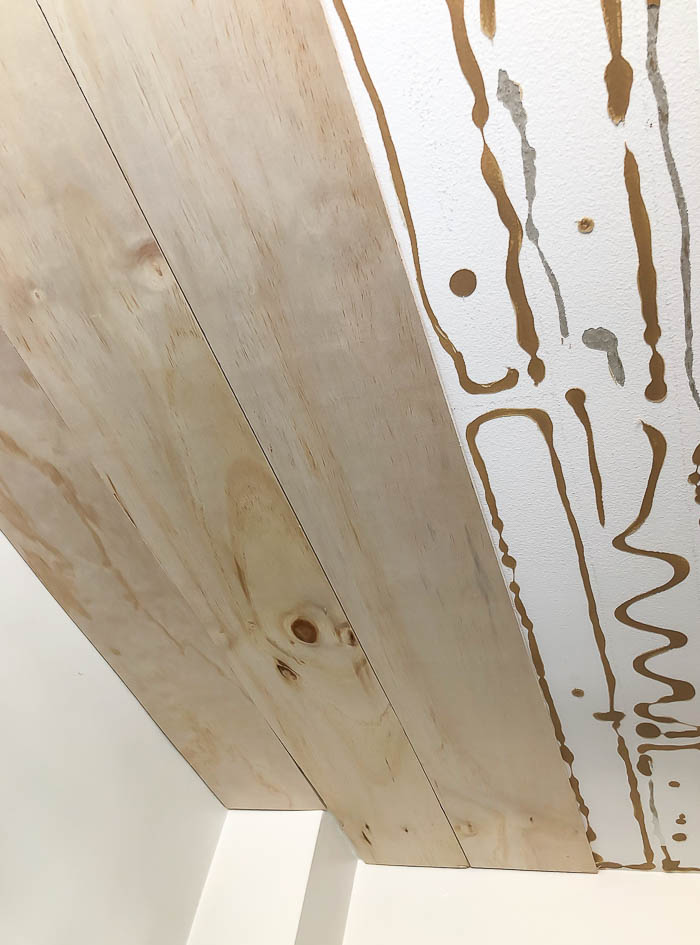
This time with our nail gun in my hands – mama was not messing around. I installed the boards, much to my surprise they went up so quickly, and this time I knew they wouldn’t be falling down anytime soon either. I used THIS nail gun to install the plywood planks.
Shop the Post
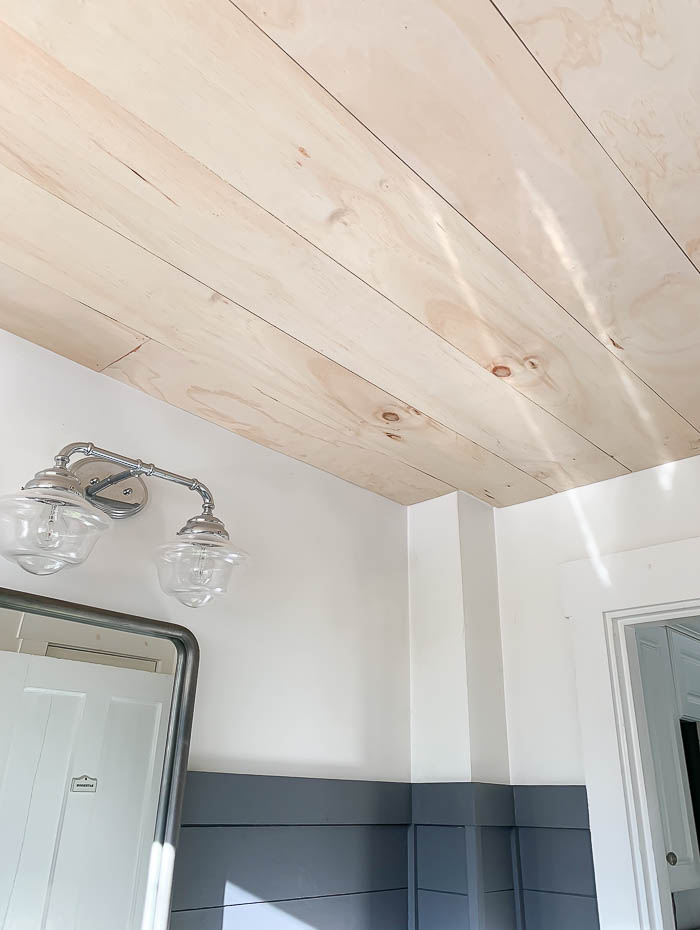
Our bathroom ceiling was SAVED! And I only need my hubby install one small plank, due to our walls not being perfectly straight.
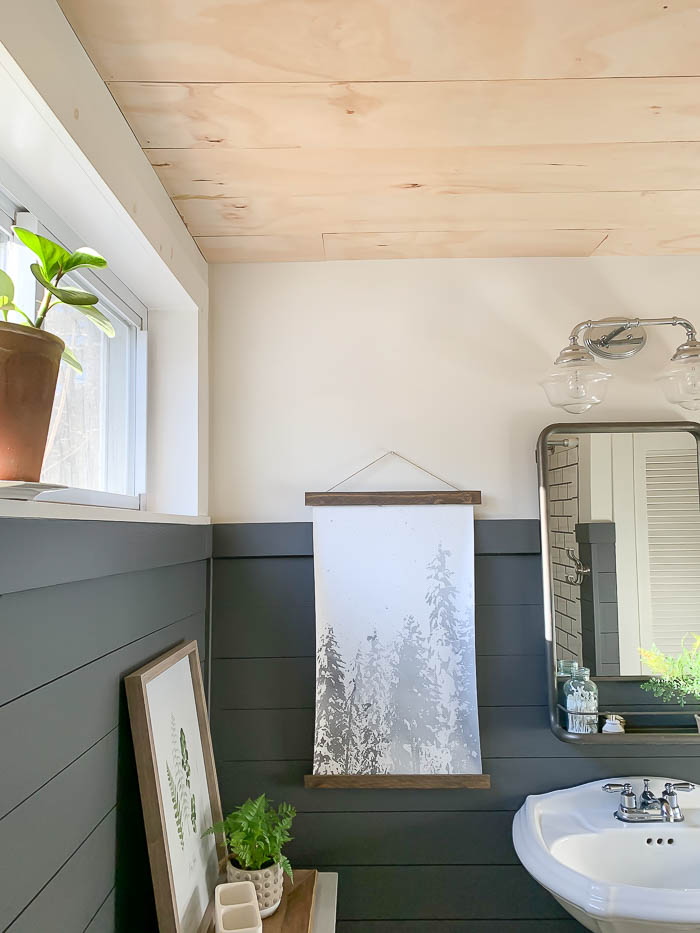
Progress :
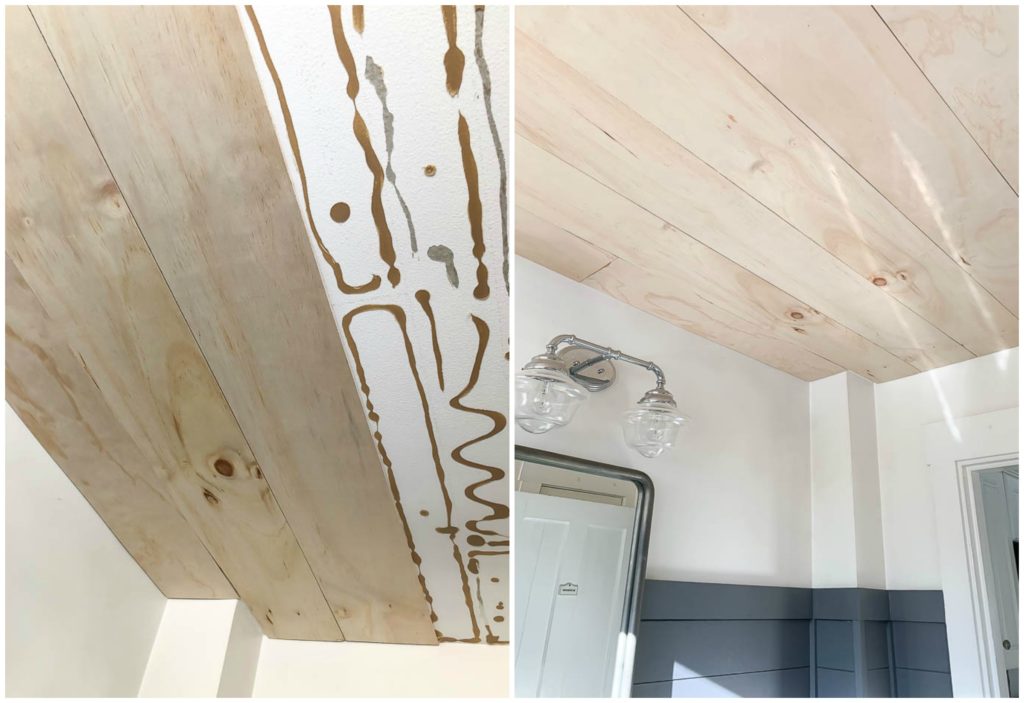
Now all I have left to do is decide if I want to paint or stain them. They are currently still in their “unfinished” state, which believe me is 100x better than what it looked like before. But there are some parts on the ends of the board where the birch veneer peels back a little bit when it was being cut, so it doesn’t look fully finished.
Shop the Post
Can you help me decide?! Here are 4 options I’m deciding between:
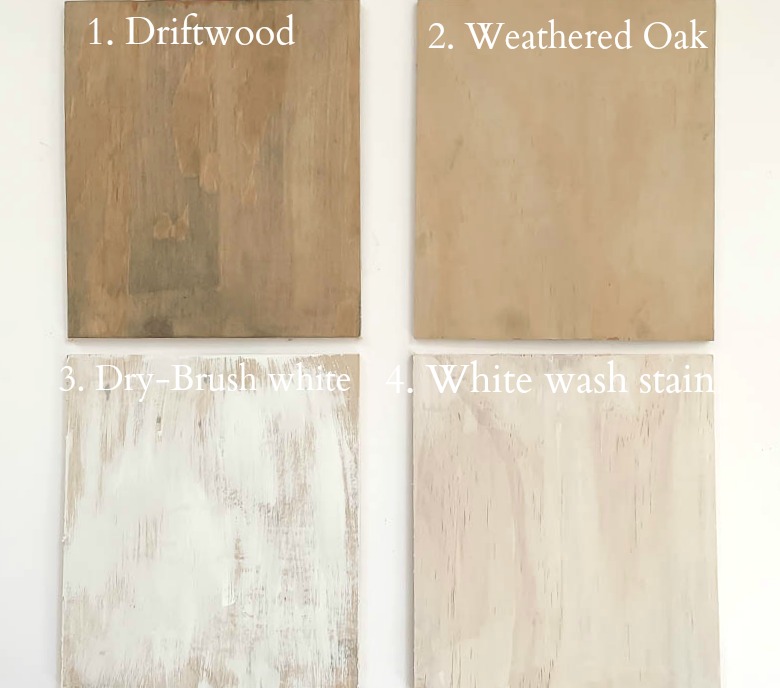
4. White wash Stain
Now take a look at what my friends are sharing :

I vote for WHITE WASH….
staining can be blotchy on plywood, so white washed is the best pick, I think. great job!
That is so good to know. I actually haven’t stained larger portions of plywood, so I appreciate the insight 🙂
I love how it turned out, but white wash would look awesome also!
I WHITE WASHED MINE AND THEN IF I GOT TIRED OF IT, I COULD THEN PAINT. NOT TIRED OF IT YET! WE PUT CORNER ROUND THE CEILING TO HIDE THE ROUGH EDGES. JUST WONDERING HOW THE PEEL AND STICK WOULD HAVE LOOKED IF YOU NAILED IT? PS WE USED CAR SIDING FOR OURS, SO MANY CHOICES…
I like the dry brushed white the most…..
Drift wood !
White wash…but whatever you choose will be amazing as always!
Love the lighter look of the Whitewash stain in this room. Beautiful job!
You are one handy gal. Loving this look. My personal opinion is you will be happier in the long run without the peal and stick look.
Whitewash would be pretty with the dark walls.
Thank you Becky! I completely agree 🙂
Bre,
Love your new ceiling! My vote is for the weathered wood stain or the whitewash.
We recently renovated our breezeway with shiplap walls. Our ceiling is wide pine boards to which we applied a satin polyurethane, just to seal it a bit. Like the natural look.
Looking forward to reading some of your friends’ DIY’s, too!
Looks great! I would go with one of the whites, or even a solid white……
Thanks Mary, I’m thinking the same thing 🙂
Love the look! I think a white wash where the wood grain is still seen would be beautiful. Great job!
Love the look of this bathroom but then I love your master bathroom, too!! Ok, I don’t think you can go wrong with any of these choices but I think “driftwood” or “white wash stain”. I can’t wait to see what you choose!!
It looks great, I hope you got a credit for the vinyl ones! Is a spacer in between the planks?
I like the white wash!
I am new to your blog, so kudos to your fellow bloggers for the diy collaboration! I think option #3 would be my choice…I like the idea of seeing the wood through a bit of dry brushing the ceiling with white chalk paint. I actually painted my guest bath, ceiling and walls, the same magnificent and rich shade of purple…it’s a small space but the dark paint doesn’t seem to make it appear smaller!
I think I know what my next project might be now and in a bathroom, too. Fast and inexpensive and looks great! WIN WIN!!! I might white wash first….do you think that will work?
Who knew that plywood would look so amazing on a ceiling. I really love it! I actually like them au naturel, but I don’t think you would go wrong with any of the options you are showing. I’m leaning toward the white wash stain though.
What a trooper you are girl! The finished looks amazing and I can’t wait to see what you do with it!
GAH!!! I know right!! Such an ordeal, but at least I love the end result :p
White wash stain. I think the dark ceiling in a small-ish bathroom would make it feels smaller. Just my thoughts! You did great installing these planks.
I’m feeling the same way!! I think it the walls were all white, the darker would be ok, but I agree with you, I think it will make the room feel smaller 🙂
I love the boards on the ceiling. I think I will try it on the bathroom down stairs ceiling. I took the popcorn ceiling off and really like the way your ceiling turned out. Thanks for sharing.
You are so welcome!! I’m very happy with how the boards look – which also explains why I haven’t felt the need to “finish” it all the way either, lol 🙂
Gah! That kind of stuff is SO dang frustrating. You soooo WON though. The new planks looks fantastic! I love all the finish options. Might lean towards the White Wash Stain, as I’m loving the natural state they are now.
Bravo Bre!
I think that’s what I’m leaning towards as well!!! Thank you so much Shannon, you are 100% right, sometimes it is so frustrating, but I’m glad the end result ended up good!
Wow! It looks amazing! xoxo
Love the look of the dry brush!!!!
What a save!! Gotta love projects that come out of disasters LOL. I love the weathered oak and the whitewash stain, by the way. Well done, friend! xo
LOL!!! I know right!!! Thanks so much girl!!