Hi Friends!
Today I’m sharing a new space in our home with you! One that I actually haven’t shared before here on the blog. Our back porch! It’s a great space full of potential, one that I wasn’t sure if we were going to be tackling this year, but we are getting ready to get this project in full swing, and I wanted to share the design plan and all the before photos with you first!
Come and see ~
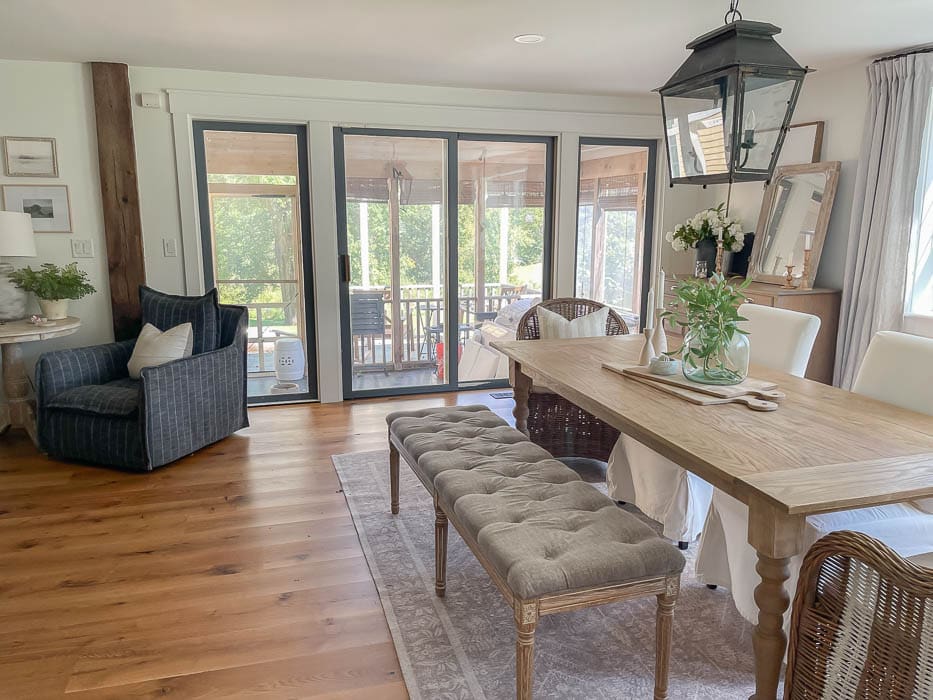
Our screened in porch is located right off our dining room. To say we live in this space once the temperatures are warm enough to use it — is an under statement. We enjoy our coffee out here in the morning, afternoon naps in the summer, and retreat here in the evening after dinner. It’s one of our favorite spots to hang out as a family, or enjoy a little quiet time. It leads out to our pea stone fire pit area, and over looks our backyard. We have a great view of the garden, the orchard, and plenty of room to let the dogs run around.
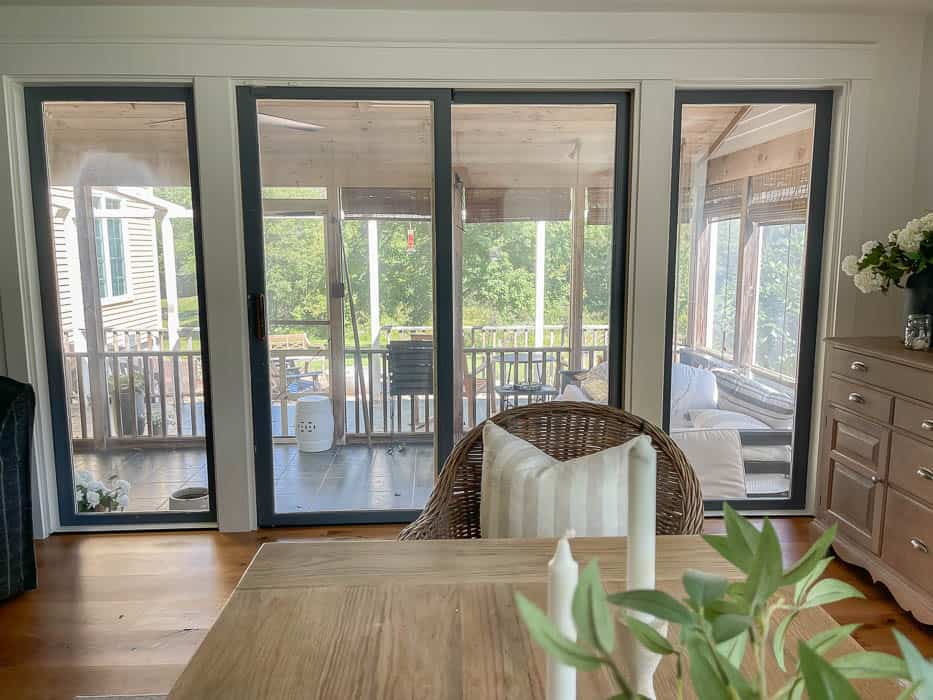
While we love having an outdoor space we can enjoy bug free, esthetically speaking we have always wanted to give our porch a little refresh. It was originally built in the 90’s and some of the materials used have seen better days.
Our Porch ~
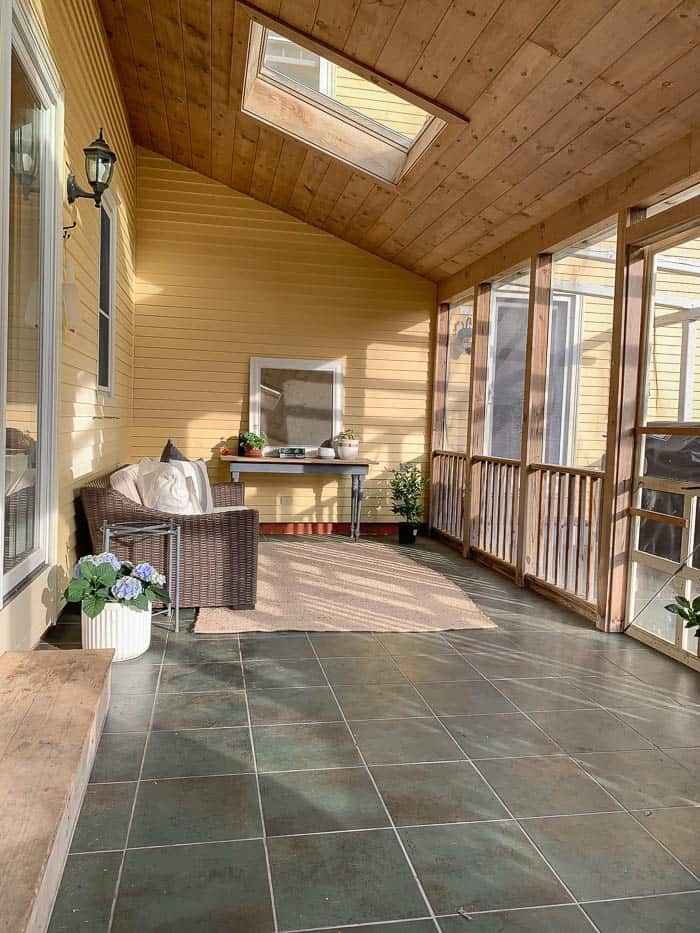
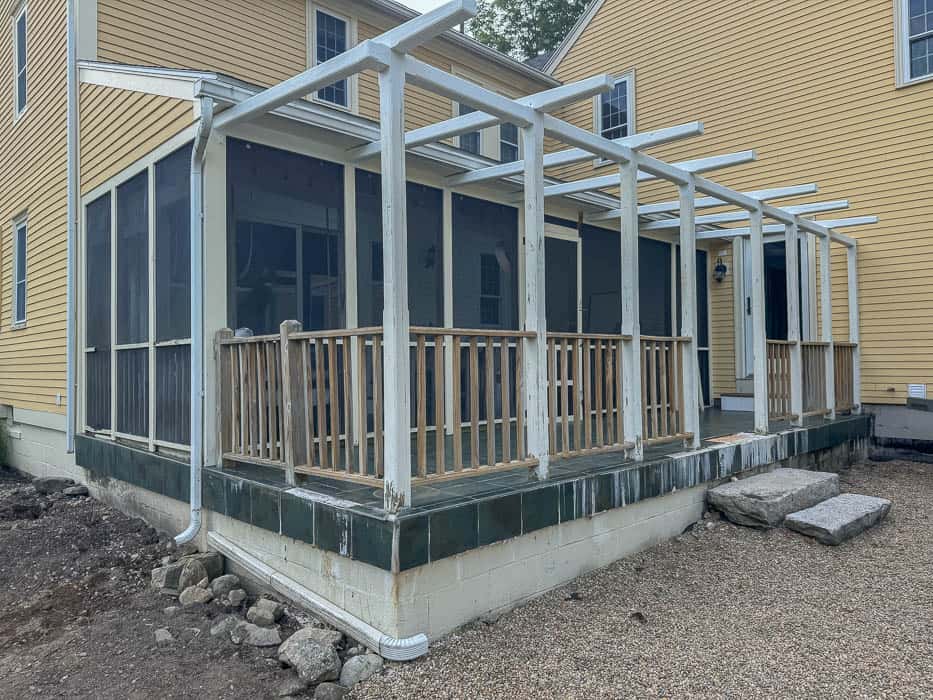
Our back porch is split into two sections. The main section we use is screened-in. Once you walk out the screen door, before taking the granite steps down to our fire pit, there is an open portion of our back porch with a built-in pergola. I shared a view of this portion last fall – seen HERE.
In preparing to re-do our back porch, we have thought through and discussed many different options for what to do, including what materials we decided to end up using. So I thought it would be fun to share the design plan and how we came to the conclusion for what we decided to go with by listing it out in a Q & A format!
These decisions we made came down to two factors – a. Budget, and b. Working within the current space we have … and BUDGET!
I know these aren’t always things people talk about when sharing projects, or when you see the beautiful after photos on social media. However these two factors where the main guidelines that led to why we are going in the direction we are. I wanted to share that you can make spaces beautiful, even if you can’t afford to rip out walls (or in our case the ceiling :P), and working with the original square footage you have. In a digital world where it seems like the sky is the limit when it comes to home renovation, many times there are circumstances that prohibit you from going a certain direction. This was certainly the case when we gave our primary bathroom a makeover in our previous home. (See that transformation HERE). In a perfect world you would never run into any complications, and be able to do whatever you want when it comes to home projects. I’ve learned over the years of doing projects that things are always copy and paste when it comes to replicating the same look you love on Pinterest into your own home. No two homes (or budgets) are exactly the same, especially when you are working with an older home. I don’t say this to discourage you, but to share a little more insight behind the pretty pictures. We come across obstacles and challenges that influence the direction we take in our projects, and that there is no magical wand we wave to make those disappear. Just some creative thinking to create a space we will love to use. With all that said, let’s dive in!
Here we Go ~
Q: Why not make the whole porch screened-in?
A: That would be the dream! However due to the placement and height of a second exterior door that leads out the back porch from our living room, we would have to remove the existing roof, and put on a whole new roof with a different pitch doubling our cost of the overall renovation, which is just not in the budget at this time.
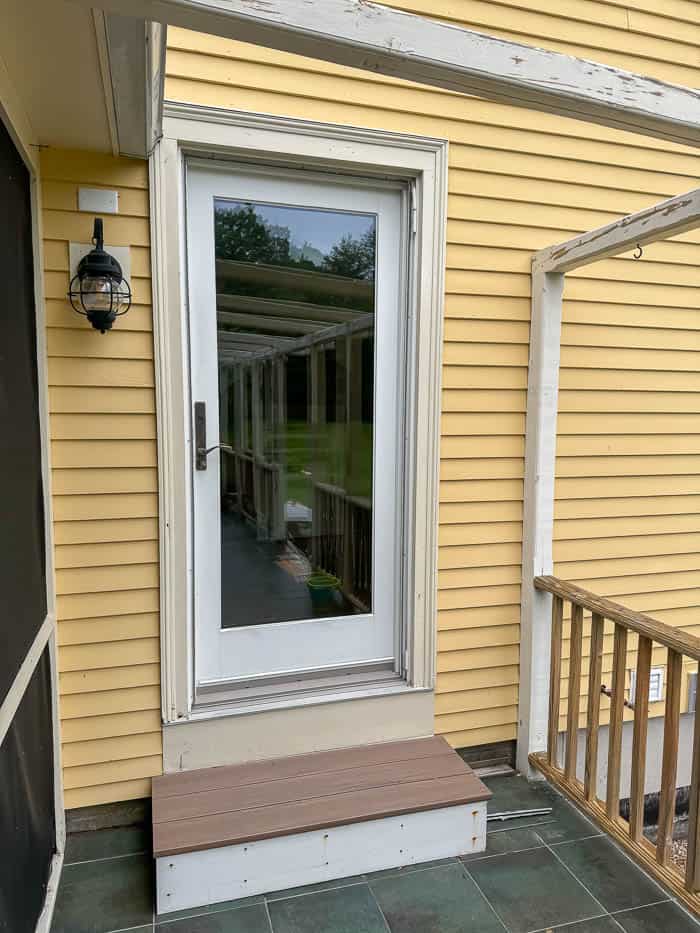
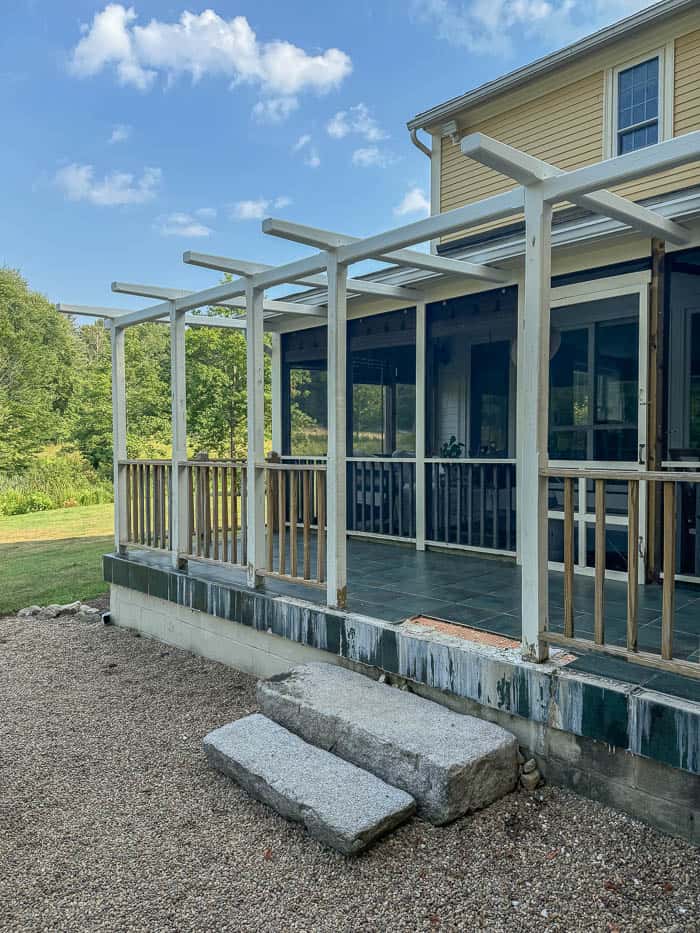
Q: Why are you replacing the tile?
A: There are a few reasons why we are replacing the tile. The first one is esthetically the green tile is just not my style. I have some friends who have seen it and love it, but at the end of the day it boils down to we are the ones who live with it, and since neither my husband and I are fans of it, the goal has always been to change it. That goal got expedited last year when two of the tiles popped off, and despite every exhausting effort my husband made to re-attach them, they would not adhere properly back on.
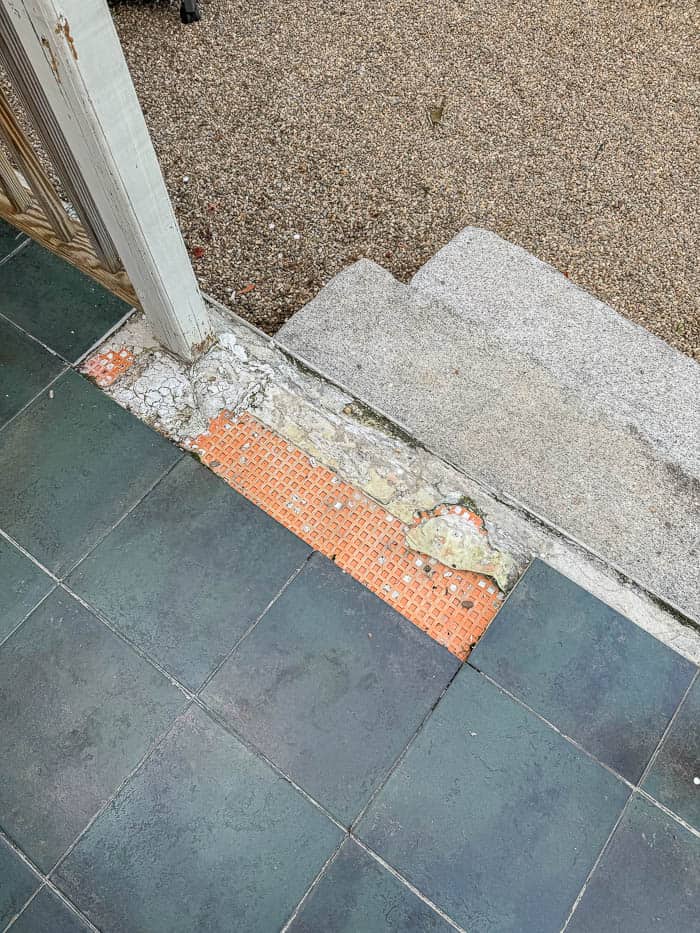
Since the tiles are deteriorating and popping up, and dangerously slippery when wet, we wanted to go with a different material for the flooring. Originally I wanted to do some type of stone or reclaimed brick for the flooring that felt age appropriate to the house, but the cost of materials alone stretched our budget further than we were wanting.
Another reason we want to remove and replace the tile, is the staining that has occurred on the exterior view of the porch. Below you can see the view of our porch when you are sitting around our fire pit.
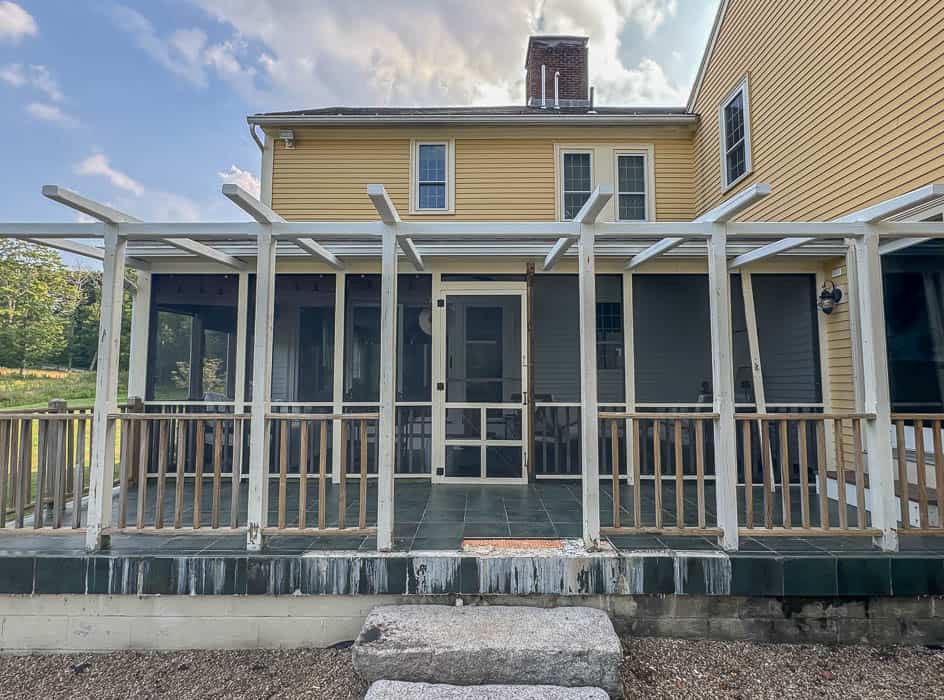
We aren’t sure exactly what was used to install the green tile, but we do know that it wasn’t installed properly which allowed water to absorb into the grout and caused efflorescence(white staining) to run off and stain the front. No amount of scraping is going to remove it, and since the proper materials weren’t used, it would always be an issue even if we just replaced the front facing tiles. We do have plans to reface the foundation with stone (similar to what we used for the fireplace makeover – seen HERE), but don’t want to risk it staining, so all the tile will be removed so we can properly seal the concrete underneath preventing any future run off staining to occur. Which is also why we can’t just cover it up, by simply laying something over the current tile.
Q: What type of flooring will you be installing?
A: Given the condition of the tile, the steps that need to taken to fix the issues at hand, and what the cost would be of installing a new stone or tile I would prefer, we decided to go with decking. We wanted to go with something that could hold up to the wear and tear of natural elements and the high traffic area of going on and off our porch. There is quite a bit involved with building a deck over the current concrete foundation of the porch, and after having a friend who is a contractor come and evaluate our current situation and inform us on everything that would need to be done to build the new porch, we opted to hire him for the job and save ourselves the time and headache of trying to figure out and trouble shoot everything that would come up during the project. A frame will need to be built over the existing concrete (once we seal it), and then decking can be run along that. Since we have the added cost of having to build a platform first, we are going with pressure treated decking and plan to stain them once they are ready. With the new platform built, this also gives us the option down the road to easily change them out for composite decking once they need to be updated or the budget allows.
Q: Are you keeping the pergola?
A: YES! While the pergola serves no real structural purpose, I do however like the look of it. We will be redoing the porch railings around the porch because the original pressure treated railings were not maintained over the years which has allowed moisture to absorb into the wood. That combined with New England weather of cold winters and humid summers, has caused the railings to split and crack that no amount of sanding or stain could repair.
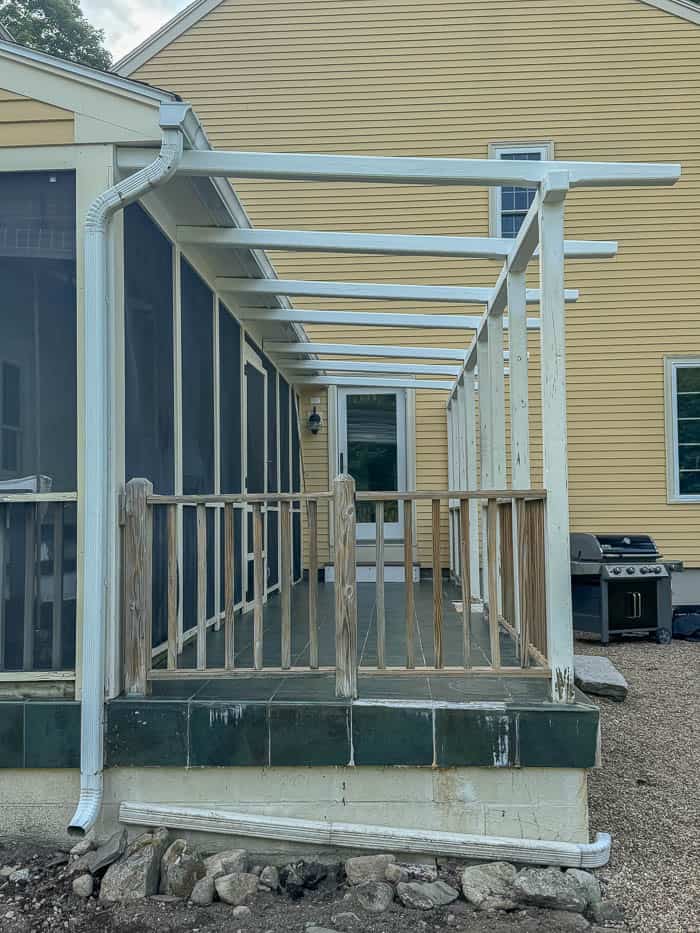
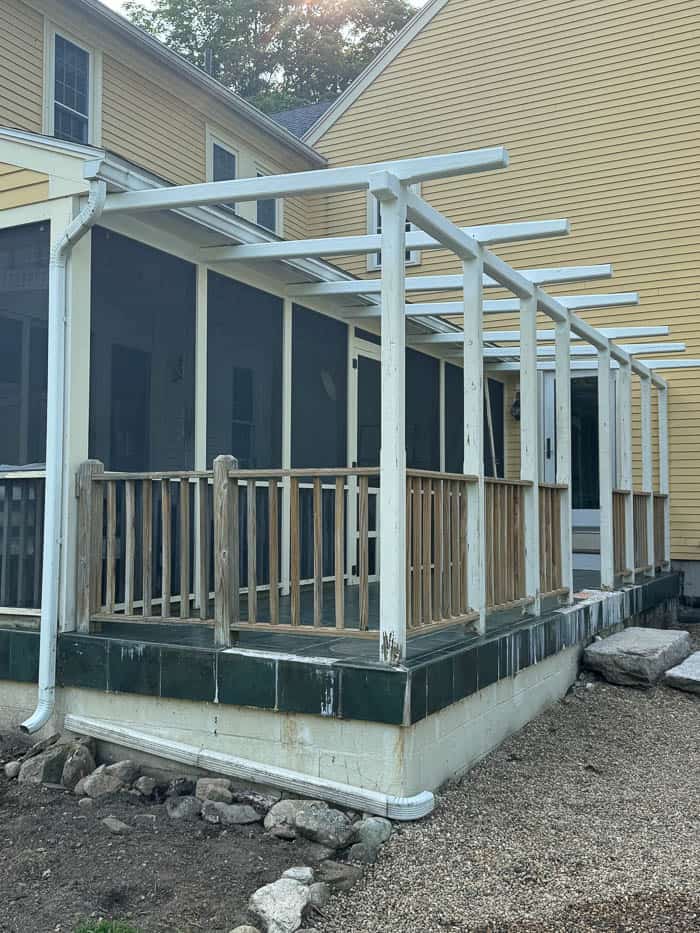
While the railings will be replaced, the posts and beams of the pergola are still in good condition, and will get a refresh with some sanding and new paint.
The Goal in this refresh is to give everything a fresh coat of paint. Replace the tile with pressure treated decking, replace the porch railings. Replace the exterior doors, add new porch lights, and reface the foundation with stone.
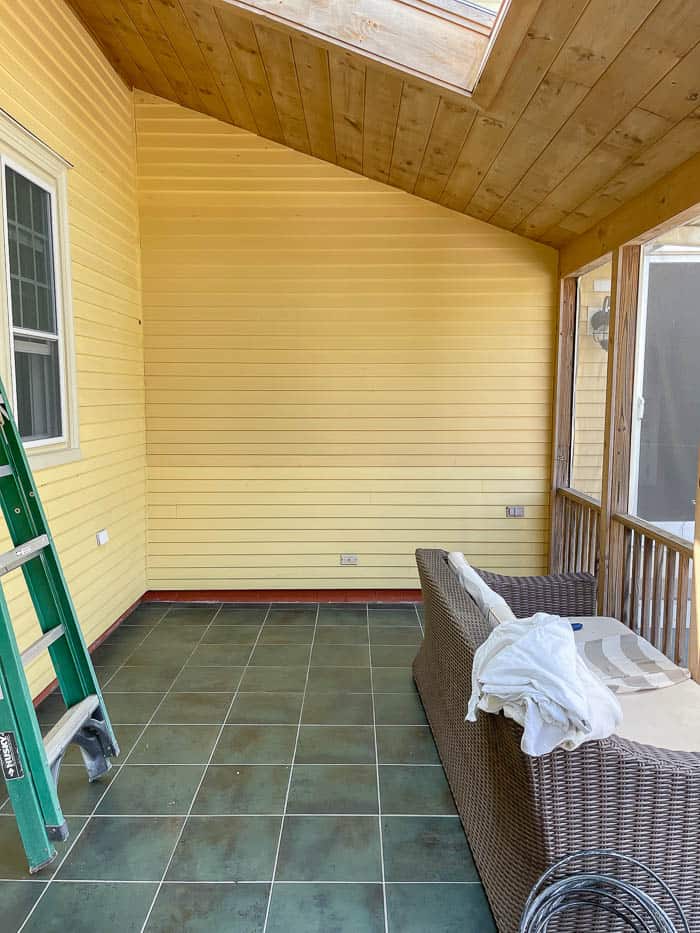
Now for the fun part! I created a little mock up of my vision for the screened in porch, to help show the direction we are going with it. Here is one more look of our porch BEFORE :
And my vision for the After :
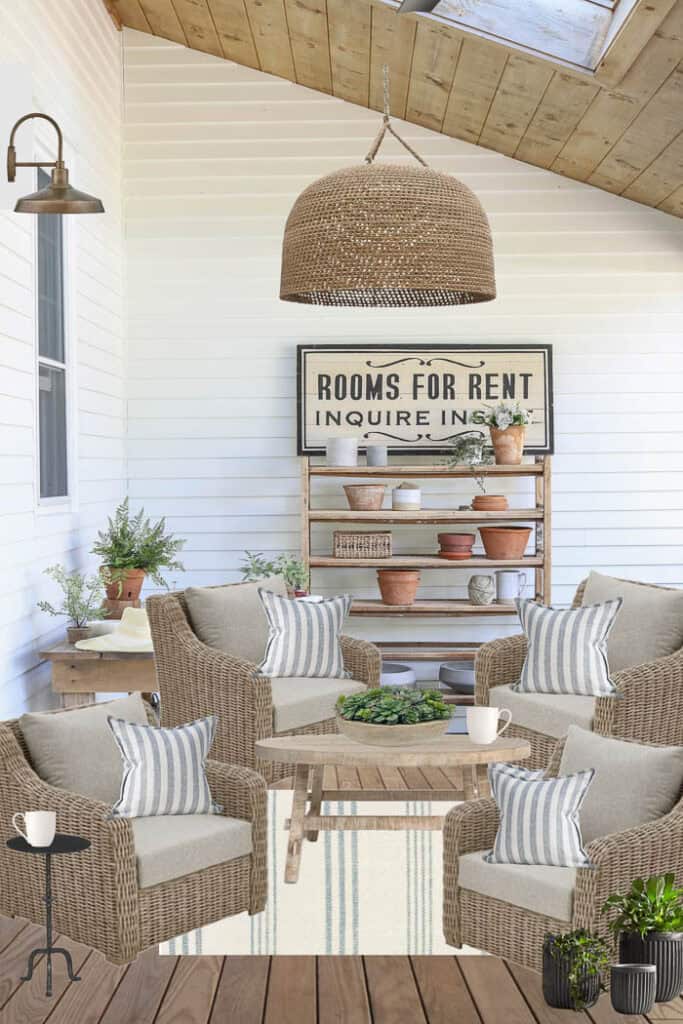
Our outdoor sofa has served us well. We used it in our previous home on our gravel patio – seen HERE. However, I want to create more of a conversation area on this portion of our screened-in porch. Living here for three years now gave me time to see how we really use this space and like to gather in it. While the sofa works just fine, I want to create a cozy seating area with four chairs around a coffee table instead. Creating a space for us to gather in the morning with coffee, or after dinner with cocktails. Knowing how you use a space is key for setting it up to make sure that space can serve you well.
If you’ve been following along in my stories on Instagram or FaceBook, then you know painting has already begun! I can’t wait to share more progress with you soon!
