Hello Friends! So one of the projects I did during my winter “break” was painting lamps. Yes lamps! I’ve actually done this a few times before, and shared one recently HERE. It’s the perfect solution when you are wanting to refresh some items in your space without having to buy brand new. In this case however, I scored this pair of vintage terra cotta lamps off of Facebook marketplace the week before Christmas, but I just knew they would be perfect for what I was envisioning. Come and see how I painted these terra cotta lamps for a fraction of the price of the designer price tag!
Let’s get painting!
It’s inevitable that after the holiday season I’m always wanting to refresh our living room in some way. Sometimes it’s just the clean slate of the holiday decorations being put away, sometimes it’s swapping out my throw pillow covers for a new look, and another way I like to refresh our living room is by bringing in a new lamp or two.
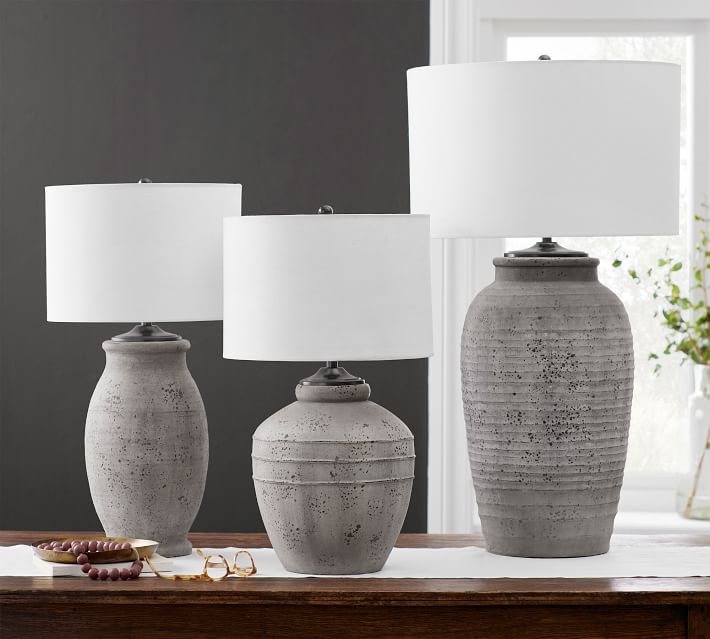
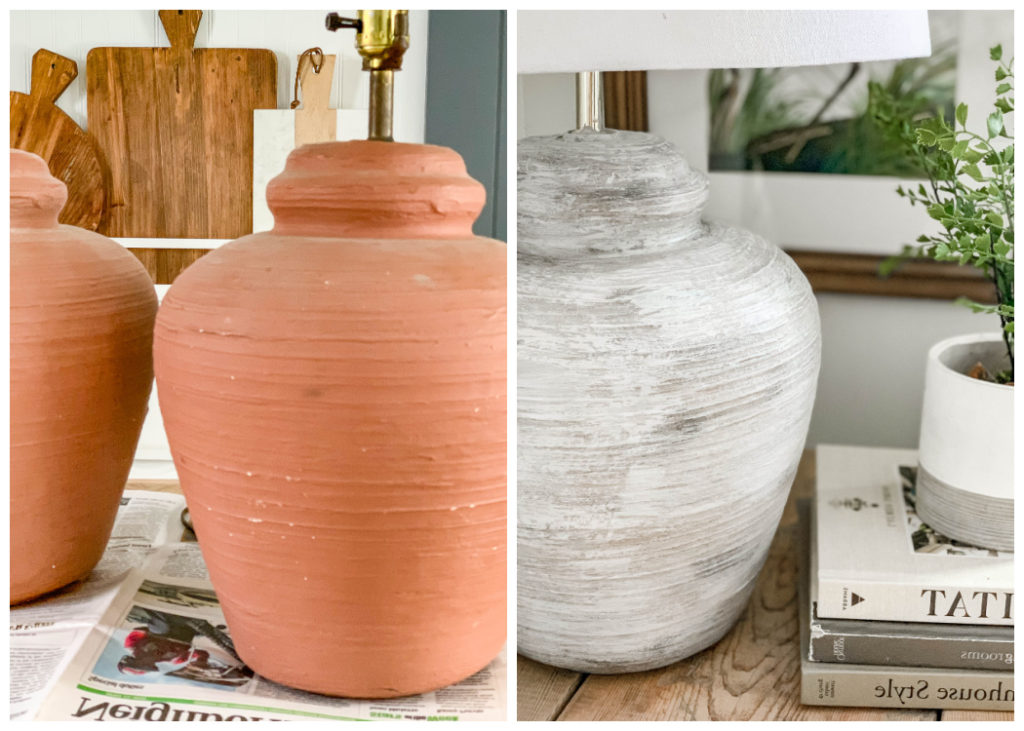
I had been eyeing this jug looking lamps for quite awhile, but just couldn’t quite come to terms with $300 price tag – PER LAMP. I’ve seen quite a few DIY versions of this look as well, including making over dollar store vases by rubbing some dirt on them and painting them. I just wasn’t quite ready to get my hands dirty – if you know what I mean.
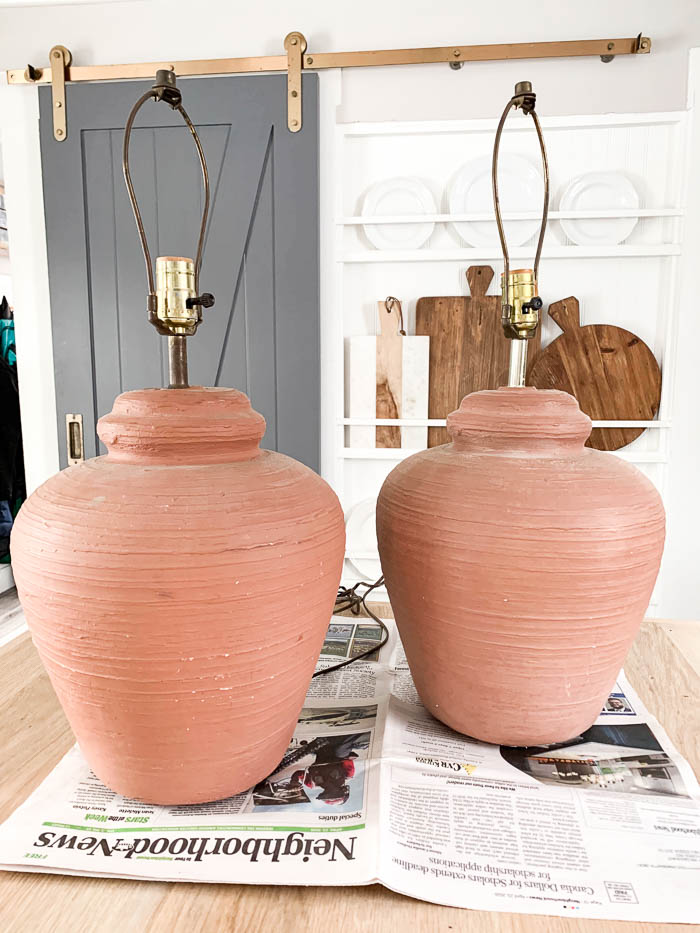
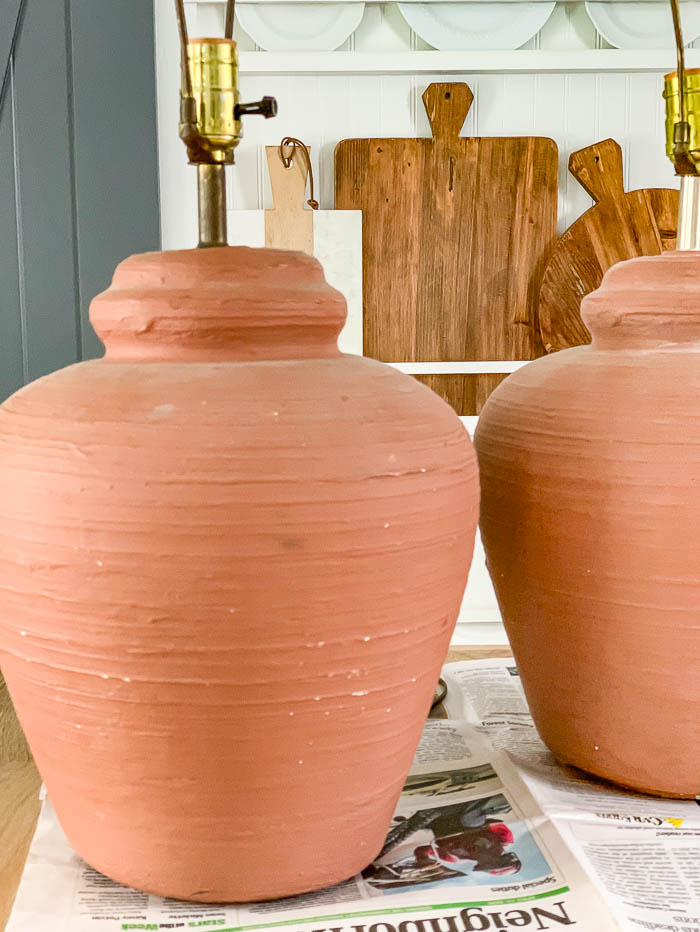
Then one day while browsing Facebook marketplace I came across a listing for a pair of terra cotta lamps, and I knew instantly these where just what I would need for this makeover. The best part?! They were $25 for the pair! I figured even if my DIY attempt was an epic fail, it was only at the cost of $25, and that was something that I could justify.
The lamps sat in our basement for about a month or so, until the holidays were behind us, and all the Christmas decorations were packed away. I used leftover paint I already had on hand, including some craft paint, and here’s what I came up with.
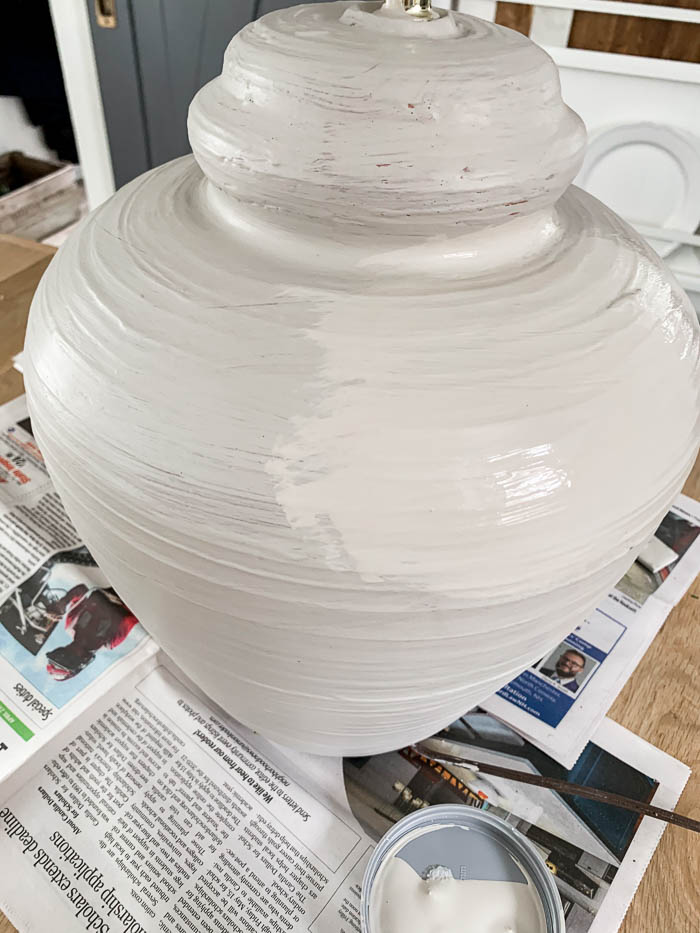
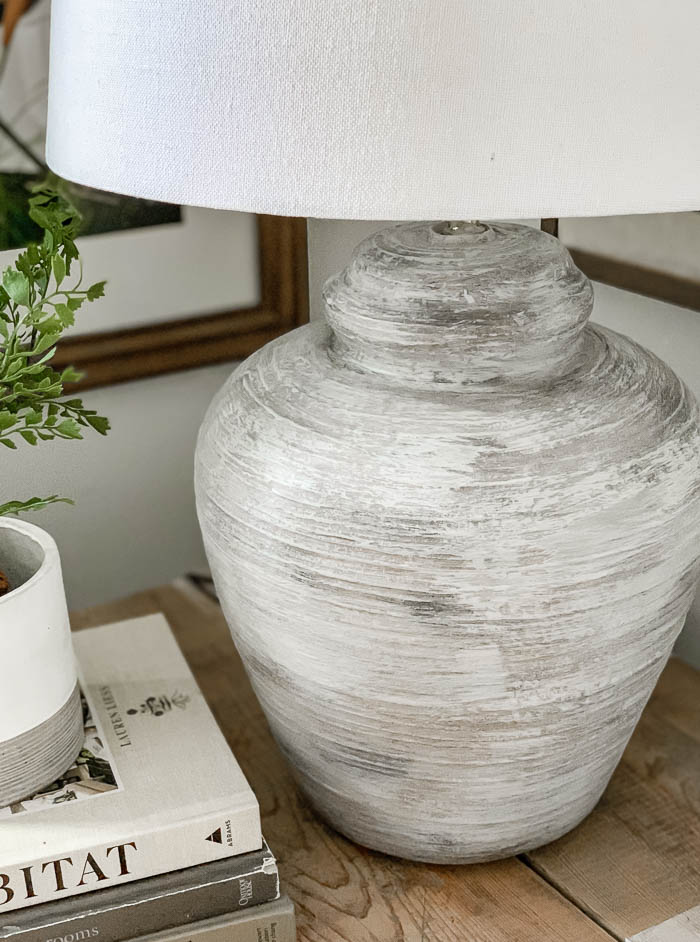
I started by painting the lamps with Anew Gray by Sherwin Williams. One of the many paint samples that I’ve had sitting on the shelf.
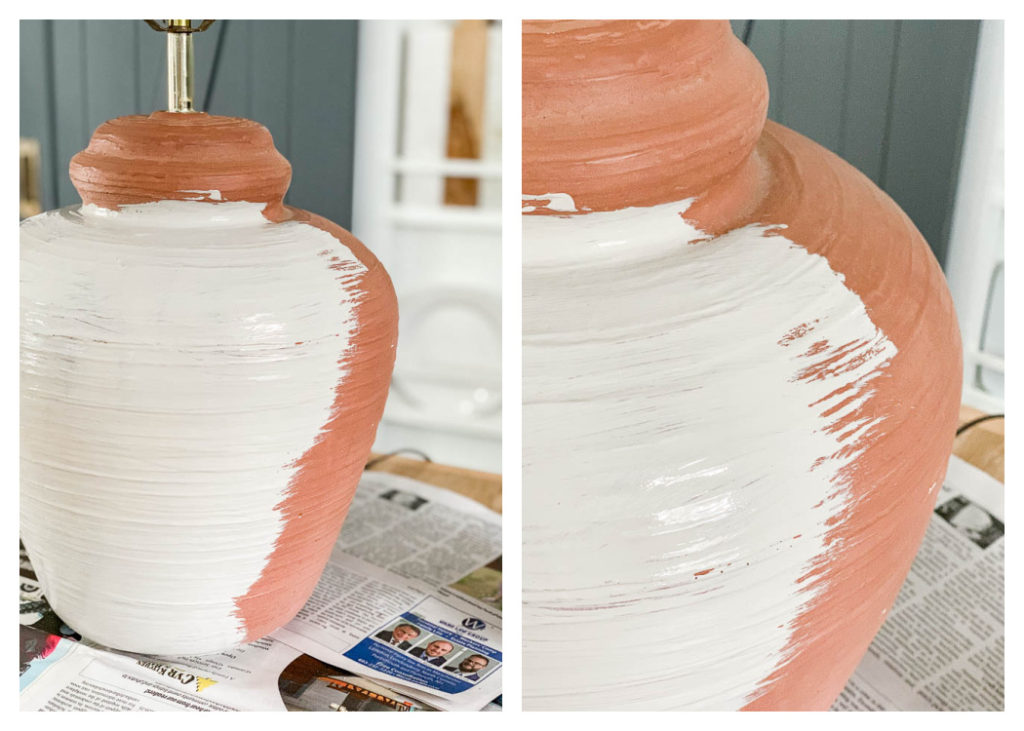
Once the first coat of paint was dry, I decided to do a second coat of paint just to be sure that all the orange from the terra cotta was covered up thoroughly.
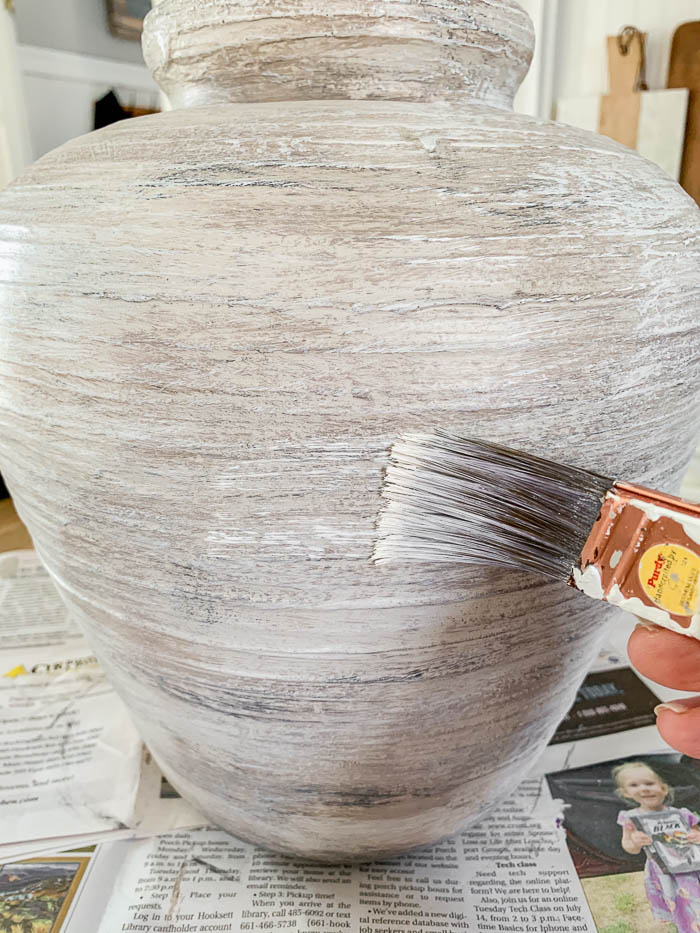
Once the second coat of paint was dry, I grabbed some craft paint I had on hand in a slightly darker taupe color to begin layering on paint. Using paint in the same color family but slightly darker and lighter, helps your faux paint finish have the same depth as the real deal.
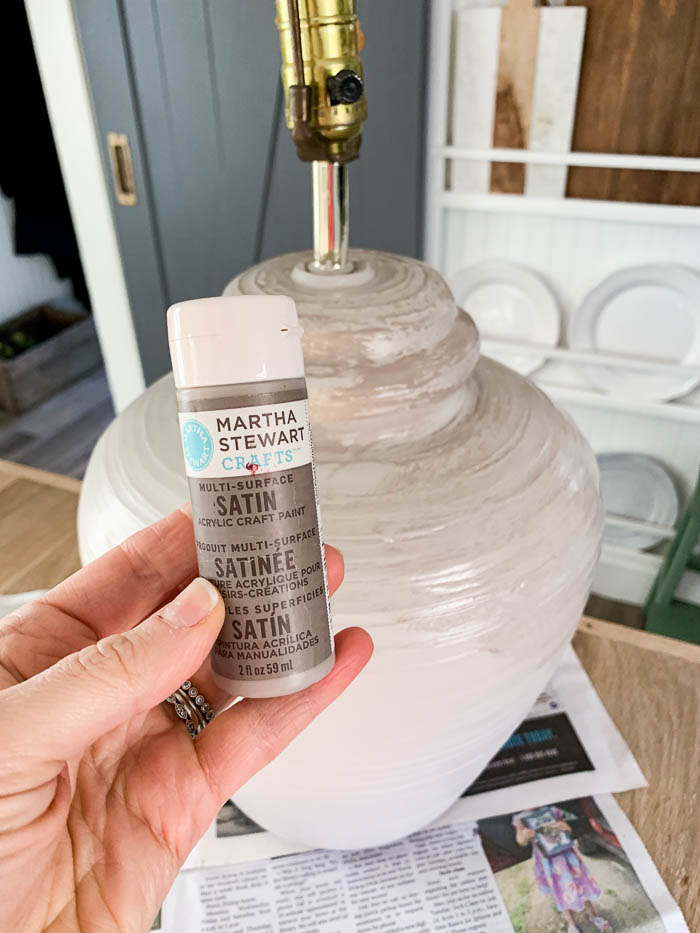
I used Gray Wolf by Martha Stewart Crafts, and did a dry brush stroke painting technique over the entire lamp. This way the Anew Gray I painted on the lamps first was still visible.
*TIP – Make sure the paint is completely dry before you start adding layers, otherwise they will blur together, instead of giving you the dry brush look*
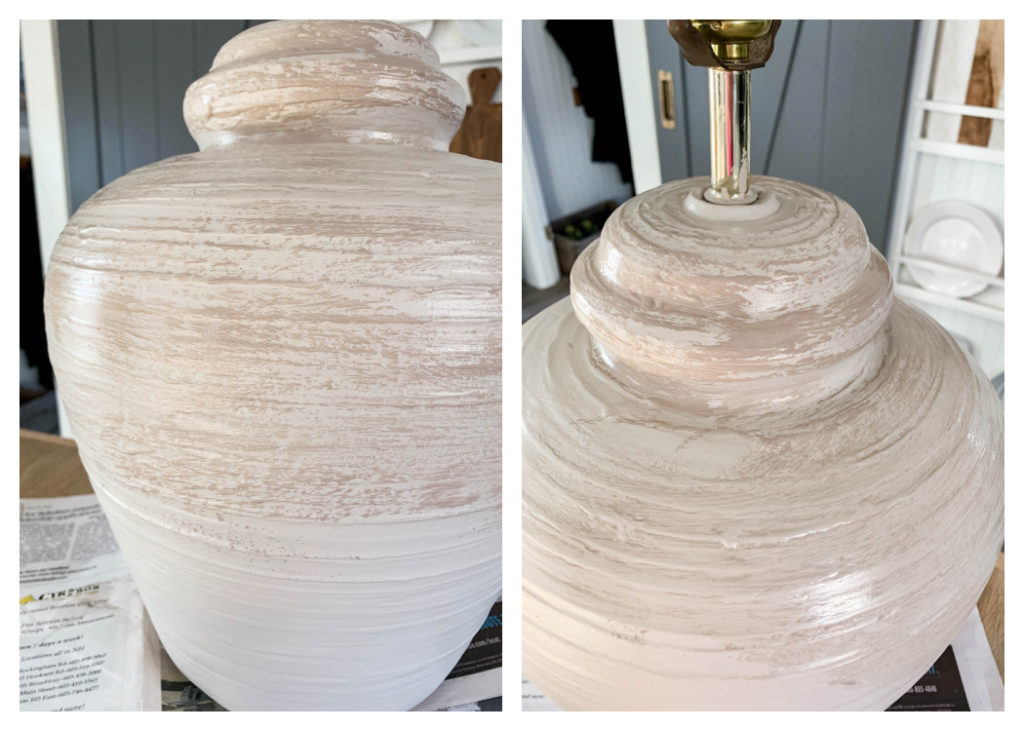
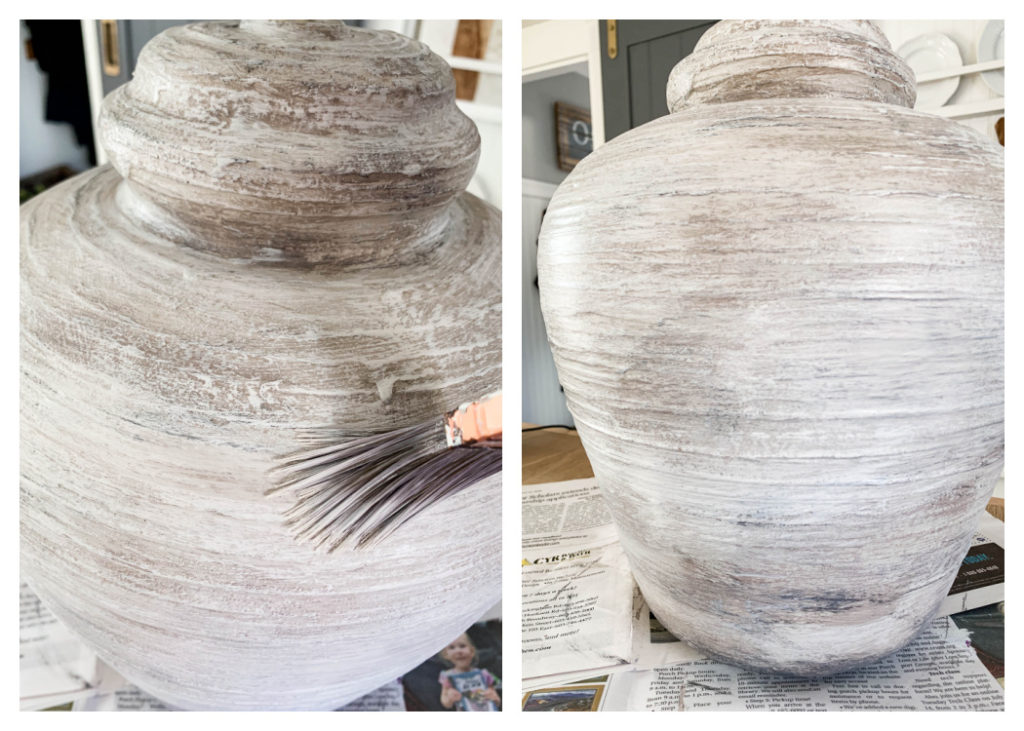
Then I used some black craft paint on various spots of the lamp base to help dirty it up. I didn’t apply the black like I did with the previous taupe color, only in random areas around the lamp base where it would appear to have natural aging over time.
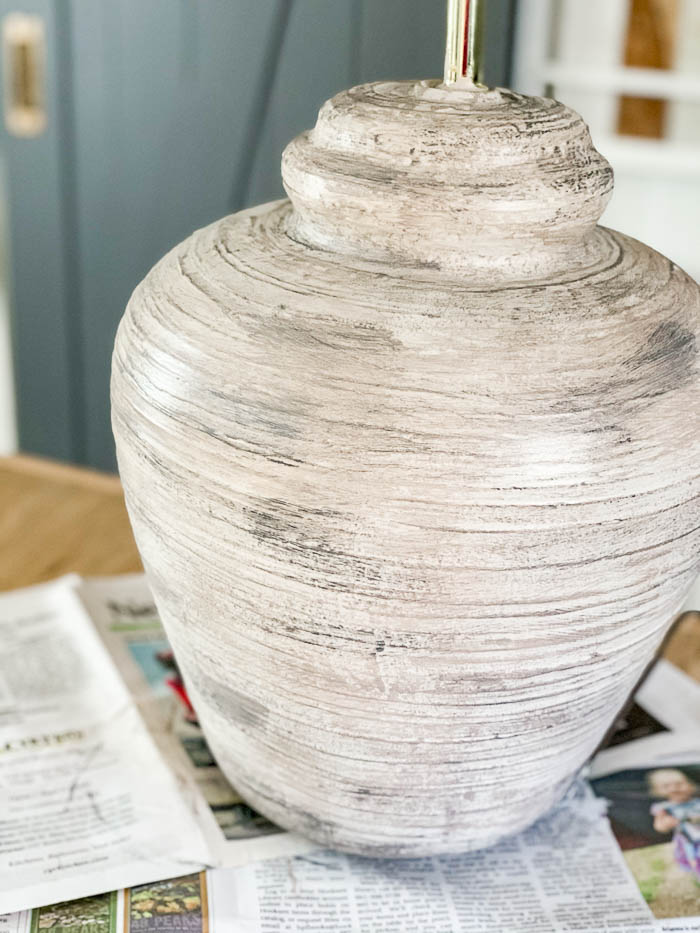
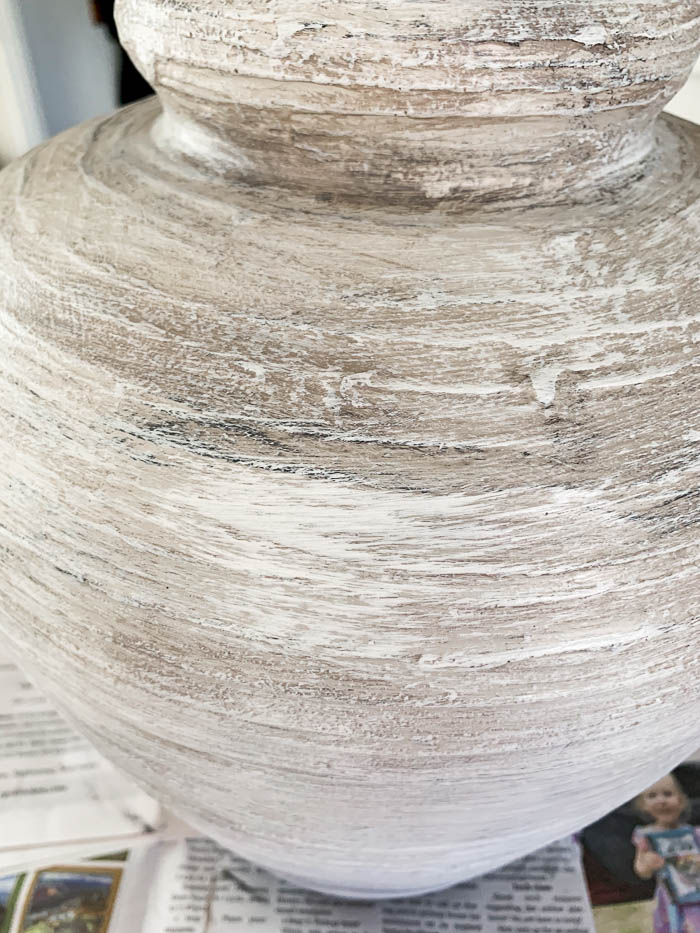
Once the black paint was dry, then I went in with Aesthetic White by Sherwin Williams, an almost there creamy white, and added “highlights”. If there were any spots that felt too blah, or dark, I would add a few dry brush strokes of the white to the lamp base. You can see the highlighted white on top below.
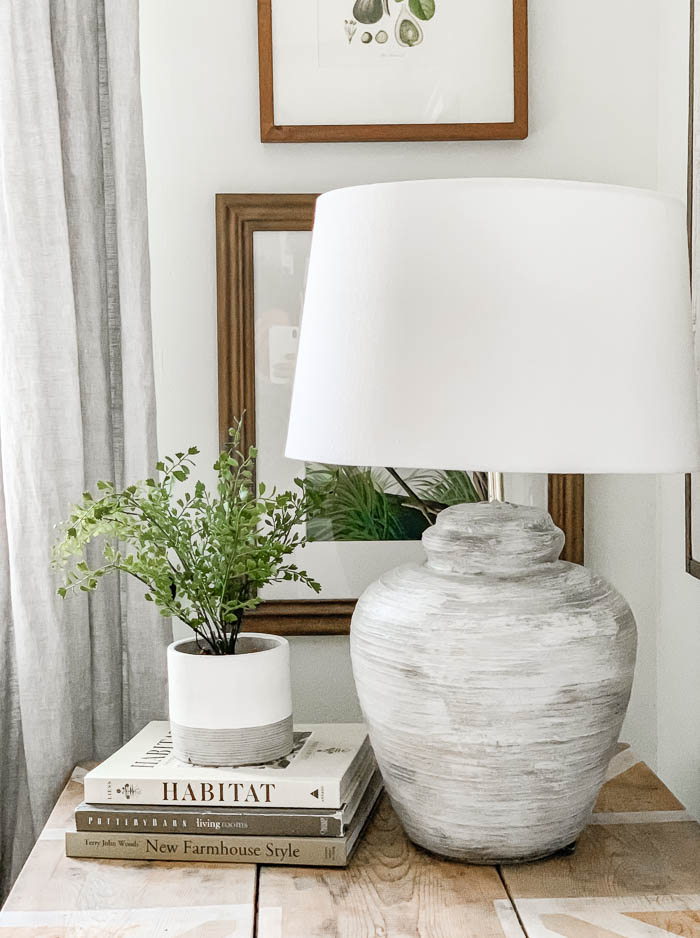
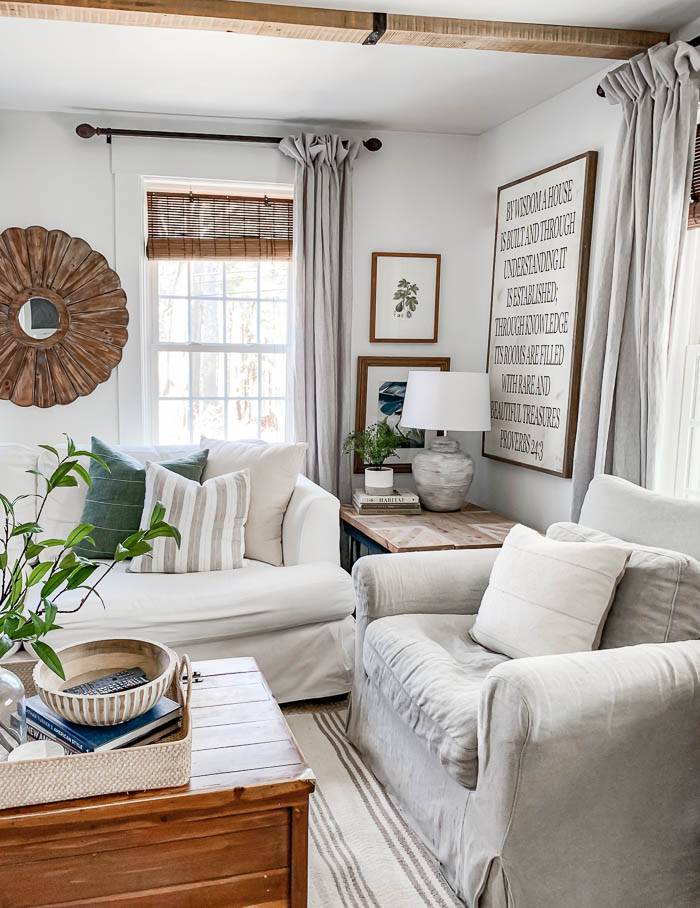
See how they look After in our Living Room below ~
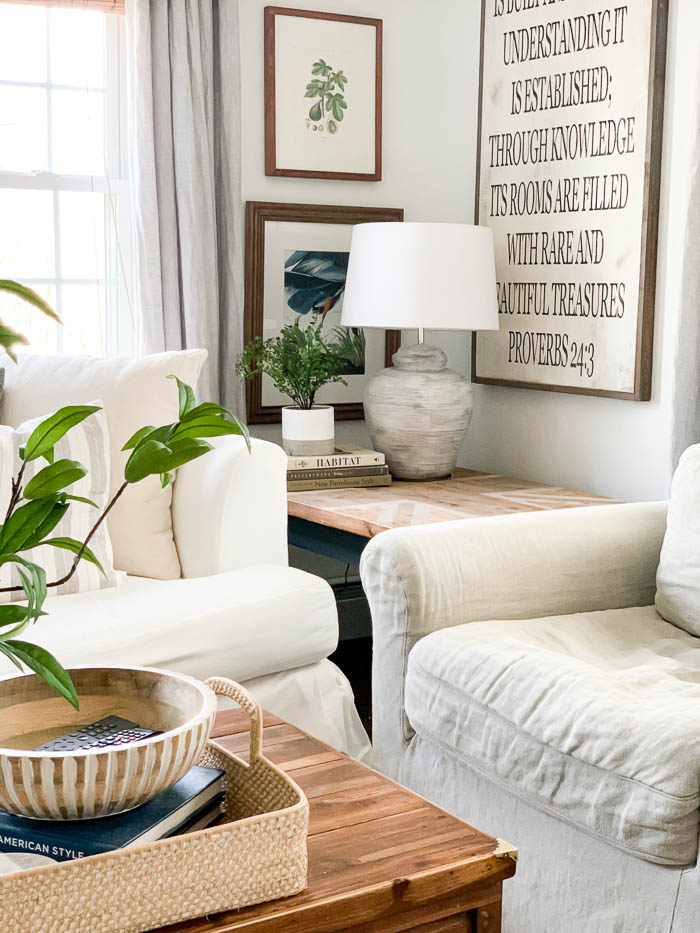
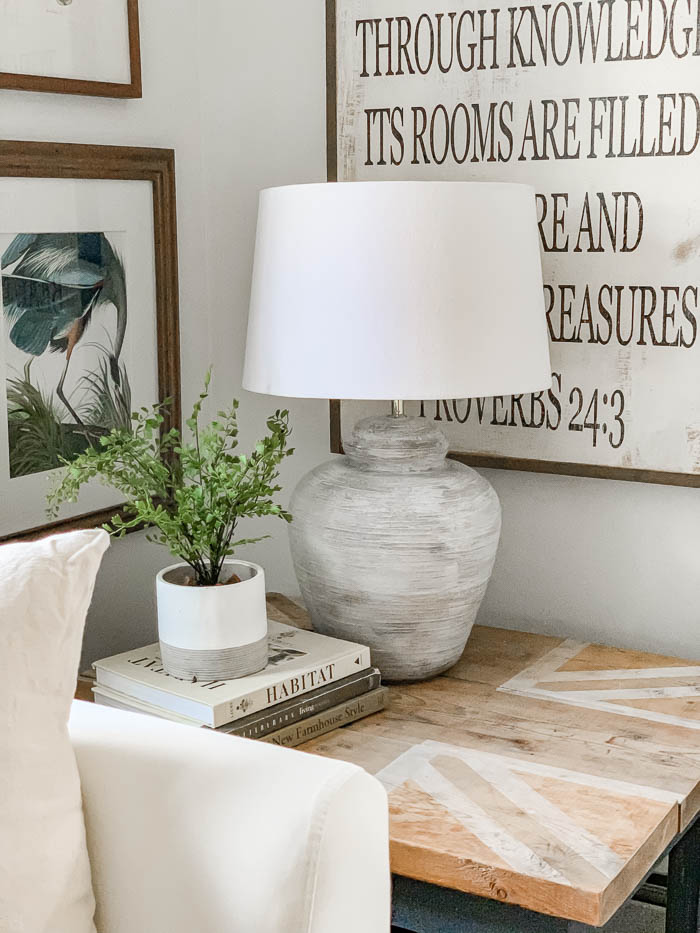
I picked up a new lamp shade at Target, to help give my DIY painted lamp a fresh new look!
Here’s a Quick Recap of all the paint colors I used, in the order I used them :
Anew Gray by Sherwin Williams for the base
Gray Wolf by Martha Stewart crafts acrylic paint for my first layer
Black acrylic paint, for my second layer to add some dark spots
Aesthetic White by Sherwin Williams for my final coat to highlight a few spots around the lamp base.
Here’s one more Before & After
Don’t Forget !!


Awesome! Great job and love em!
Thank you Amanda!
I think I had that exact orange terra cotta lamp back in the late 70’s or early 80’s!! Love what you did with it, great idea!
HA! That is awesome Mary!!
I think I like yours better than Pottery Barn’s, you did a great job with them. I love your new lamps and they look wonderful in your living room. Thanks for sharing, pinned it.
Oh my goodness thank you so much Marlene for the sweet compliment!! I’m blushing 🙂
Looks great!
Thank you Jan!
Wow; what a difference!
I know! I almost feel like you wouldn’t even have known they were orange before 🙂
Just lovely Bre!! They turned out beautifully!! Very inspiring DIY post – thank you!!
Ohh thank you SO MUCH Heather!!
Wabi Sabi awesome! Great job and thanks for sharing the technique.
Thank you Kathy!!
Hi Bre! What a s or on FB Marketplace. I love e this look and I’ve been wanting to try it but everyone has a different technique . I’m on the lookout for lamps. Thanks for the tutorial!!
Thanks Cheryl! I know I couldn’t believe my luck!! I was so excited!!
What a fabulous job – the finish is gorgeous!
Just a thought: A shorter harp will minimize the metal conduit exposed and provide you with a more-pleasing/better-proportioned profile.
Ohh thank you so much Trish! I never thought about changing out the metal conduit part, but that is a great idea!