I’m so glad you guys enjoyed our updated kitchen tour. It feels so much brighter, and full of personality. Today I’m going to show you how I painted our pendant lights to resemble weathered, antiqued pendant barn lights. I loved those rustic, perfectly weathered barn lights, but right now they just didn’t fit in our budget. However I didn’t want to sacrifice on look. On a routine quick trip to Lowes, the hubby spotted these, and thought they were close enough to what I was hoping for, and he was right!
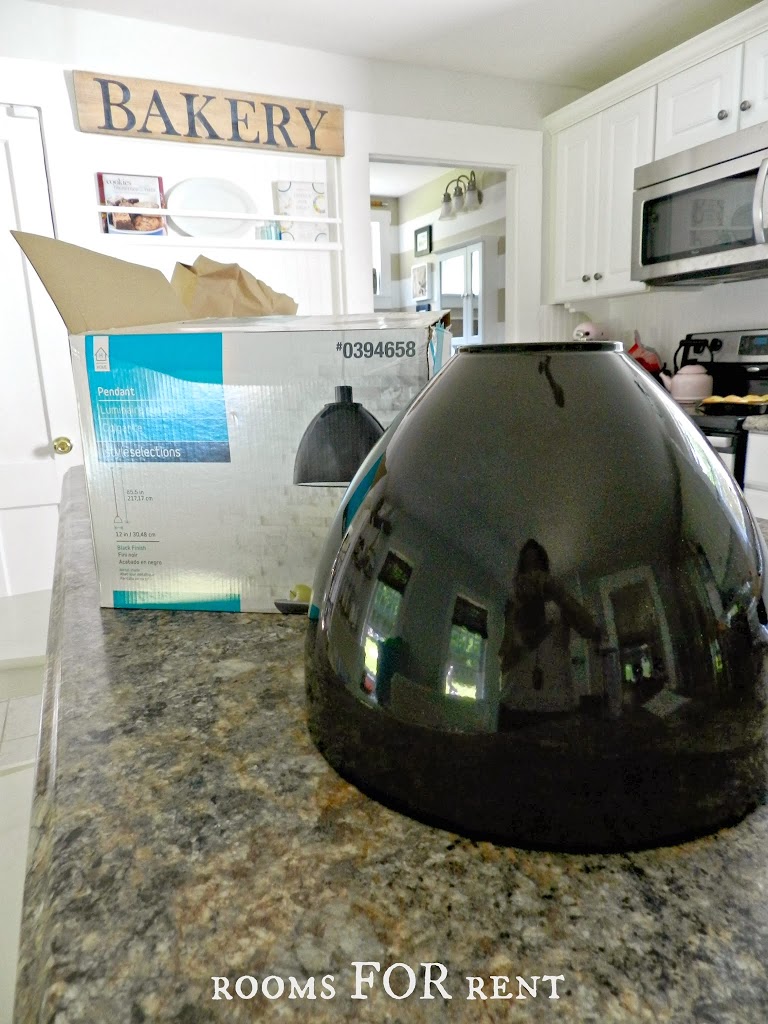
He found these at Lowe’s for $50 each. I don’t know if you have looked around for lights recently, but this is at least half if not a little more than the price most of the rustic barn pendants go for. At least the ones I was scoping out. The only problem was they were shiny black enamel. Like 50’s diner, retro, which were cute, but not vintage farmhouse at all. I had remembered seeing on Pinterest a tutorial for a faux zinc finish, and that’s exactly the route I decided to go. I found this post here, and totally took her advise on which paint to get.
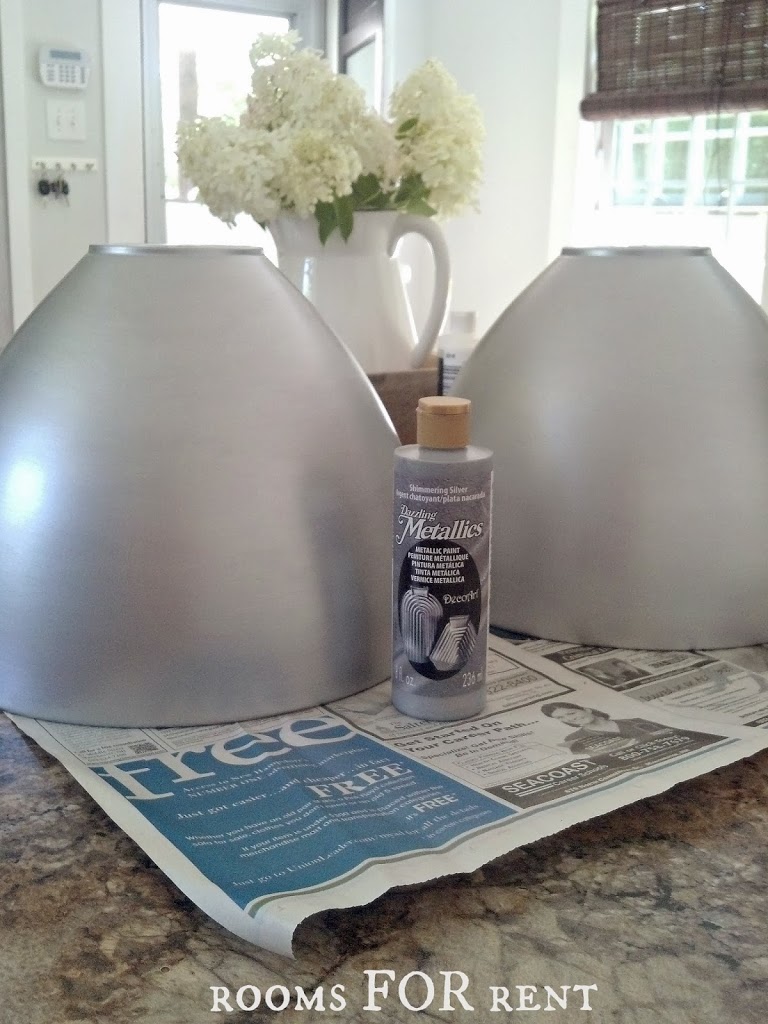
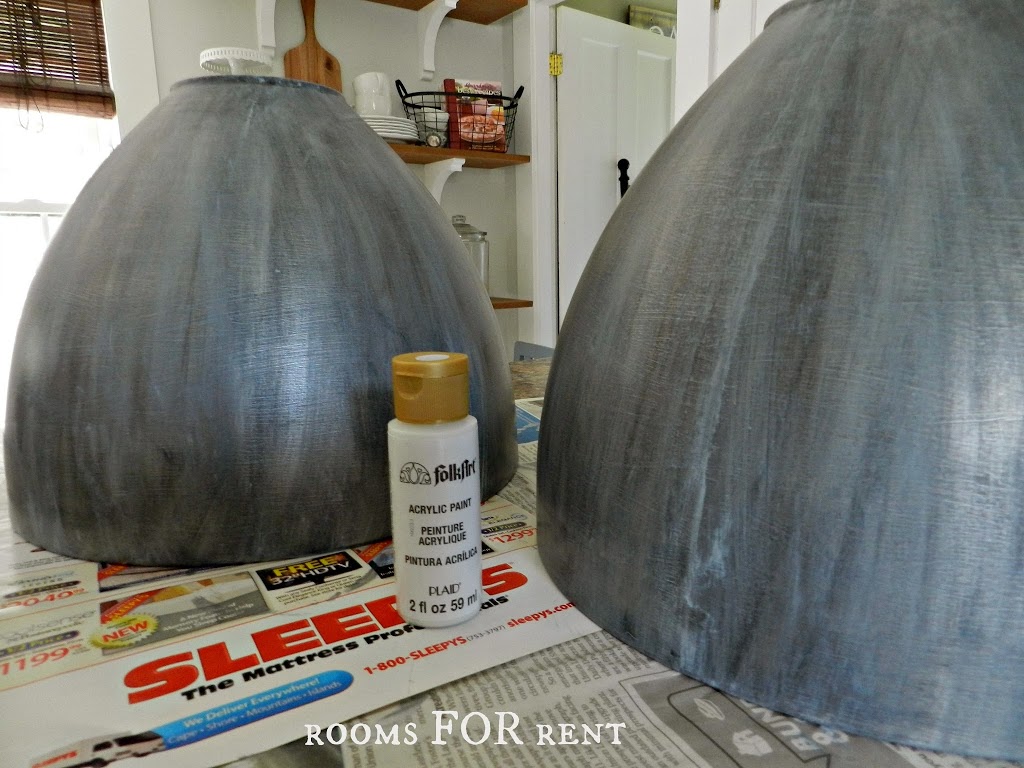
I started by painting each shade all over with the Metallics paint. Holy Cow what a difference, to the point where I debated even do the shades of paint. It’s a little hard to see in the photo below but this paint even gave the texture of metal. Crazy?! But it looked like brushed nickel almost, and was already a huge improvement from the shiny black.
But wanting some depth, I continued with the steps, and began to rub Black Acrylic paint all over the surface with a cloth.
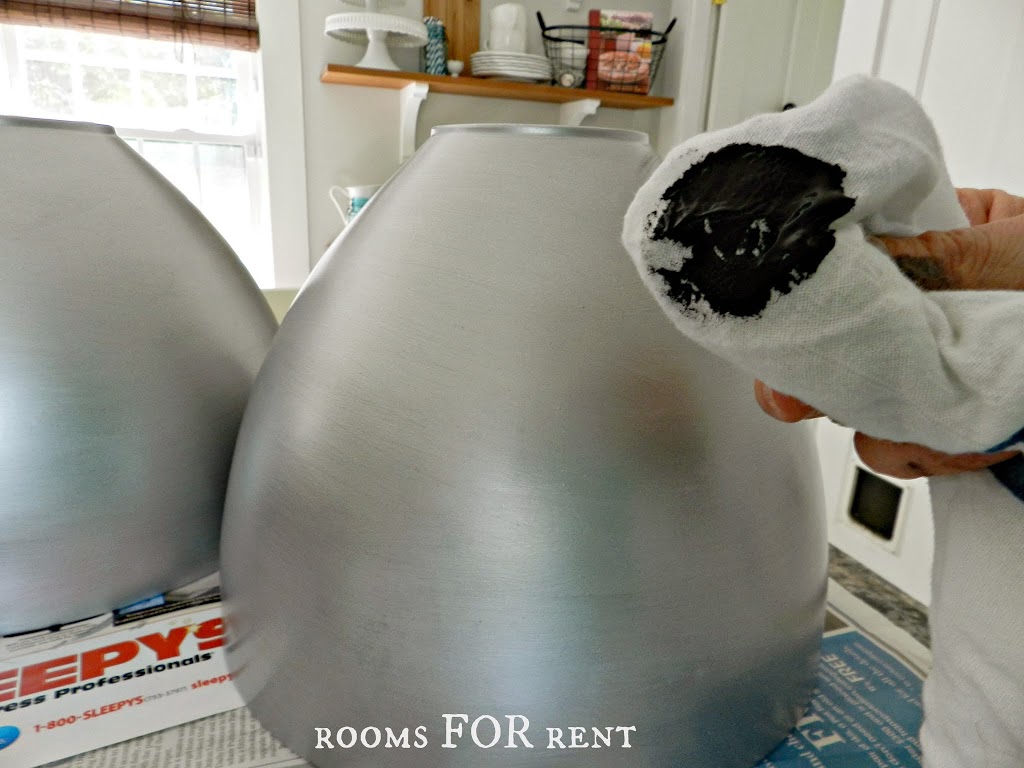
Can I just tell you, after I did this step, I so badly wanted to press the re-do button! I kept thinking, OH no what have I done. But like with anything you paint, I thought well at least I could paint the Metallic back over it if I absolutely hate it in the end. Gotta love that about paint!
*WARNING : A little goes a long way, so be prepared to cover a larger amount of surface at once.*
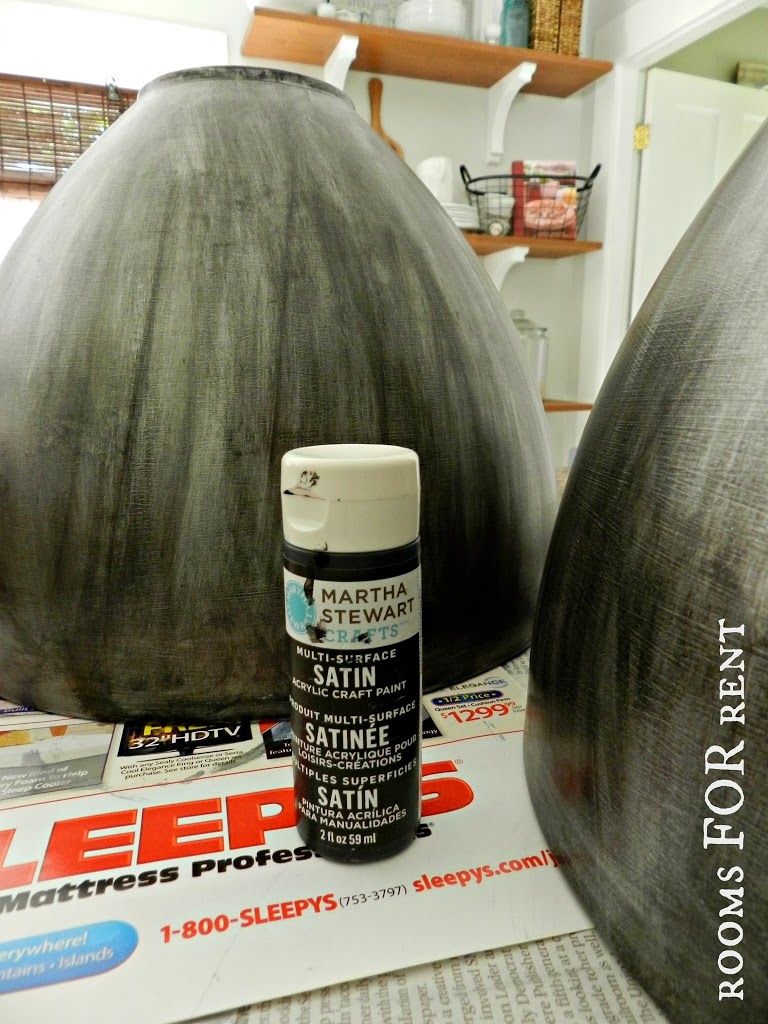
The last step for a faux zinc finish is then rubbing a White Acrylic paint over the entire thing. It helps dilute the look of the black paint, and gives it a sort of milky finish.
It certainly looked dull and aged, and vintage, like it had been sitting in a barn for the past 70 years. However, I was really missing that pretty metallic finish I had started with. So to give it a little more shimmer, instead of dull, I dry brushed a thin layer of the metallic paint I started with over each shade .
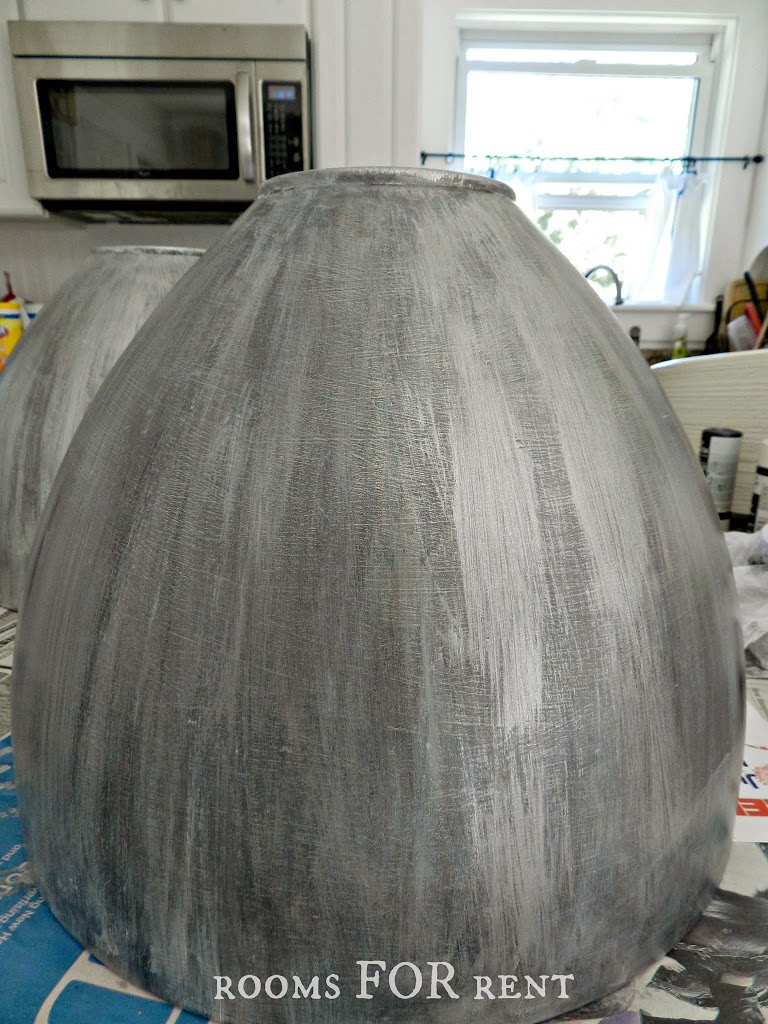
I did this completely and utterly without any thought as to being perfect or evenly covered. Because after all, when something ages, it is never perfectly aged or worn in exactly the same on all sides. So some areas I felt were a little to black I brushed on more metallic paint, and then in some areas I even wiped some off so it wasn’t as consistent.
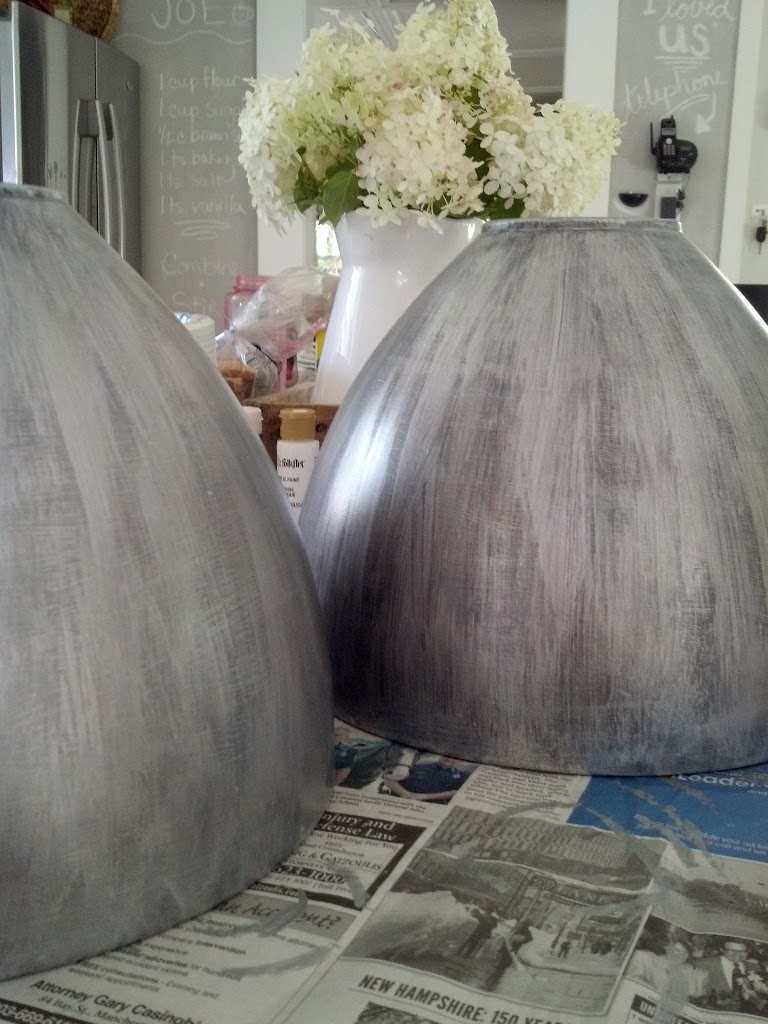
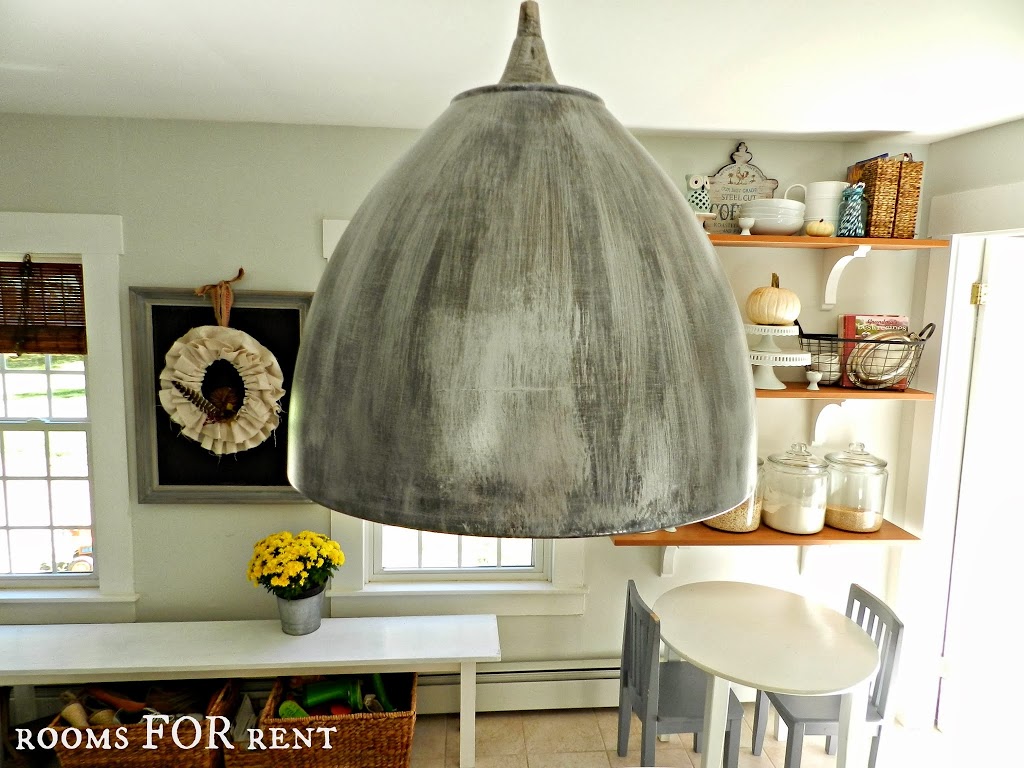
Here you can see what it looks like when I was finished. It’s hard to photograph the finishes, so you can really get a good idea of the sheen it has. But I guarantee it does not look like I painted it at all.
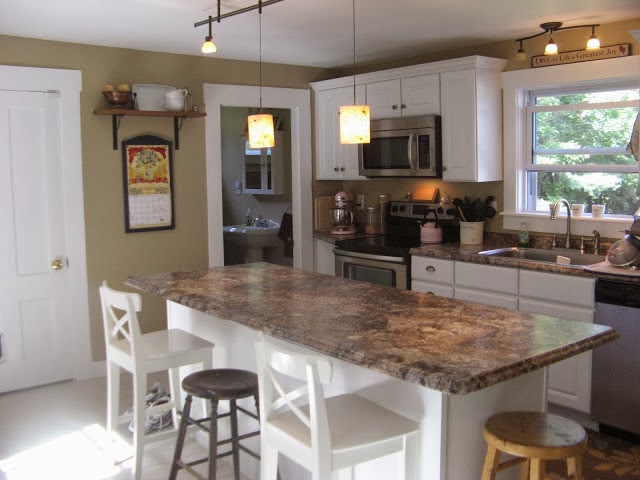
Before:
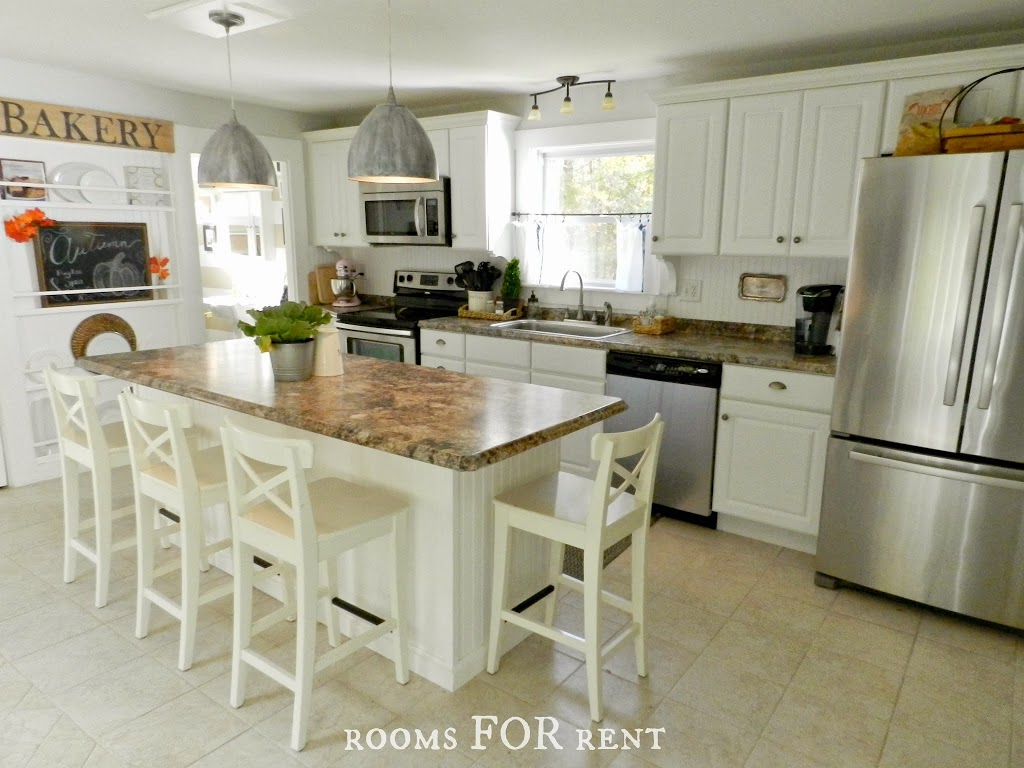
After:
I will be back with another post, answering some questions I’ve received about sources, paint color, and more details. I still feel in shock that Thanksgiving is this week, but hope you have a wonderful holiday!
Happy Monday!

http://crepuscule-estate.deviantart.com/
You did a fantastic job on these lights. They look so good in your beautiful kitchen. I think you made the right decision to go all the way with the faux finish. They look like they are a great old metal treasure find! I will definetly be copying this.
Thanks for posting.
Happy Thanksgiving to you and your family!
Those turned out great! I probably wouldn’t have kept going but it worked! Found you at Eclectic House Tour. Now following.
Cecilia
Thanks so much Cecilia!! I was totally feeling the same way for a moment there 🙂 Thanks so much for stopping by 🙂 ~Bre