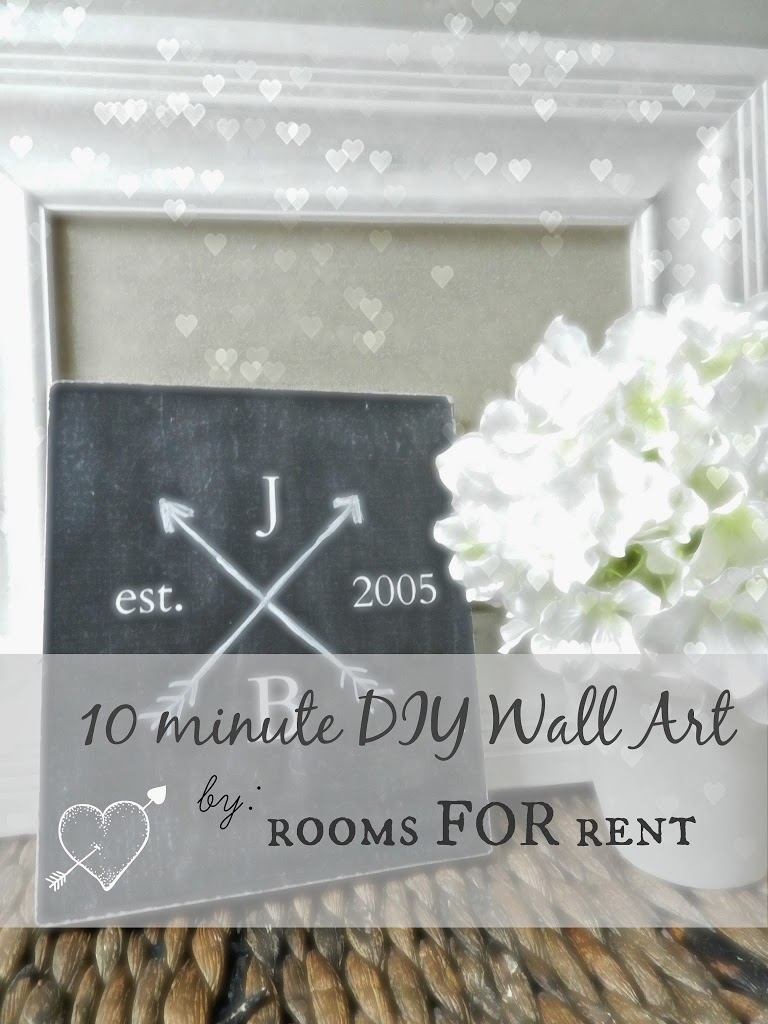
Today I want to share with you a quick project, with few supplies needed, that almost anyone can do. I love decorating my walls with photos and art that celebrate our life. My kids, our family, and our marriage. I love all the arrow art that seems to be the latest craze and came up with this simple diy project after seeing this inspiration here. I didn’t want to have to go out and buy anything to make this, so I strictly used what I already had so for me this project cost $0, but if you don’t have everything, you won’t have much to get 🙂 I started with this free chalkboard background found here.
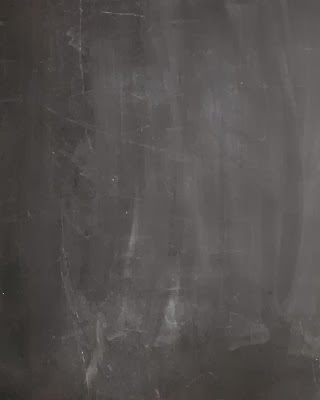
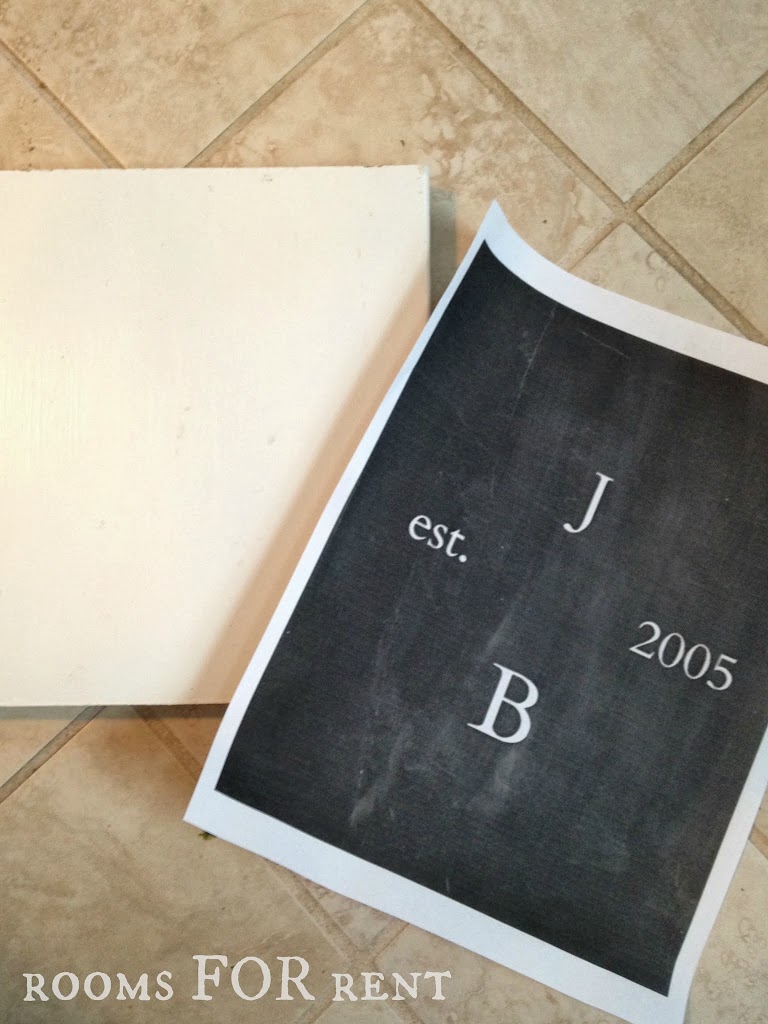
Then I uploaded the image to Picmonkey, which is where I edit all of my photos. The thought of using photoshop or something like that stresses me out, so I use picmonkey, simple, easy to navigate, and free! I added the text shown below, and printed it out.

Once I had my print, on plain old printer paper, I grabbed a piece of wood from my stash that would be about the right size. If you don’t have scrap wood to choose from, you could easily get a piece from Lowes or Home Depot, once you find the thickness you want have them cut the size you need right there in the store.
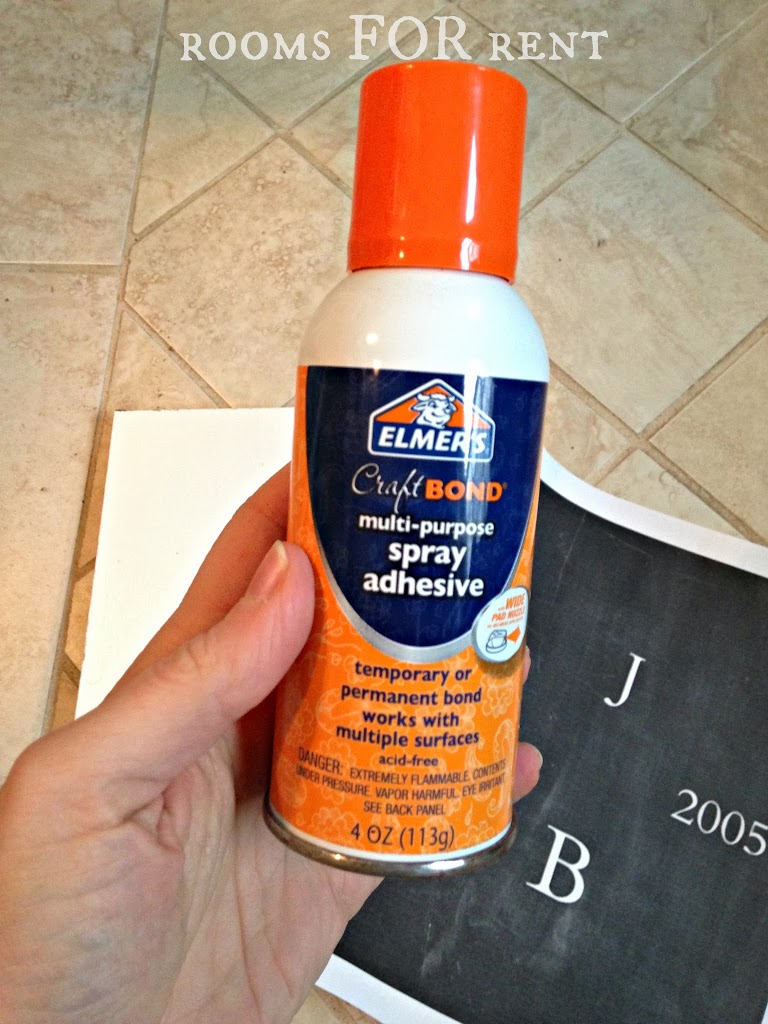
Other than my printout and piece of wood, your main tool required is Elmer’s Craft Bond. If you are not familiar with this stuff, get familiar! It’s fantastic. I use it for a ton of projects around the house, and it makes it easy to adhere anything to any surface. The reason I didn’t use Modge Podge was because in some articles I had read before they mentioned that the corners began to peel up, or it was too glossy on top. For a those 2 reasons alone I stuck with the craft bond.
I evenly sprayed my piece of wood (NOT the back of the paper), and placed my paper on top of the sprayed wood. Once straightened and centered, I pressed down firmly, smoothing out any wrinkles or bubbles. Then I used a scraper to score down the edges to remove the access paper.
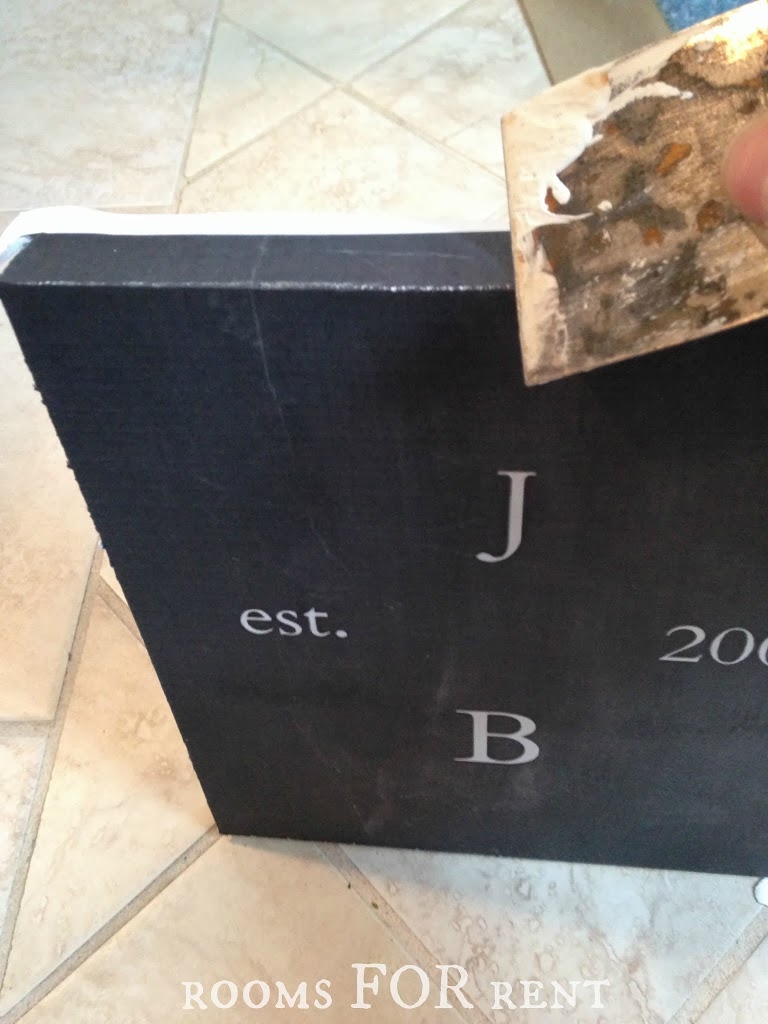
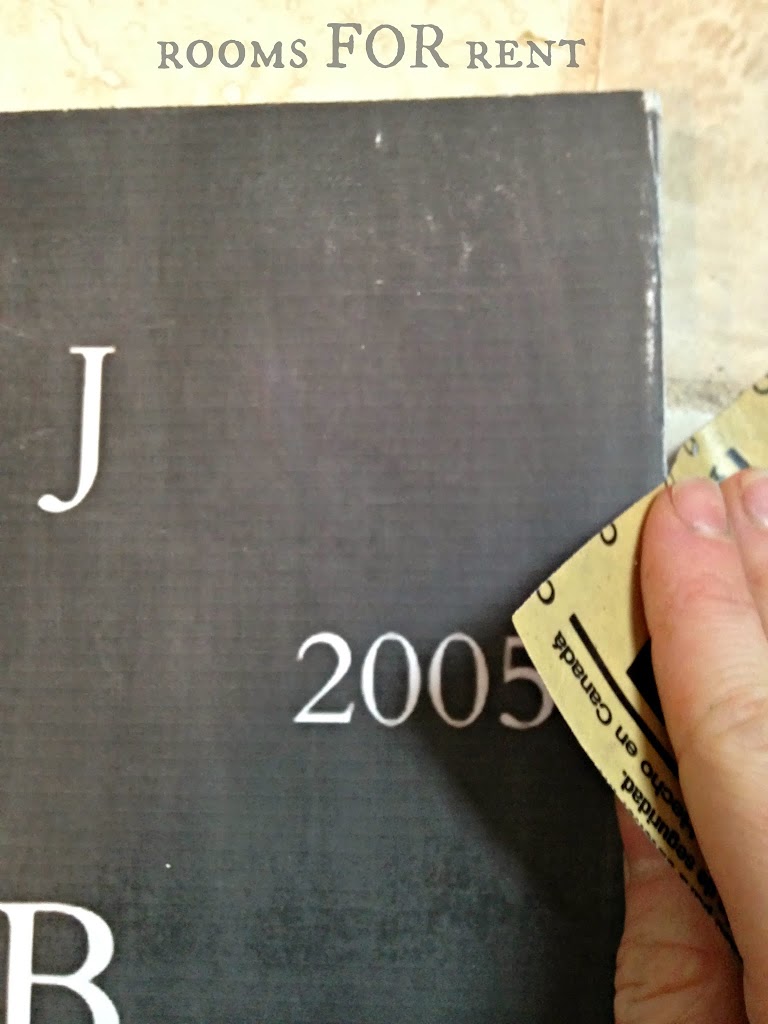
Once the access from all four sides was removed, I then took a medium grit sandpaper and lightly sanded all the edges. I sanded just lightly enough so that the paper appeared as if it were one with the wood.
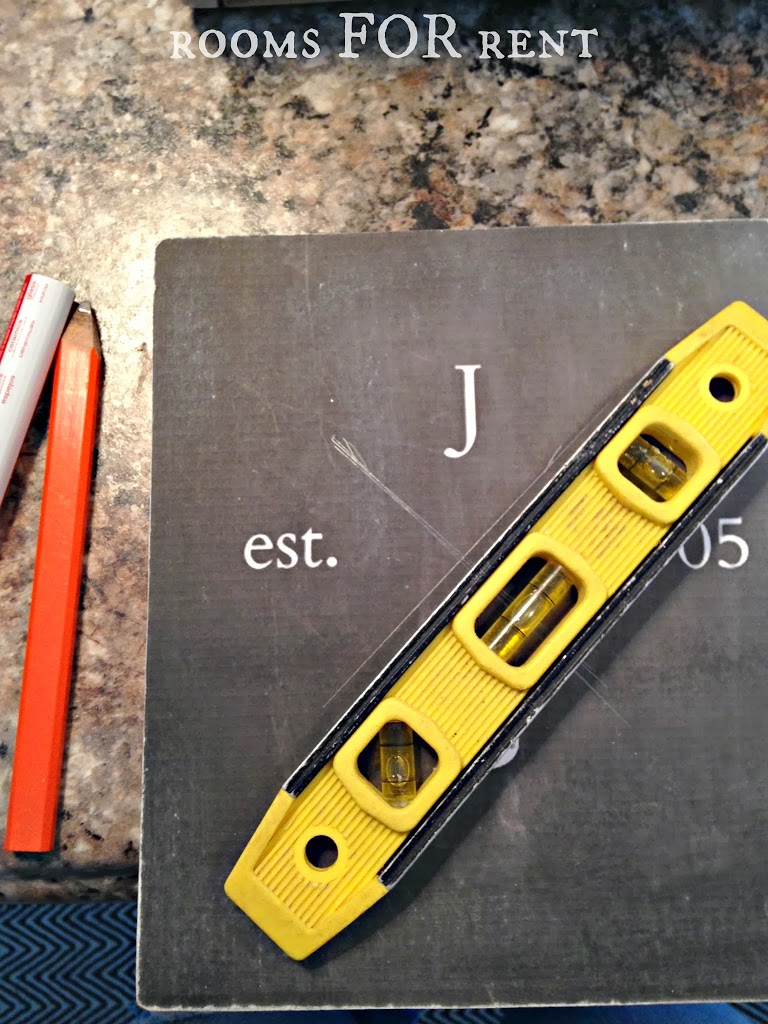
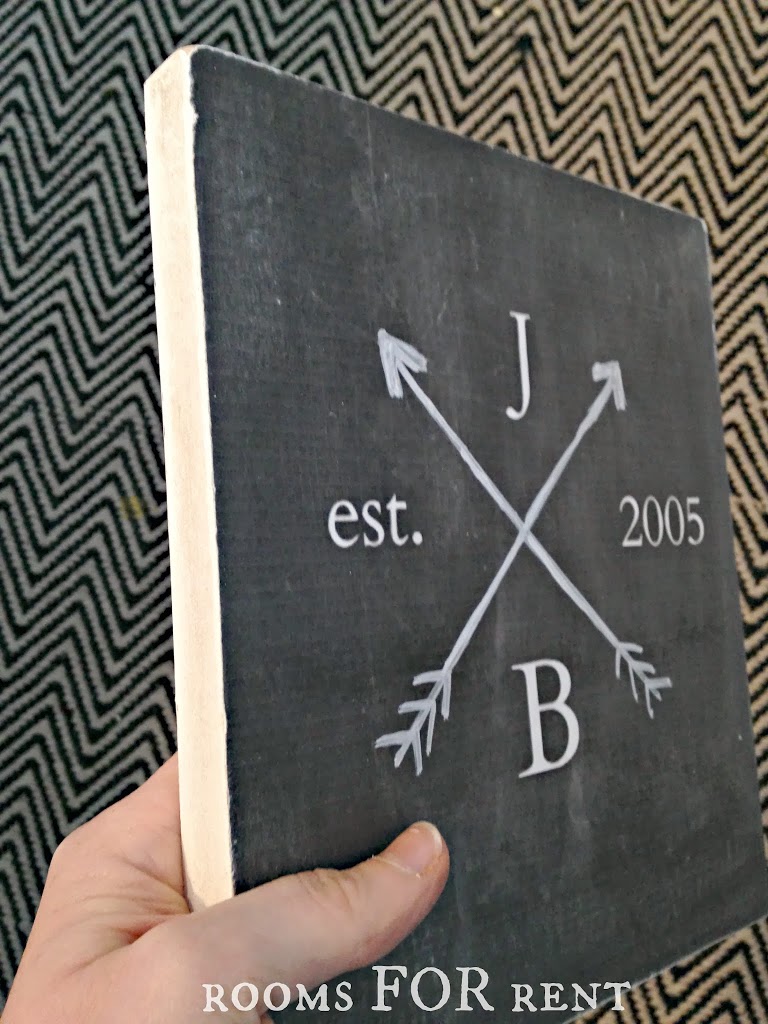
Next up it was time to draw the arrows. I like the ones that look hand drawn vs. perfectly straight, because to me it adds a touch of whimsy and character. Choose to draw whichever arrows you like the best. I used a straight edge and a pencil as a rough placement.
Then went over my lines with my chalkboard paint pen. You could really use any type of paint or marker, but I liked the chalk pen because it gave it more of a milky finish instead of bold, which to me resembled more of a chalkboard finish.

Here’s a side view, where you can see when I sanded I rounded the corners a bit, for a more worn-in feel.
And that’s it! You could add a hanger to the back of it,
if you want to hang it on the wall,
which I did, I just haven’t found the exact spot I want to hang it yet. You can also see in the pic below, that although the chalkboard background provides a hazy background, I lightly sanded some spots on the paper for more of an effect.
I hoped you enjoyed this quick and easy DIY wall art! I think it would be perfect to make with Valentine’s Day coming up in a few weeks. And thank you to all of you who entered our Giveaway last week! A winner will be announced soon. Good Luck to those who entered, and I have quite a few projects to share with you coming soon!
I tried this craft and loved it! It was truly as easy as your tutorial suggested. Love your blog and thank you for introducing me to Elmers spray glue. christina
It looks great – and I love your whole kitchen. So happy to find and follow your blog!!
hello!!!
this is amazing!
awesome idea…pinned…Christine from Little Brags